Monday, August 31, 2009

Making Compost

Compost 1
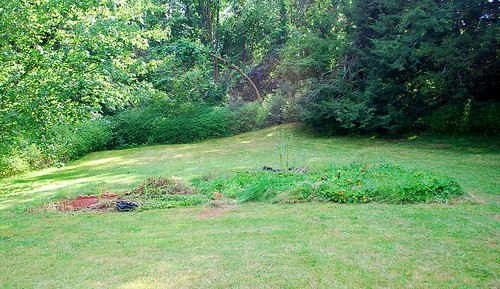
Yesterday, I started my compost pile. I figured I should find a good use for all of the grass clippings we've accumulated in the past month. It's amazing how quickly grass grows, not to mention the amount of effort that goes into maintaining a decent-looking half-acre lawn. It almost doesn't seem worth the trouble (but that's just the gardener inside me talking). Next year, I'm hoping to get most of my "green" material directly from the vegetable garden, however for this year, grass clippings will have to do.

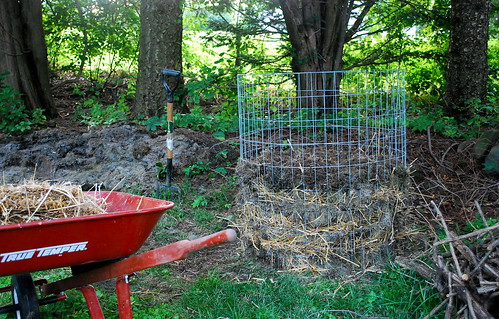
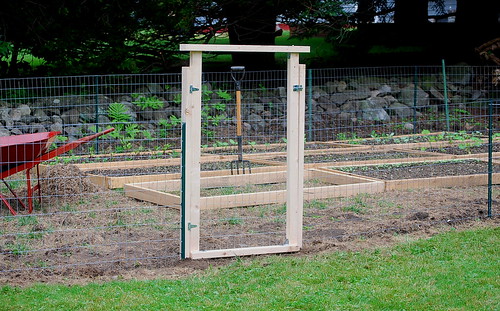
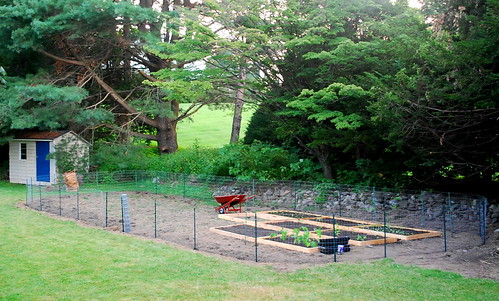
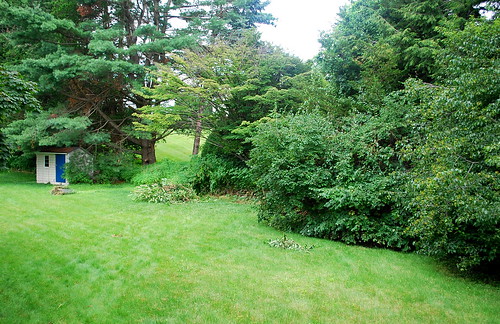
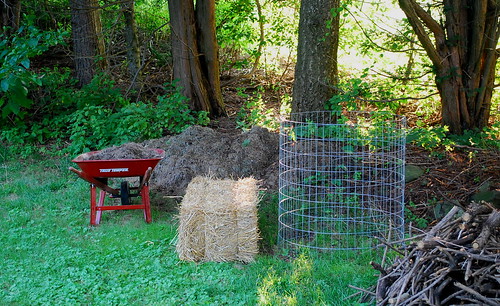
I decided to utilize some leftover 2" by 4" wire mesh (which I used for my fencing) to construct my compost cage. The ring is held together by plastic electrical ties (easy to attach and easy to snip off). It took about 5 minutes to assemble. As far as locations go, I decided to place my compost pile behind the shed under the evergreen trees. This location is out of sight from the house (though I find nothing "ugly" about a compost pile). I figured the evergreens would act a kind of protection from heavy winter snow storms and drifts.

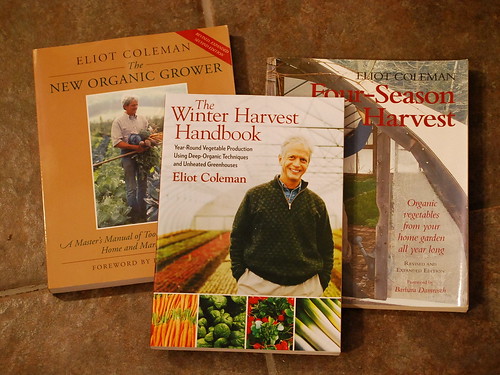
I'm building up my compost pile in layers of brown, green and black. I started off by putting a layer of straw into the cage. I purchased the straw this past weekend for use as a mulch in the garden and as a "brown" in the compost pile. A 50 pound bale was only $9 and more than enough to suit my needs. Adding straw ensures proper drainage and airflow. Then came a layer of grass clippings or "green". Next, I added a layer of grass roots, which I removed from the plot when digging my raised beds. The "black" component comes from the soil that's caked onto these roots and supplies the microbial life that will break down all of this material. Finally, although I forgot to do so yesterday, I will also add a fine layer of greensand and rock phosphate to top things off. So why go through the trouble of building these layers? Eliot Coleman likens this process to that of a smoldering fire. The browns provide the fuel, the greens provide the fire, and the microbial life powers the engine. Evenly distributing these elements ensures that this engine runs smoothly, or at least that's what we hope for.

After I had accumulated several layers of material, I watered the pile well. I will also cover it with a piece of tarp or old carpet to keep it moist. All that's left to do now is to slowly build up this pile and wait for mother nature to do her thing.

compost 2

Thursday, August 27, 2009

More Thoughts on Winter Gardening

seedlings 1
From left: Flowering Brassica, Hakurei Turnips, Salad Greens
What to grow and harvest during the long winter months - I came across a great article in the New York Times the other morning on this very subject. I have a stockpile of hardy Asian Greens in my seed box waiting to be planted out this fall. Hopefully they will fair better than the ones currently growing in my garden, which tend to resemble Swiss cheese these days. (One added benefit of winter - fewer pests!) I've already sown my winter carrots and the special package I ordered from Johnny's Selected Seeds just arrived in the mail today (more on that later).

winter carrots
Winter carrots
I'd mentioned in a previous post that I have a fascination with growing and harvesting food during the winter months. If someone were to ask me why, I don't know if I'd be able to give a definitive answer, especially since in my opinion there are many compelling reasons for doing so. For starters, I appreciate the fact that this practice has had a long and rich history particularly in Europe, and the stubborn Luddite inside of me wishes to preserve this dying tradition. Also, I think this idea lends greater credence and meaning to a piece of advice being widely dispensed these days by foodies, gardeners and even physicians -"eat according to the seasons" - a concept that is generally more acceptable in parts of the world where winters are mild or where access to the global food trade is still limited. In my case, this particular piece of advice also begs the question - are seasonal eaters living in cooler climates (New England, for example) limited for 6 months out of the year to what's stored in a root cellar, processed in a jar, or bagged in a freezer? Or is it possible to add some variety during these lean months by starting a winter garden, while at same time lessening our dependence on produce shipped from California and South America?

Having never grown a successful winter garden myself, I'm approaching this endeavor admittedly with a bit of trepidation. I can't help but wonder- if winter gardening is possible in this part of the world, then why aren't more people doing it? This I can't be sure of. But what I am certain of is that it indeed is worth an earnest effort.

Winter Seeds
Back to my package - earlier this week, I placed an order with Johnny's for the seeds I intend on growing in the coming months, crops that are particularly known for their hardiness. Those who have read Eliot Coleman's books will find some items on this list rather familiar:

Spinach - Smooth Leaf Space (F1)
Wild Arugula - Sylvetta
Green Oakleaf Lettuce - Tango
Minutina (Erba Stella)
Mache (Corn Salad) - Vit

As you've probably noticed, this list is limited mainly to the traditional salad crops. In addition to what's here, we hope to be eating some Napoli carrots, Hakurei turnips and assorted varieties of Asian greens. A year from now, and if all goes according to plan, I hope to add on to this list some kale, leeks, chard and other salad greens such as claytonia and bulls blood beet.

Finally, I'd like to give a BIG thanks to Kelly from How My Garden Grows for filling me in on a special offer that was advertised in Johnny's newsletter this month. I also happily received today free packs of Johnny's all lettuce mix (1200 seeds) and Easter egg radishes! YES! I love free stuff! THANKS KELLY!

Wednesday, August 26, 2009

D is for Distruction, Devils and Disappearance

sad looking tatsoi
Here is how my Asian greens are looking these days. Hole-y guacamole, indeed! I feel like holding the leaves up to a light and pretending that I'm gazing up at the stars. Sadly, about 90 percent of my Asian greens are no more. My tatsoi and flowering brassica look as though they've been used as target practice by garden outlaws armed with tiny guns. Also, most of my pac choi have disappeared all together, except for the few leaves I found this morning surgically cut from their stems (now that's just plain rude). This leads me to believe that there are more than one dark force at work here. Slugs? Insects? Field mice? All are suspects at this point. This is just further incentive to get my newly sprouted Asian greens under cover ASAP!

meyer lemon
On a happier note, I finally got around repotting my meyer lemon tree this past weekend. I had previously posted that it had been undergoing a flush of growth. I'm happy (and a bit shocked) to say that it is now nearly twice the size it was a couple of months ago. Also, several of the dozen or so lemons are at about 4 inches long now (but still show no signs of ripening). When the garden fairies close a door, they always open a window...

meyer lemon 2

Tuesday, August 25, 2009

Winter Gardening

Eliot Coleman
The other morning, I awoke at 5 AM startled by how dark it was. To think that this time 4 weeks ago, I was already dressed and laced up to do some early yard work. Despite the weather being insufferably hot and humid these past few weeks, you can still feel the days of summer drawing steadily to a close. To many around our parts, this may sound a bit depressing. I have to admit that I'm not one of them. You see, I've never been a huge fan of summer (shocking for a gardener to admit, I know). I guess I'm just a creature of cooler weather or maybe too many childhood summers sent baking in "the urban jungle" have left a lasting impression on me. Who knows? What I do know is that growing food doesn't have to end with the summer season.

I am a huge fan of farmer and guru Eliot Coleman, best known for his writings on winter harvesting. His Four Season Farm in Harborside, Maine specializes in growing food all year long using only low-tech, non-heating (and in some cases, minimal-heating) elements. Coleman's technique relies upon, among other things, choosing the right varieties of winter crops, succession planting on specific fall dates, and a couple of added layers of protection during the harsh winter months. Such will be my inspiration for the coming season. I figure that if Coleman can accomplish all of what he does on a commercial scale in zone 5, I can at least have some success with my winter garden in zone 6. There's still so much to do before our first frost, and such precious little time...like the nature of most things.

Unexpected Good News for Urban Honey Bees

Who says that all things agricultural and sustainable have to be relegated to the countryside? Here is an interesting article about a growing industry in Paris, France - Honey. It turns out that urban hives are more productive then their country counterparts and have lower mortality rates. Could this be yet more evidence that chemical pesticides (more prevalent in rural areas) are heavily impacting the local bee population?

"Paris rooftops swarm with bees as urban honey industry takes off" - by Charles Bremner (The Times -UK, August 18th, 2009)

Monday, August 24, 2009

Garden Gate

garden gate 1
This past weekend, I finally got around to installing my garden gate. I'm not a handyman by any stretch of the imagination, but all in all, I think it turned out well. Installing the gate was pretty quick, taking me about an hour. I constructed the gate using pine 2 x 3's and some mesh wire. Three inch screws hold the pieces together and metal ties reinforce the corners of the frame. Simple hinges connect the gate to an outer wooden frame, which is kept in place by metal posts driven into the ground. Though it's not perfect, the end result seems to do the job (open and close, that is). Only time will tell whether or not the gate and fence will keep out the neighborhood critters.

garden gate 3 garden gate 2
On a side note, the hakurei turnips and mesclun mix that I direct-sowed a few days ago have begun to emerge. (Surprisingly quick!) A small victory for the gardener. This will have to mitigate the damage that's being done to my Asian greens and broccoli by an unknown insect. I will have to do some investigating.

turnips and mesclun

Friday, August 21, 2009

A Closer Look

raised beds 3
Here is a closer look at my raised beds. I've prepared 8 so far and have 4 waiting to be worked on. Initially, I was planning on adding more beds to these rows until I reached the other side of fence, but lately, I've been having second thoughts about that. You see, I've been reading up on the traditional European-style "potager" (or what we would refer to as the "kitchen garden") and have become a bit fixated on the colors, geometric patterns and classic aesthetics associated with them. I think every gardener gets to a point in their planning where they have to weigh the benefits of form versus function. The goal of the traditional kitchen gardener was to marry both elements deemed equally important, making the potager something that was not only pleasing to the master's eye but also to the chef's needs. As a result, I think I'll stop at 12 of these raised beds (4 to each row) for now and try to think outside of the box when laying out the rest of the garden. Since fall is close at hand here in New England, at least I know I'll have time to think about it before spring rolls around. For now, I'll continue to turn the soil and sow my green manure.

raised beds 4
Planted (from top left): Asian greens, beans and beets, peas and more Asian greens, zucchini, radishes and mesclun mix. Center: carrots.

Freedom Gardens

Dig for Victory

A few days ago, I decided to join FreedomGardens.org, which is a small but growing online social network of people who are interested in living a greener life. It was started by the Dervaes family, who gained worldwide attention a few years back for being urban homesteaders in Pasadena, California. They've been able to grow more than 6000 pounds of food annually on their 1/5 of an acre suburban home (which is amazing when you think about it) and currently raise goats, chickens and ducks. I have to say that this is probably one of the best online communities I've joined. There's plenty of great information and advise posted by members on the site and interesting groups/forums to join. Ultimately, without meaning to sound too political, I just like knowing that there are plenty of people out there who share similar values regarding our interaction with this world and who seek their own version of what Helen and Scott Nearing referred to as "The Good Life". Plus, it's also nice to see what some non-blogging gardeners are up to!

Another brief update on the garden: The fall planting of carrots, beets and peas are starting to emerge. Yesterday, I prepared another bed (8 total now, at least 4 more to go) and sowed some flowering brassica (Yu Choy Sum), hakurei turnips and mesclun mix. Also, I will hopefully get around to installing the garden door this weekend.

Tuesday, August 18, 2009

Fall Garden Update

beans
tatsoi beets 3
clockwise from top: beans, beets and tatsoi

Now that a good chunk of the garden construction is done, I thought I'd do a quick post on what's growing and what I'd like to accomplish this month. Ok, so here's what's happening:

- In the past week, I've transplanted all of the seedlings that I started back in July, including a bunch of beets and asian greens (tatsoi, pac choy and flowering brassica), 8 bean plants (which have already begun to flower), 4 good looking zucchini plants, and 2 broccoli plants ( 2 were accidentially decapitated during the process). I also transplanted my peas and lettuce, neither of which are looking very happy in this hot weather.

- In the past week, I also direct-sowed all of my carrots (nantes and napoli), my remaining beets, peas and beans, and a couple rows of radishes. I'd purchased my napoli carrot seeds pelleted, which makes them look like little tapioca pearls and very easy to handle. Already, the beets and radishes have started to emerge. I feel like we'll be buried in beets this fall, which ironically is the one vegetable that only I like.

- This week, I want to put in my remaining raised beds (I've constructed 12 thus far) and sow more asian greens, lettuce and some hakerei turnips. Also, I'd like to install my garden door, which is still a work in process in my basement.

- Finally, by the end of this month, I plan on preparing the remainder of my garden plot and have it sown with my fall green manure mix. I'd also like to order some winter-hardy (or should I say 'hardier') greens from Johnny's Selected Seeds.

Radishes
radishes

What Springs from Concrete

I love reading about all things green and tasty. Much of my downtime away from the garden is spent reading newspaper and magazine articles, online essays and books about home gardening, urban "greening", sustainable farming practices, agricultural history, modern food practices, traditional cuisines, etc. That being said, I thought I'd start posting links to some articles on such things I find interesting (and hopefully, others find interesting as well). Also, I would greatly welcome any reading suggestions you may have.

Anyhow, speaking of urban greening, I found this NY Times article today about a little flower garden that sprang up from a graffiti-ridden Brooklyn sidewalk. I love reading about individuals who take it upon themselves to create something beautiful out of something that's rundown and lifeless for everyone in the community to enjoy.

"A Verdant Spot Springs Forth From Concrete" - by Anne Rever, NY Times (August 5th, 2009)

Monday, August 17, 2009

Raising Fence

building garden fence 3

My main task this weekend was to put up a fence around my vegetable garden. Earlier, I mentioned that I had purchased 100 ft of 2" x 4" wire mesh and 20 4' metal stakes from a local gardening center. Figuring that it wasn't enough, I went back last weekend and got an additional 50 ft of wire mesh. I also had a dozen or so extra stakes from the old garden, which ultimately came in handy.

building garden fence 1

Saturday morning, I started by marking off the perimeter of my vegetable plot with kitchen twine, leaving about a foot of tilled soil between the lawn and the future fence. I plan on mulching over this area later on this fall and utilizing the space to plant flowers all around the vegetable garden. This should also making mowing and weeding along the fence a lot easier. Next, I dug about 4 inches down along the perimeter of the plot, removing more rocks and roots in the process. I'm hoping that by burying the fence a bit, it will act as an added deterrent against woodchucks and rabbits. This took me a couple of hours and was exhausting work in 90 degree weather.

Later on in the day and after the sweltering sun had eased a bit, I pushed the metal stakes about a foot deep into the trench (spacing them anywhere between 4 to 6 feet apart) and used a trowel to even out the depth and remove any rocks that might obstruct the wire mesh. After all of the stakes were put up, I uncoiled the wire and attached it to each stake at three different points using plastic electrical ties. I will point out that getting the wire up straight and taut was not that easy, especially if the stake was not pushed in perfectly straight, if there was a slight slope to the land, or if I had to make a turn. This entire process took about 3 hours and I was pretty satisfied with the finished result. At the end of the day, my only remaining tasks are to back fill the trench and build a garden door, things I hope to get done sometime this week.

building garden fence 2

Zinnias

flower 4
Friends of ours dropped by a couple of weeks ago and gave us a beautiful pot of zinnias as a housewarming gift. Even though I haven't really thought about what kinds of flowers I wanted to grow next year, I will admit that caring for these flowers have gotten me really excited about it. Zinnias (although somewhat ubiquitious these days) are definitely a flower I would consider growing from seed. They've wilted several times already due to may neglect and seem to bounce back really quickly after a good soaking. Now that's my kind of flower. I've already purchased some cosmos, morning glory and oriential poppy seeds off of a discount rack for next year. I think I'll add zinnias to the list.

flower 2 flower 3

Tuesday, August 11, 2009

Constructing Raised Beds

Raised beds 2
Last Friday, I made a trip to Home Depot to purchase untreated pine 2 x 4's in order to construct my raised beds. I had the sales clerk cut them down so that my beds measure 6 feet by 3 feet each. This may seem a bit small to some of you out there but I did this for a reason. I wanted the width of the beds (3 ft) short enough so that I can access the entire surface of the bed from one side. Though this isn't all that important during the summer months, it will come in handy during the late fall, winter and early spring. You see, I plan on building cold frames that fit on top of these beds, are attached to one side by metal hinges, and are easily removable in the spring. I chose a length of 6 ft to ensure that the cold frames are not too heavy and awkward to handle and lift once in place.

Mind you, this is all theoretical at the moment but I'm really looking forward to experimenting with season extending techniques and winter gardening ideas, as they are major areas of interest for me. Since our summers seen so fleeting here in zone 6 northern Massachusetts, the idea of being able to harvest some hardy winter greens and carrots in the dead of January seems really appealing. I plan on constructing at least 12 beds this size, which still leaves plenty of room for several longer beds and other growing areas.

Outgrowing One's Home

Since the forecast for the remainder of this week appears to be mostly rainy and overcast, I'm guessing this would be the ideal time to transplant the beets, broccoli, beans, zucchini, lettuce, asian greens and peas I started a few weeks ago. The plan was to get these transplanted within a couple of weeks of us moving in, but again, things are running a bit behind schedule. If my plants could talk, they would cry for roomier real estate.

I have several more raised beds to construct in my basement and I think I'll put up a temporary fence around the beds I'm using to transplant these seedlings until I have time to construct a more formal one. Hopefully, it will be enough to keep the bunnies and woodchuck living underneath our shed at bay. Two weeks ago:

Seedlings on table

Today:
Seedlings on table 2

Monday, August 10, 2009

Tasty Blackberries

blackberries
The wild blackberries are starting to ripen. For the past week, we've been enjoying this tasty mid-summer treat. The bush that we have produces a very good crop, but they've yet to make it into the kitchen. Since this is my first blackberry bush, I've learned so far that the berries are at their sweetest when harvested a couple of days after they've turned black. This gives them time to really plump up. I noticed that there are a couple of other young blackberry plants growing along the stone wall. I'm imagining future summers of endless blackberry shortcakes, trifles, sponge cakes, and tarts. Yum.

In Progress

It's been exactly two weeks since we've been in our new home and I have to admit that I'm a bit disappointed that the garden hasn't progressed as much as I'd hope it would. With a new home to get in order, a toddler running around and a longer work commute to contend with, it doesn't leave much time in the day to carry out one's hobbies. Oh well, I guess some things in life move at their own speed and you just have to run with it. I have to remind myself that the joy of gardening is as much about the process as it is about the end result. That being said, here is the progress I've made so far.

old garden
Soon after we moved in, I began dismantling the prior owner's old garden. I had initially wanted to save myself some time and energy by expanding upon it, but in the end, I decided to find a new spot for my garden. The major con in doing so is that the new spot (along the side of our yard) gets a bit less sun than the old one. However, the major downside in keeping the garden where it currently is (smack dab in the middle of the yard) is that it effectively cuts our lawn in half, and eventually, the backside becomes under-utilized. Although I've never been a major fan of large grass lawns period, I can see how a long continuous one would someday appeal to my son. Finally, I think the new spot will add better overall visual appeal to the yard.

Side Yard
A few days after we moved in, I began clearing out about 150 sq feet of overgrown brush on the right side of our yard. So far, I've filled 18 30-gallon lawn bags with branch clippings and leaves, not to mention the HUGE pile of trunks and thick branches that we've accumulated. I'm starting to realize that clearing brush and trimming trees is the easy part; it's the clean up that's the big headache! It took me the better part of a week to get this cleared out and cleaned up.

Once the side of the yard was cleared, I made a visit to Home Depot this past weekend to rent a rototiller, which ended up being one of those life lessons experiences. I won't bore you with the details but here is what I've learned from my experience:

1) Rent a machine that is up to your particular task. In my situation, I had to clear about 600 sq feet of well established (VERY THICK) lawn. I foolishly rented the smallest machine available at Home Depot simply because it was the only one that would fit (barely) in the back seat of my Nissan Maxima. (I was starting to see the appeal in owning a big gas-guzzling pickup truck...well almost.) Needless to say, the machine was barely powerful enough to crack the surface of the lawn and ended up being more trouble than it was worth.

2) Before rototilling, make sure you mow the area to the shortest length possible and rake up the grass clippings. I rototilled on lawn that hadn't been mowed in over week and end up with 600 sq feet of clumpy soil densely matted with grass. And the recent rains didn't help either. I suppose if I had gotten a more powerful machine, this wouldn't have been an issue, but alas, I didn't. The best I can hope for now is that this mass (and mess) of dying grass/soil starts to break down quickly and hand turn any areas of new grass that might develop.

3) Do a bit more research on what's available in your area. After I returned the thing to Home Depot and explained to the sales clerk my problems, he confirmed that I should have rented a much more powerful (and heavy) machine (one that requires ramps to load it onto a pickup). He also mentioned that although Home Depot didn't deliver, there was a tool rental shop located the next town over from us that did for a reasonable fee. Now I know.

Side Yard 2
So after several days of clearing and four grueling passes with the darn rototiller, this is what I ended up with. It's amazing how much more of the yard we are able to utilize now. We can also see the stone barrier that had been hidden underneath the brush. One of my many future projects is to continue weeding and repairing the stone wall and to plant a small shade garden to the right of the raised beds (more on them later). Sorry this post is so long! Shorter next time...promise.

Tuesday, August 4, 2009

Aaaaaaand....We're back.

The past week or so has been pretty hectic to say the least. We are finally getting settled into our new home, though still not completely unpacked. Last week, I made a trip to Dodge Grain in Salem, New Hampshire to load up on materials for our new garden. Among my many purchases was 100 feet of 2" by 4" mesh wire fencing, 20 4' metal stakes, some sleak gardening gloves and huge bags of lime, rock phosphate and greensand. I also picked up a bag of blood meal, which is not only a good source of added nitrogen but also deters deer and rabbits. That being said, I think I'll try to limit my use of blood meal in factor of something a bit less "icky", like say alfalfa meal.

Last week was spent dismantling the prior owner's garden fencing and clearing about 100 square feet of brush (which still needs to be chipped and composted). I also stopped by Home Depot to have materials cut to built a simple garden door (I still haven't quite figured out in my head how it will come together). This week, I would like to have the garden plot rototilled, the fence put up, the soil amended and (hopefully) some of my seedlings planted out. One big decision left to consider is whether or not to build wood frames for the raised beds...I'm on the fence with this one.

P.S. Pics when we get our internet connection up and running!