Showing posts with label garden projects. Show all posts

Tuesday, April 24, 2012

Spring Cleaning

DSC_0132
A few weeks ago, we began the task of cleaning up the raised beds behind our townhouse.  The beds had been left unattended to for at least the past year so much of the work involved lots of weeding.  Here, Marc is clearing out the crowded strawberry bed.  This is where I'll be growing much of my tomatoes, peppers, cucumbers and string beans.  

DSC_0211
I haven't done too much planting up until now.  The snow peas, shell peas and fava beans have sprouted but are growing rather slowly.  I also transplanted some spinach, lettuce and Asian greens not too long ago.  The rest will have to wait until May as temperatures are expected to reach down into the low 30's later on this week.

DSC_0183
A while back, I also began work on cleaning up the overgrown soft fruit bed beside our unit.  I pruned back many of the shrubs, removed lots of dead branches and cleared out most of the weeds. Now all it needs is a top dressing of some good compost.

DSC_0189
I wouldn't say that I know all that much about pruning fruit trees and shrubs.  Mostly, I pruned each shrub to a manageable size and shape and removed dead and crossing limbs.  I'm looking forward to seeing this elderberry bush in fool bloom.

DSC_0188
As you can see from this picture, the raspberries have taken over much of this bed. I suspect that it's an everbearing variety because I remember seeing some fruit on the canes when we visited last December. In any case, I pruned back the tops and will wait to see if they produce an early summer crop as well. It's hard to see in this picture but there are also two black currant bushes behind the raspberry canes.

DSC_0182
In addition to the black currants, there are also white and red varieties in the bed. The "Red Lake" currant bush in particular is loaded with buds. Hopefully it will produce well this year.

DSC_0225
In addition to two dwarf cherry trees beside our unit, there's also a shrub that's described as a "bush cherry" in this bed.   I'm not quite sure what this is but it's flowering profusely right now.  I'll have to do some googling.

DSC_0213 
Finally, the four sorely neglected blueberry bushes don't look like they've done much growing thus far. Hopefully that will change as I would love to take some green wood cuttings this summer.

Tuesday, November 29, 2011

A Straw Mulched Garden

DSC_0015
I realized the other week that the garden was looking rather untidy (to put it mildly) even for this time of year. We had a lot of rain during the past couple of months, which left the garden paths awfully muddy. The beds were covered in brown pine needles from our neighbor's trees and the weeds were a bit out of control as well.

This past weekend, I finally got my butt off the couch and did something it. Boy, what a difference a little straw makes to the overall look of a garden. A stirrup hoe (fast becoming one of my favorite gardening tools) also made weeding the entire garden a breeze, especially now that there aren't many veggie plants to maneuver around.

DSC_0028
This is also the first time I laid down some straw in the back garden. All in all, I think it looks good.

Tuesday, October 18, 2011

Random Happenings...and Non-Happenings

DSC_0152
Looks awful doesn't it? For some reason, I can't seem to find the motivation to start the fall cleanup. And it's not helping that the garden is covered in mud right now. It's always hard getting started but ultimately, I do enjoy tidying things up and putting the garden to rest for the winter.

DSC_0228
The only things blooming in our garden right now are the Asian greens that have bolted prematurely. In this case, it's the Napa cabbages. The honey bees seem to appreciate them so I think I'll wait to pull them.

DSC_0136
The wild arugula seeds that I sowed last fall never took so I'm happy to see that it did this time around. The leaves are very pungent so a little bit goes a long way in a salad or sandwich.

DSC_0179
Broccoli side shoots - one of my favorite things in the fall garden. I love a veggie plant that keeps on giving.

DSC_0140
My two Brussels Sprout plants - I'd cut off the tops but I'm wondering now whether I should remove more of the leaves to coax the plant into putting more of its energy into maturing the sprouts.

DSC_0142
The four chrysanthemum tea plants that I transplanted into the garden in 2010 have since taken over their bed.

DSC_0145
It won't be long now before they begin to bloom. And if we can avoid a hard frost anytime soon, we might just get a decent crop of flowers this year.

Tuesday, July 12, 2011

Today's Tidbit - Dry Stone Walling

I've always wanted to learn the craft of dry stone walling. For anyone interested, the New York Times published an interesting piece on this very subject recently:

The Master of the Stone Wall Discusses the Perfect Fit - New York Times, July 6, 2011

Check out the short instructional slide show too!

Tuesday, June 14, 2011

Tomato Trellises - Trial and Error

DSC_0073
I thought I'd do a quick post on my tomato trellises. Part of me wishes I had purchased those fancy folding tomato cages, but alas, I just can't justify the expense. Of course I could always make my own out of concrete enforcement wire but then there's the issue of finding a place to store all of those bulky cages during the winter months.
DSC_0056
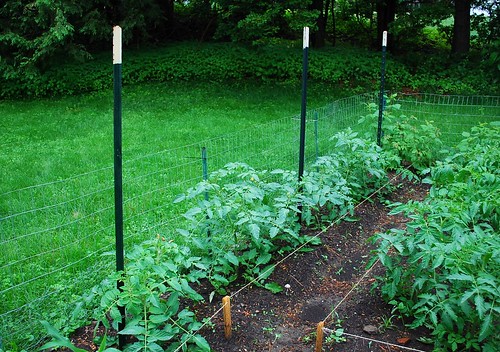
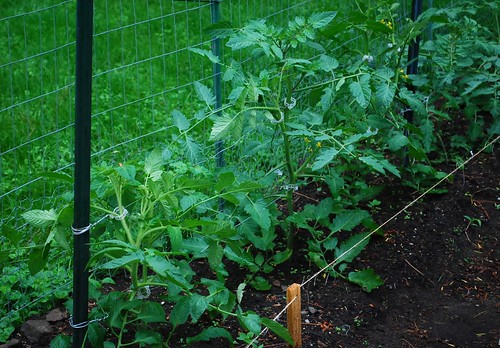
Last year, all of my tomatoes were trained using metal wire stretched horizontally along a series of 5 ft poles. The vines are attached to the wire using plastic clips or Velcro tape and as the vines grow, you just stretch another wire about 10 inches above the last.
DSC_0089
The main advantage to this setup is that it's relatively simple and inexpensive. The major downside, in my experience, is that it's just not strong enough to handle the weight of beefsteak tomatoes - the wires easily sag and the poles bend over under the stain. However, it seems to hold up just fine for cherry tomatoes, which is what I'm using this method for this year.
DSC_0053
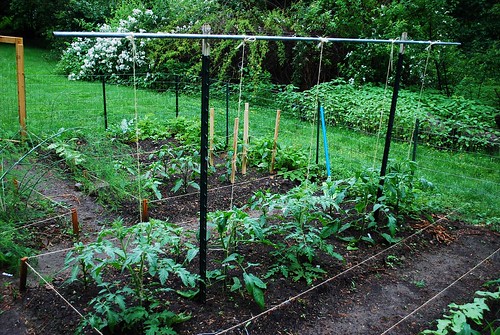
I had two 5 ft metal poles left over from last year so I decided to rig up a different kind of trellis. I attached a length of steal conduit (also something I had lying around) to the top of each pole and will train the tomatoes with strings tied to the top and attached to the vines using plastic chips or Velcro tape. The conduit's rigidity should prevent the vines from sagging and additional strings can be applied as the vines branches off.

I wouldn't call this method revolutionary but I have feeling that it's popular among gardeners because it's simple and works relatively. The only major downside I can think of to the one I put up is that at a height of 5 ft, the poles are just not tall enough. Some of last year's vines grew over 10 ft long. I'll have to decide whether to trim the vines to a reasonable height or allow them to loop over the top.
DSC_0080
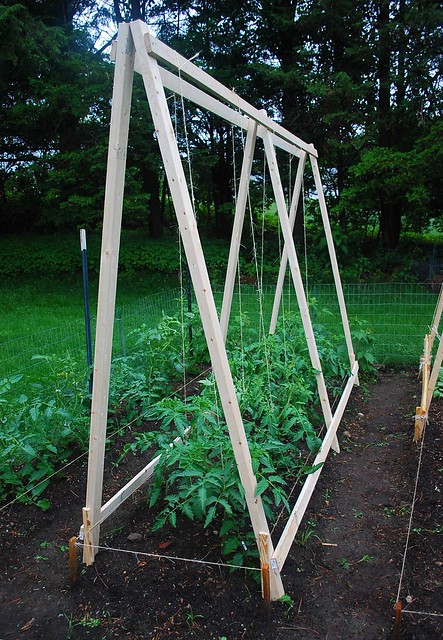
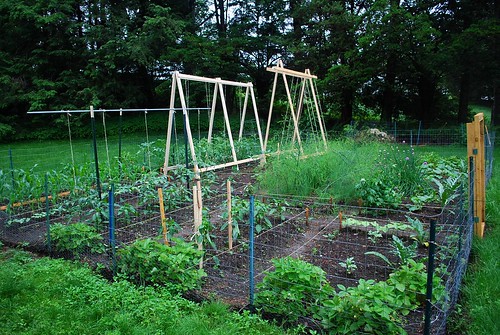
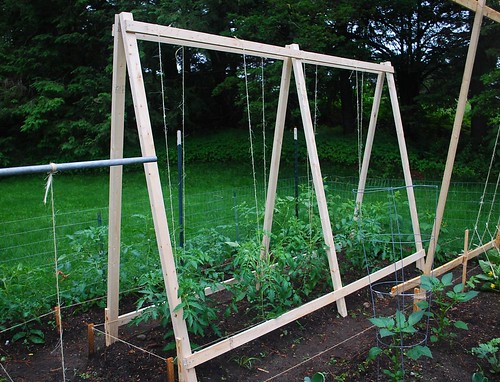
Lastly, here's the latest trellis I built applying the string method. Standing 7 ft tall, I think this height should be adequate to handle even the most aggressive vines.

DSC_0085
Here's a slightly different angle. I decided to plant my tomatoes in a zigzag pattern to make the most of the bed. Hopefully next year's tomato bed will be bit wider so that I can fit a double row.

DSC_0094
And here's a close up view of the tomato clips I use. I love them. They are really sturdy and the best part about them is that they are reusable.
Monday, June 13, 2011

Building New Trellises for the Garden

DSC_0033
I've given up on trying to predict the weather this year. It rained all weekend and temperatures barely got into the 60's. The rest of the week isn't looking much better. Plant growth seems to shut down during these cool and cloudy periods. Hopefully this will change as we approach July.

Anyway, I found myself working in the rain on Saturday and Sunday. I had to build and erect my two new vegetable trellises as a few of my indeterminate tomato plants were beginning to keel over. Sometimes certain gardening chores/projects cannot wait any longer (I'm sure most you will agree with me on this) so you put your boots and rain jacket like a good little gardener and just suck it up.

DSC_0035
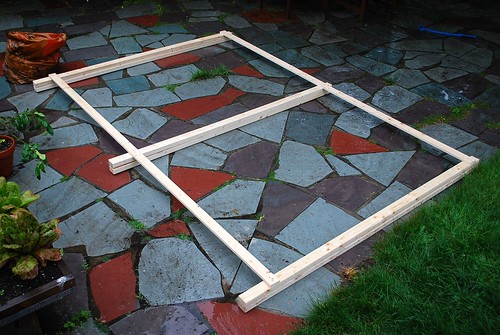
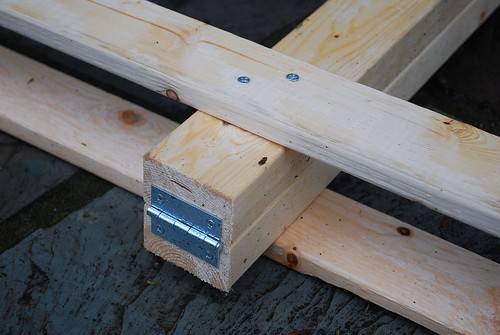
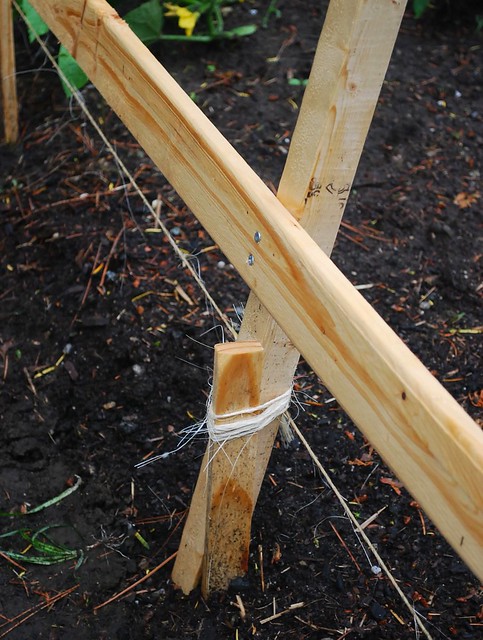
I wanted to build trellises that were fairly light weight and moveable and opened up like a tent. This way, I could adjust the angle of the vertical beams to suit the gardening space. Simple hinges were just to connect the vertical beams together.

DSC_0078
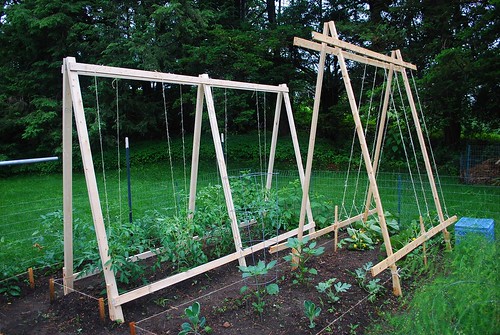
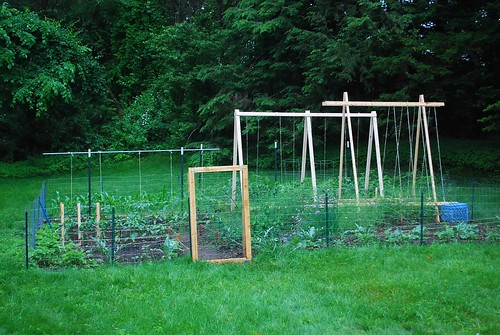
It didn't take me too long to put my two trellises together. Here is what they looked like fully installed. The cucumber trellis (right) is about 8 ft tall and 8 feet wide. I used 2 x 2's for the vertical beams and 1 x 3's for the horizontal ones. The pieces were all connected together using 2 inch screws. The tomato trellis on the other hand is 7 ft tall and 10 ft wide. I used 2 x 3's for the vertical beams and 1 x 3's for the horizontal ones. If I had to do it over again, I would have used 2 x 3's for the cucumber trellis as well.

DSC_0082
Once erected, the trellises felt surprisingly sturdy. For added stability, I tied each vertical beam to wooden stakes that where driven a foot and half into the ground. I'm hopeful that the trellises will be able to withstand a mighty wind storm anchored in this way. I used rope instead of screws as it will be easier to remove. However, I'll replace them with screws at the first sign of trouble.

DSC_0047
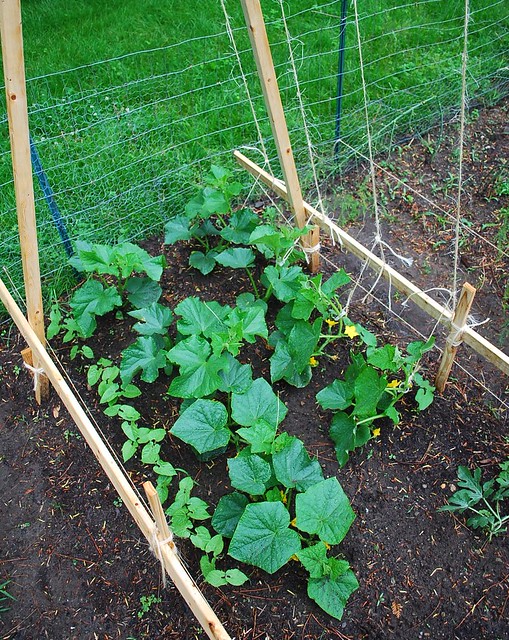
Once up, I began to train my cucumbers to climb up the strings. You can't tell from this picture but I used two strings for each plant. This will allow me to weave the vines through them if I have to do so. On a side note, I planted some beans next to the cukes. I been planting them in as many places as I can fit them as I'm determined to get a good bean crop this year!

DSC_0097
Whenever you're constructing something for the garden, there's always a degree of uncertainty as to how it will turn out. In this case, I'm pretty satisfied with the end result. Then again, only time will tell. Tomorrow, I'll talk more about my three tomato trellises.

Wednesday, May 25, 2011

At Work in the Back Garden

DSC_0007
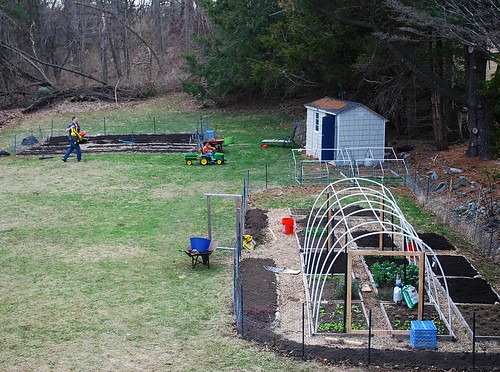
This past weekend, I spent most of Saturday in the back garden. Most of the work involved weeding, designing the space and building up the raised beds. It's amazing how much earth you can move with a simple garden rake. It helped that the soil wasn't too compacted. Instead of framing each bed with lumber, I drove wooden stakes into the ground and used string to outline the growing areas. Not only was this more cost effective, it also involved much less work.
DSC_0017
A major difference from the before picture don't you think?

DSC_0014
Here's a view from the opposite end of the garden....

DSC_0010
...as well as a semi-close up of the beds. I'm actually very pleased with how it all came together. The paths should be easy to weed with a stirrup hoe and once in while, I'll tidy up the edges of the raised beds with the garden rake.

DSC_0004
Sunday was all about getting my summer transplants into the ground. It was a lot of work and I rushed to get everything planted before I had to catch my plane in the afternoon. I didn't quite finish but the rest can wait until when I get back. I didn't take any pictures before I left so I won't be able to post any until I return home late Thursday.

I hope you all are making major progress in your gardens!

Tuesday, May 17, 2011

Mending Fences

DSC_0002
Despite the awful weather, Jonathan and I were able to get some work done in the garden this past weekend.

DSC_0005
Our first order of business was to move one end of the fence enclosing the side garden eight feet closer to the growing beds. This section of the garden doesn't get much light and the area had become neglected and covered with overgrown grass and weeds. I started by marking where the fence was being moved to and dug a narrow trench. Cutting and pulling up this section of fence was much easier than I'd expected since the ground is still moist and loose.

DSC_0011
Once the fence was in place, I closed off the cut ends and replaced the sod. In total, this job took about an hour. All that's left to do now is to lay down some cardboard and straw to kill this narrow patch of grass.

DSC_0017
Next, I had to tackle the fence enclosing the back garden. I'd put it up hastily last summer and with all of the snow we had this past winter, it was in really rough shape. Taking it down was the easy part. Digging the perimeter trench, adding several more stakes and putting the fence back up took all afternoon.

DSC_0019
Thankfully, I think it turned out pretty well. Now that the bottom six inches of the fence is buried, I doubt the rabbits will be able to break through this summer. And the extra polls should prevent the wire fencing from sagging.

DSC_0040
I even got around to building a new door for the back garden. Now I won't have to leap over the fence like a crazy person.

Wednesday, April 20, 2011

This Week's Gardening Chores

Brassica Transplants
I wasn't able to get as much gardening done this past weekend as I would have liked. We've had a good amount of rain and overcast skies so far this month - not surprising considering it's April in New England. The garden remains pretty wet still but the plants don't seem to mind it all too much. When I dig down 6 inches in my planting beds, I see lots of water ( pools of it in fact). Our yard has significant drainage issues this time of year but the ground tends of dry out by the time June rolls around. Let's hope that's the case this year.

Transplanted Broccoli
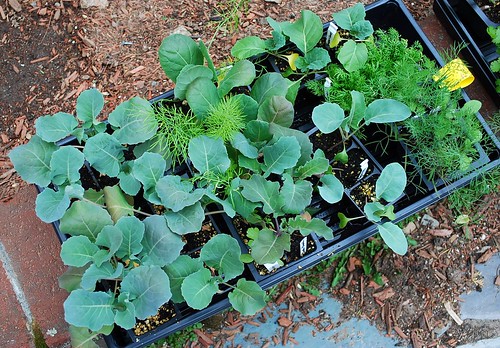
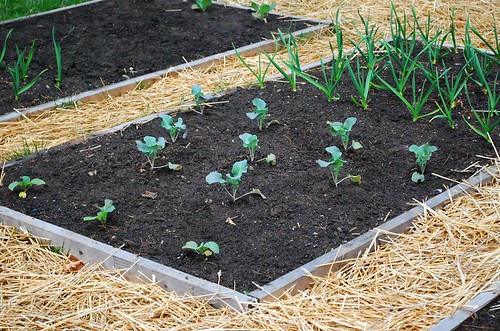
I did get around to transplanting some broccoli, Brussels sprouts, cauliflower, purple sprouting broccoli (from Dan) and savoy cabbage. For me, it always becomes a lot easier to evaluate your overall available gardening space once your early spring greens and brassicas are in (I always tend to underestimate the amount of growing space I have). I want to make sure I leave enough room to grow all of my summer crops but it also would be nice to have enough space left over to fit in a second sowing of brassicas if I can. We love broccoli around here and any remaining space available will be planted with it.

Question to those of you who've grown purple sprouting broccoli - can I expect anything this year? Or will the plant only produce edible buds the following year?

Carrot Bed
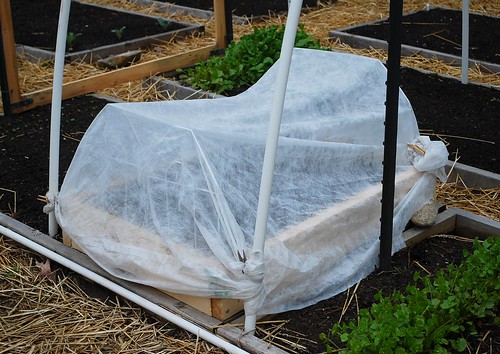
On Sunday, I was also able to install my carrot box, which was built using 2x6's and made to fit one side of an existing bed. Our soil is so heavy here that it is often different to get carrots that are straight. Hopefully, adding another 6 inches of fine potting medium to the top will help us achieve better results (and deter the mice). I placed fabric row cover on top to help shield the germinating seeds from this week's heavy rains.

Monday, April 11, 2011

The Freshly Mulched Garden

April Garden 1
As the weekend drew to a close, we were able to haul the remaining compost over to our "homegrown" pile behind the shed, smooth over the planting beds and lay down some fresh straw along the garden paths. Now that Marc is able to spend more time with me in the garden, we can get much more done in one weekend. One of the things I like best about gardening is being able to stand back and look at a finished project with pride. Maybe it's because vegetable gardening is something born from your own two hands (I doubt that we would feel the same way if we had paid someone else to do it). I also enjoy its communal aspects as well. Marc's mother came over to help out, our neighbors were out tidying up their yard and our children were running around both properties laughing and playing. It's times like these that make me appreciate the simpler things in life.

Anyway, here is what it looks like now:

Freshly Mulched Garden
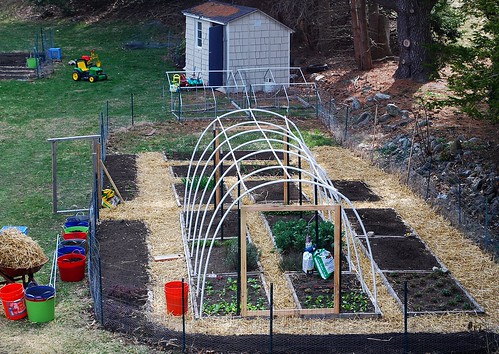
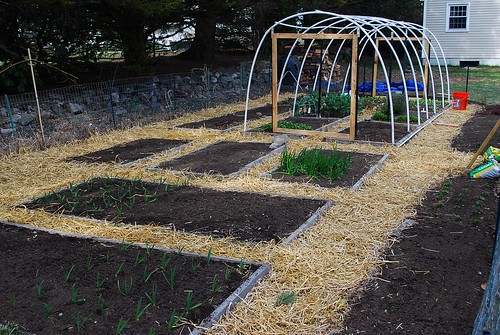
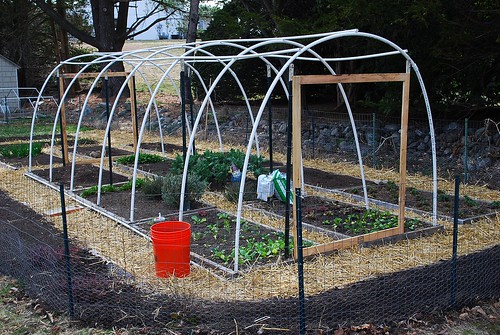
A half bale of straw was enough to cover this space. I have to admit that straw isn't really my favorite form of mulch but it does present a nice contrast to the dark raised beds, especially when it's still relatively fresh and yellow.

Freshly Mulched Garden 2
I also got around to sowing some shell peas, snow peas and French Breakfast radishes. Still no signs of the Fava beans I planted two weeks ago (though it has only warmed up in the past week). Should I be worried? I might have to start some indoors just to be on the safe side.
This week I'll also be sowing some carrots and mesclun mix and transplanting several varieties of broccoli. With temperatures remaining in the 6o's this week, I finally feel as though the Spring gardening season has begun.

Compost Pile
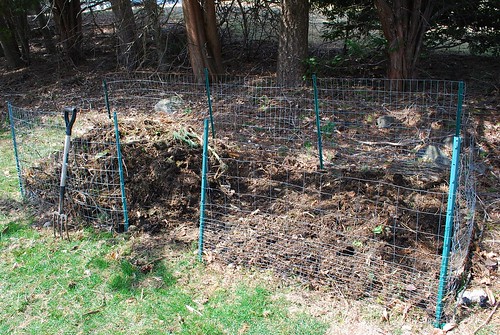
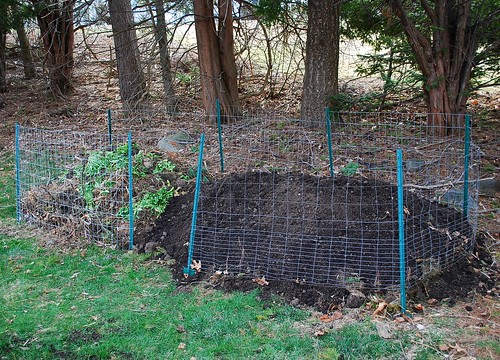
On a final note, I tidied up our compost pile a bit to make way for the excess we purchased. I moved all of the fresh(er) garden waste to the left. The waste to the right has broken down quite a bit but still needs several more months to finish.

Compost Pile 2
We piled the remaining compost onto the semi-decomposed waste. Hopefully, this will help speed the process along. As you can see, my composting pen is pretty lame. Until I find a composting system that I really like, this will have to do.

Sunday, April 10, 2011

The Back Garden

back garden 2
On Saturday, we decided to do some work in the back garden. Those of you who've followed my blog for a while now will remember that I'd taken the lazy gardener's approach to setting up this space last May. Instead of breaking my back trying to remove a well established lawn (and destroying most of the topsoil in the process), I decided to let Mother Nature do the slow work of it for me. I'd used a not so mighty rototiller to break ground on my first garden the previous summer and was not interested in repeating the process.

expanding garden 4
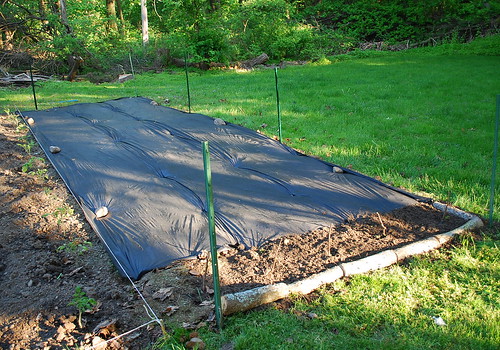
Anyway, here's a reminder of how this space looked like last May. (You can read about it here.) I'd laid a thick layer of dead leaves followed by grass clippings before covering the entire space with some porous landscape fabric and leaving the old lawn to break down slowly over the course of a year. The melons planted here also benefited from the added warmth generated by the black fabric and natural processes happening underneath.

back garden 1
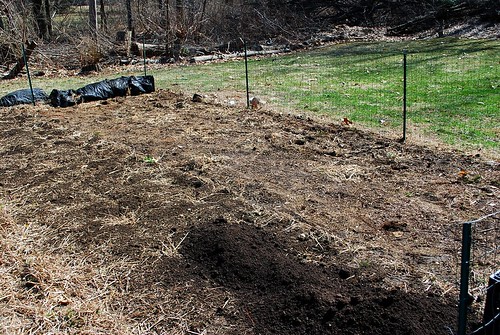
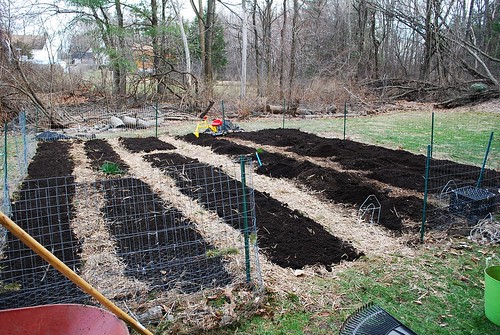
As you can imagine, I was really anxious to find out whether or not this method had worked and to what extent. When I removed the plastic, I noticed immediately how different the soil looked. I raked away some leftover debris from the surface and then poked into the ground with my garden fork. Amazingly, no traces of lawn (roots and all) or leaves remained. The topsoil also felt light and crumbly. Needless to say, I was beyond stoked - so much so that I decided against turning over the soil as I wanted keep the structure intact. (I always kill too many worms in the process anyway.) Anyway, I would definitely recommend this slow method of lawn removal.

back garden 3
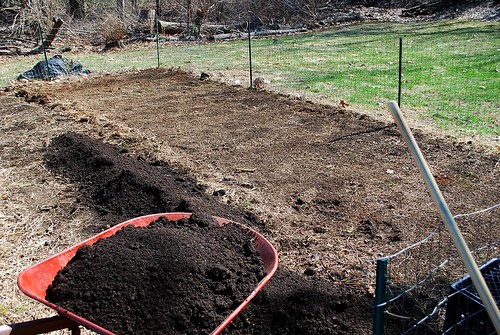
After initial inspection, we then went about the task of covering the new beds with 2 cubic yards of compost. I really hope the tomatoes, corn, cukes, melons, artichokes and potatoes we grow here will benefit greatly from this. And since it will be at least May before we plant anything in this space, we'll have plenty of time to make it look a bit prettier. Next weekend, I'll have to take down the beat-up fence and put it back up again (properly this time).

April Gardening 1
I hope you all had a fun time gardening this weekend. We sure did and the weather was definitely perfect for it.