Monday, March 29, 2010

Sunshine, Rain and Everything in Between

harding off seedlings
Hardening off (from left: wild strawberries, herbs and artichokes)

This week, I'm moving more of my hardier plants outdoors to make room for my warm season veggies. The tomatoes are taking up more and more space and in a couple of weeks, I will be starting my melons and summer squash. During the long Easter weekend, I will also tackle the task of cleaning up the old owner's garden, which is situated on an ideal spot in our yard for sun. This will have to take top priority as our last frost date is a little over a month away and before we know it, we'll be transplanting our tomatoes.

On a side note, I've been feeling lately that there never seems to be enough time during the day to get anything done. Spring fever? Modern culture? Urban living? Call it what you want, but if you ask me, this can't be good for your health. Our lives are often defined by our many obligations...I think I'm due for a different perspective. During the past couple of months, I've been so anxious to get things started, transplanted and grown that I kind of lost track of what makes gardening fun. Also, I hate to admit it but the recent storms and pests have put a slight damper on my mood.

So what's the solution? I don't know exactly but I'm hoping it will come to me soon. I'm thinking few days away from my plants may do me some good. That being said, I hope you all are feeling much more motivated than I am! (I need to catch up on my blog reading!)

rosemary and chrysanthemums
Chrysanthemum tea plants and my newly purchased rosemary

Saturday, March 27, 2010

Learning from the Past


I've been thinking a lot today about why I feel compelled to grow my own food. Somehow, I think this video has a lot to do with it. I love watching this footage of our gardening forefathers working the land. While our growing techniques have changed through the ages, it seems the core principles still remain the same. Will our country ever take part in such a powerful movement again? Victory was their motivation....what should ours be?

Wednesday, March 24, 2010

Slugs, Shoots and Shelter

slug damaged bokchoy
By the looks of this Shanghai bok choy, the slugs are starting to come out of hibernation. Like the mosquitoes that hovered about as I did some gardening this past weekend, I'm sure the warmer temperatures of late has something to do with it.

Sluggo
Back in December, I purchased a canister of "Sluggo" to deal with the slugs in my garden this Spring. Most of my Asian greens were ravaged by this pest last fall. It's amazing the level of damage they can do in such a relatively short period. I guess it's time to put this product to the test.

Bok Choy and Sluggo
Just a light sprinkle of Sluggo all around my bed of bok choy. I took another look this evening and although there was slightly more damage, I don't think it was nearly as bad as it would have been if I hadn't used it. Hopefully, this product will live up to it's reputation.

Mizuna
On a side note, this is my first time growing mizuna. The leaves to me are particularly striking. I can't wait to taste them.

Garlic shoots
The sight of garlic shoots is a sure sign of spring. It looks like 90% of my heirloom hardnecks and supermarket softnecks made it through the winter just fine.

Early Spring Protection
Speaking of winter, our temperatures are supposed to reach down into the mid-20's Friday night. I hung some plastic over several beds to protect them from freezing temperatures and excessive rain. I may also place some fabric row cover over my garlic Friday night. A new layer of straw also helps to keep my garden paths from becoming too muddy.

Monday, March 22, 2010

I Should Have Known Better

plant therapy 2
I broke the one cardinal rule that every gardener should live by...I invited the enemy into my home and it almost cost me dearly. On Sunday, I was dumbstruck to find that my artichoke, tomato and strawberry seedlings were infested with Aphids. Aphids? In March? In a basement? Immediately, I examined my newly purchased chrysanthemum tea plants more closely and noticed that a colony had been brewing for some time. I can't believe I hadn't noticed this sooner. The lesson to be learned here is, no matter how reputable the nursery, you must always quarantine your new plants until you are SURE they will not introduce a foreign pathogen or pest that will infect and potentially kill the rest of your houseplants.

organic pest control
I rushed over to our local home improvement center to pick up an insecticide and sprayer. I will admit that I was tempted to buy the politically incorrect stuff, but in the end, cooler heads prevailed and I decided to go with an organic solution. I had heard about Organocide (which is both an insecticide and fungicide) before but have never tried it. Any thoughts regarding this particular product?

I also decided to treat my Meyer lemon and Kaffir lime trees, both of which have had a lingering scale problem. As I diluted and sprayed the product, I couldn't help but notice that it smelled a lot like fish emulsion. Hopefully, my houseplants won't smell like this for too long.

aphid damage on artichokes
Here, you can see the damage that has been done to one of my artichoke plants. My tomato plants looked particularly sorry after they had been treated, shocked by being outdoors and sprayed for the first time. Thankfully, they are beginning to bounce back. So far, the product seems to have worked its magic. I will have to pay close attention to my seedlings during the next few weeks to make sure the aphids do not return.

Sunday, March 21, 2010

Harvest Monday - Early Spring Greens

kale and spinach harvest
This weekend, I ventured out into the garden to harvest some early spring greens. The spinach that I sowed back in August is still producing tasty leaves. I'm really grateful to have gotten so much bang for my buck from this variety. I'm hoping to get one more harvest before it begins to bolt. Also, the Red Russian kale that I planted last September is starting to take off. Hopefully, I will be able to enjoy its succulent leaves well into the fall season. For this week, I harvested about 0.66 lbs of fresh greens.

cold treating the artichokes
In other news, we've been enjoying some incredible weather here in New England during the past 5 days. Unfortunately, the clear skies and warmer temperatures have not been enough to dry out my garden, which is still pretty muddy at the moment. In fact, there is some standing water remaining in a large section of my garden. I understand that 11 inches of rain from one storm is highly unusual, but I must admit that I am now nervous that this area will remain very wet for the remainder of this spring (and therefore unsuitable to work). It's becoming clear a large portion of our yard has drainage problems. As a result, it's time to come up with plan B. I'm considering moving a big chunk of my garden elsewhere.

Finally, I did get around to moving my artichoke plants outside in order to expose them to a few weeks of cold treatment. They will spend most of their time in one of my hoop houses and will be brought inside only when the temperature drops below 37 degrees. Let's hope that doesn't happen too often!

Saturday, March 20, 2010

My Own Private Citrus Orchard

dwarf seville and mandarinquat trees
I've been wanting to expand my Citrus collection for some time now. Even though natural light is a rare commodity in our cape style home, I thought I'd have a go at it anyway. My Meyer lemon and Kaffir lime trees have tolerated being indoors during the winter months with only 4 to 5 hours of direct sunlight per day. I'm sure that they will be much happier once they are set outside after our average last frost date (May 2).

four winds growers
On Wednesday, my two new trees arrived from Four Winds Growers. I had placed an order for an Indio mandarinquat tree (a cross between a mandarin and a kumquat) and a Seville orange tree a few weeks ago. As a gardener, I try to grow vegetable and fruit varieties that are hard to source locally or are unique in some way. These two definitely hit the mark.

As many of you already know, I am a huge marmalade fanatic. It would make sense than that I would want to grow Seville Oranges in order to make that quintessiantial English marmalade. I'm also looking forward to tasting my first mandarinquat, which is supposed to be sweeter and less sharp than an ordinary kumquat.

manarinquat and seville orange trees
Hopefully, these trees will enjoy their new home. I potted them up using a cactus/citrus potting soil mix amended with some slow release organic citrus fertilizer (the brand I use is Growmore). Although somewhat pricey (the cost of these trees, including shipping, came to $70.00), Four Winds has a great selection of true dwarf citrus trees. Chances are good that they will have what you are looking for.

Friday, March 19, 2010

Spring Preparations - Part II

Without going into too much detail, here is another update on what else I have growing at the moment:

early spring greens
(From left: Tuscan kale, Mizuna and Shanghai bok choy) The early spring greens I transplanted a couple of weekends ago are doing very well. The soil under my hoops is a bit soggy while the rest of my garden is still covered with standing water. I am somewhat concerned that the soggy conditions might cause all of the seeds that I've recently sown to rot. I hate the prospect of having to re-sow everything.

mini napa cabbage
Despite the weather last weekend, I did get a chance to transplant more Kale and mini Napa cabbages.

potting up tomatoes
Inside, I potted up my tomatoes this week. I buried the stems a bit to encourage more root growth. Here, I have Sungold F1, Cherokee Purple, Siberian, Black Krim and Green Zebra. I will be growing 15 other varieties this year as well. (Yikes!)

Ground Cherry
I thinned my ground cherries down to 1 or 2 per block/peat pod. I really should thin them all down to 1.

herbs
The sage, thyme, oregano and German chamomile were potted up as well. I've given up on the rosemary.

chilies
The chilies and peppers (Ancho/Poblano, Hawaiian, Thai, Early Jalapeno and Italian Pepperoncini) are growing slowly but surely.

eggplant
The Rosa Bianca eggplant took FOREVER to germinate.

asian greens and lettuce
More Asian Greens (extra dwarf bok choy and tatsoi) and Manoa lettuce.

celery
I thinned my celery once before but it looks like I didn't do a very good job. I just can't bring myself to thin them down to 1 per block. Next year, I will sow 1 seed per mini block instead and pot up to a 2 inch block. That way, I won't feel like I wasting anything.

rhubard chard
This isn't a great picture but I just love the striking color of this Rhubarb chard.

Finally, although not pictured, I also have some cauliflower and Piracicaba broccoli growing inside at the moment. I hope everyone's spring preparations are going well!

Tuesday, March 16, 2010

March Madness - Part One

March Madness
We are now just recovering from 3 straight days of unrelenting rain. While we had some minor flooding in our backyard, our neighbor had a virtual lake in theirs. I used to think that us gardeners were much more sensitive to the weather forecast than everyone else, but in times like this, it's hard for anyone to ignore mother nature's power.

I'm glad I was able to get some seeds and transplants into the ground before the weather turned for the worse. I'm even more grateful that my hoops withstood the winds this time around and prevented all of my hard work from washing away with the rain. Hopefully, things will begin to dry out during the next few days when temperatures are expected to reach into the low 60's. I MUST remember to vent my hoops as the internal temperature reached 85 degrees F today even though the high was only in the low 50's. It feels strange to be fighting both frost and excessive heat in the span of a day.

Anyway, just because little work has been done in the garden this past weekend doesn't mean we haven't been busy! I'm feeling a bit overwhelmed with my indoor seed starting right now.

seed starting shelves
In fact, I've had to add another shelf of lights to accommodate all of my starts. With all of seeds that I've been sowing lately (I will have to post a complete list for my own reference) and the seedlings that needed to be potted up, available shelf space is in short supply these days.

Super Early Tomatoes
These super early tomatoes desperately need more elbow room. I'm really surprised by how quickly they've grown so far.

Leeks
I think I overdid it with the leeks. We could probably consume all of these over the course of a few months but I don't think I'll have enough space in the garden to accommodate all of them. I'll have to find good homes for some.

chrysanthemum tea plants
The chrysanthemum tea plants that I received a couple of weeks ago are doing well. Once they outgrow the shelves, I will place them outside during the day.

wild strawberries
The wild strawberries are also looking pretty good. As you can see, some sort of green algae is growing on the tops of my soil blocks. I think this is stemming from the organic potting mix that I used as an ingredient for my blocks, which contains composted seaweed. Luckily, it doesn't appear to be having an adverse affect on my seedlings.

imperial artichoke
Finally, I potted up my Imperial artichokes this past weekend. After a rough start, they too are growing rather well. Sometime during the next few days, I will transfer them to one of my hoop houses. Artichoke plants that are exposed to at least 6 weeks of temperatures in the forties (F) are more likely to produce edible flowers during the first year. Since it is extremely difficult (if not impossible) to overwinter them in our zone 6, they are best grown as productive annuals. I have 16 healthy plants, which will hopefully result in a lot of artichokes!

Monday, March 15, 2010

Harvest Monday - When Life Gives You a Lemon

meyer lemon
This is my contribution to this week's Harvest Monday - one lone ripe Meyer lemon (0.35 lb). Chances are I will not see another one until late next fall. My two year old tree is still producing blossoms and has about 50 immature lemons on it right now ranging in size from large marbles to small peas. I'm expecting that it will naturally shed about 60% of them. If I can get a harvest of between 15 to 20 lemons this year, I will be very happy.

wild blueberry Jam
So what does one do with a single lemon? I decided to add mine to a batch of wild blueberry preserves. The end result tasted good but was a bit too runny for me. If I were to make this recipe again, I'd use 1 and 1/2 pouches of liquid pectin instead.

French Apple Tart
Not just for breakfast anymore, I used a bit of my preserves to glaze this French Apple Tart. I quite like the vibrant magenta color it imparted.

Sunday, March 14, 2010

Apologies and Thanks

lavender
I feel like I've been a bit remiss in my blogging and blog reading lately. I have no excuse other than to say, "life happens" and that I can't wait to read about what you all have been up to lately. I don't know about the rest of you, but sometimes I feel pulled in too many directions or stuck in an endless rat race - a symptom of living in this day and age I guess.

First of all, I've been meaning to thank Winnie (Mac) from High Desert Garden for the wonderful gift she sent to me this past week. She was kind enough to share with me a couple of root divisions from her garden (on top of the many seeds she gave me not too long ago). I'm really looking forward to transplanting this English lavender (right) and French lavender into my garden. Hopefully, they won't miss the American Southwest too much. Lavender has to be one of my favorite flowers/herbs from the Old World. I like to imagine that in a previous life, I was farming the French countryside.

Honey Yuzu Marmalade
And as an unexpected bonus, Winnie also gave me some homemade Honey Yuzu Marmalade grown from her own tree! (Score!) I will have to bake something extra special to have with this treat...maybe some challah bread.

Thank you so much Winnie! I will have to find a proper way to repay your amazing generosity one of these days.

Wednesday, March 10, 2010

Late Winter Sowings - Fava Beans, Snow Peas and Seed Mats

planting fava beans
This past weekend, I planted my Fava beans. Traditionally, Fava beans are sown when the crocus emerge or as soon as the soil can be worked. My raised beds have thawed out completely due to the recent rains and though it seems a bit early, I thought I'd take a chance. While our nightly temperatures are averaging in the high 20's to low 30's, I've read that Fava bean seedlings can tolerate temperatures down the low 20's. In any case, I can cover my quick hoops with plastic in a jiffy if I have to.

planting slow peas
I also planted several rows of snow peas in 2 different beds. The seeds were sown fairly close together because I will be harvesting the young shoots as greens. If you've never tried pea shoots, please do because they are absolutely delicious. After a cutting or two, I will pull half of them and let the remaining plants mature. Also, I made sure to soak my Fava beans and peas for 12 hours prior to planting. Hopefully, that will kick start the germination process.

seed mats to be sowed
My homemade seed mats containing Scarlet Nantes, Cosmic Purple and Carnival blend carrots, several different varieties of beets, and Easter Egg radishes were ready to be sown undercover. The carrots and radishes were spaced 2 inches apart and the beets were spaced 4 inches apart on each mat.

sowing seed mats
I started off by amending and leveling my raised bed.

sowing seed mats 2
I then laid down my mats and covered them with a bit of packaged organic gardening soil.

sowing seed mats 3
Once all of the mats were in place, I covered them completely and tamped down the soil lightly with the back of my garden rake. Simple as that. Quick and easy. Hopefully, they will germinate well and I'll have ultra-neatly planted rows to admire. :-)

If you'd like to construct your own seed mats, read Granny's awesome tutorial here or a post I wrote here.

Monday, March 8, 2010

Weekend Chores

March transplants
For the past few days we've been enjoying truly wonderful weather here in New England. It is indeed a nice change from the torrential rain and cold winds we experienced not too long ago. This past weekend, I was able to get out into the garden to do a bit of cleanup and digging. While the recent rains caused my garden to flood for a few days, it also helped to thaw out the soil. Even the beds that were left uncovered this winter were easy to turn over.

transplanted greens
I went ahead and transplanted some of my cool weather greens (Shanghai bok choy, Mizuna and Tuscan Kale) underneath one of my mini hoop houses. Admittedly, I neglected to harden them off beforehand. Regardless of this, they seem to have adjusted to the protected environment just fine. Our nights are averaging near freezing, but the days are warming up dramatically. With the increasing sunlight, I have to be more diligent about venting my hoops as temperatures inside are now reaching into the low 80's at mid-day. In fact, my spinach is already showing signs of heat stress.

It felt really good to get my hand dirty. The soil blocks were incredibly easy to transplant and I'm happy to say that none of my seedlings were damaged in the process. Hopefully, I can start to harvest some Mizuna and bok choy at the end of this month.

overwintered chives
In other news, the overwintered chives are starting to sprout again...

hardneck garlic
...and my hard-neck garlic is finally showing some signs of life.

The spring growing season has officially begun! I hope you all are as excited as I am!

Harvest Monday - I'm So Sick of Carrots

March carrot harvest
That's it! I promise! This is the last carrot harvest of the winter growing season. I'm as sick as you are to see them on Harvest Monday. Hopefully soon, I will have some nice Spring greens to blog about.

As I'd mentioned earlier, my garden mouse had dined on about half of my remaining Nantes carrots. Still, I was able to harvest 1.92 lbs of trimmed carrots. I was really surprised by how much they sized-up this winter. I wanted to make sure they were all pulled before the weather gets too warm and they start to send out roots again. Waiting until early March was definitely pushing it.

Here's to carrots - the ultimate winter vegetable. If you'd like to see what others are harvesting or show off your own, visit Harvest Mondays at Daphne's Dandelions.

Saturday, March 6, 2010

How to Build a Salad Box or Table

salad box
I first came across the concept of salad boxes and tables while watching the PBS show, Cultivating Life. The idea behind them is pretty start forward - many salad crops have shallow root systems and therefore only require 3 to 4 inches of soil medium in order to grow. Building a salad box or table made out of 2 x 4's enables you to harvest fresh greens right at your doorstep or even on small balcony. As a result, they are ideal for urban areas and for gardeners with limited amounts of growing space. Since they are movable, salad boxes and tables also allow you to extend your growing season. Finally, I think they would look quite attractive in any kitchen garden.

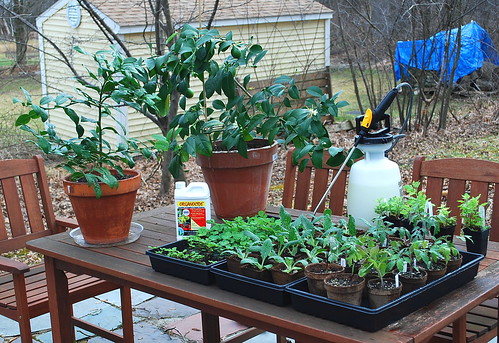
Here are the materials I used to construct a large salad box:

6 - 2 x 4 x 30 inch pieces of pine
16 - 3 inch galvanized screws
1 - 30 x 36 inch piece of aluminum screen
1 - 30 x 36 inch piece of hardware cloth (with 1/2 inch mesh)
2 - galvanized door pull/handle
4 - 1 inch galvanized screws
staple gun and staples

(Note: Since I wanted to build two of these boxes, I purchased three 2" x 4" x 12' lumber and asked the sales attendant to cut them down to twelve 30" lengths.)

building a salad box 1
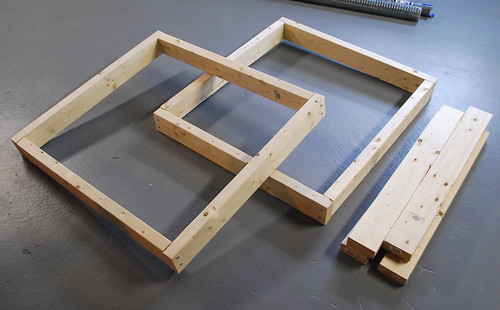
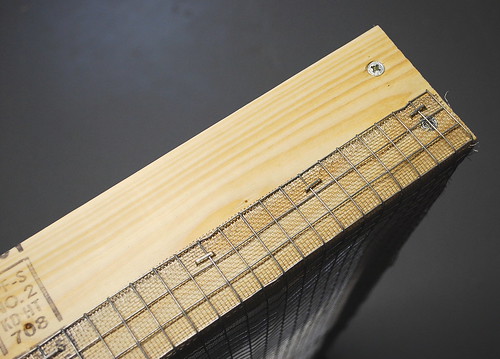
1. Start by constructing the frame. Screw together four of the 2 x 4's (using two 3-inch screws at each corner) to build frame measuring 30 x 34 inches.

building a salad box 2
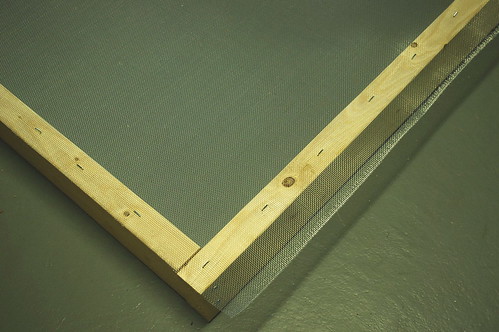
2. Attach the aluminum screen to the frame using a staple gun. The side of the screen measuring 36 inches should be placed on top of the side of the frame measuring 34 inches, leaving about an inch of overhang on each side. Start by stapling the corners and then at the center of each side, lightly stretching the screen taut as you do so. Then place a staple every 4 inches or so along the frame.

building a salad box 3
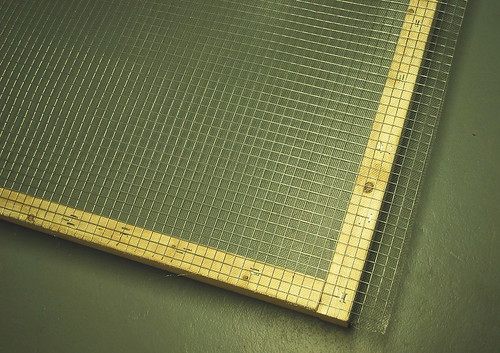
3. Place the hardware cloth on top of the screen and repeat step 2. The hardware cloth adds stretch and rigidity to the bottom of the salad box.

building a salad box 4
4. Fold and staple the excess screen and hardware cloth onto the sides of the frame.

building a salad box 5
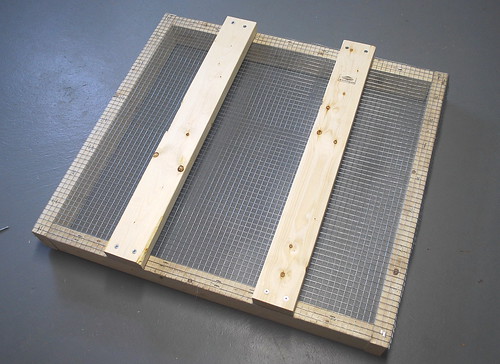
5. Place the two remaining 2 x 4's on top of the hardware cloth (positioning them about 8 inches from each side) and attach them using the remaining 3-inch screws. These will serve as the legs of the salad box and add greater stability to the frame.

building a salad box 6
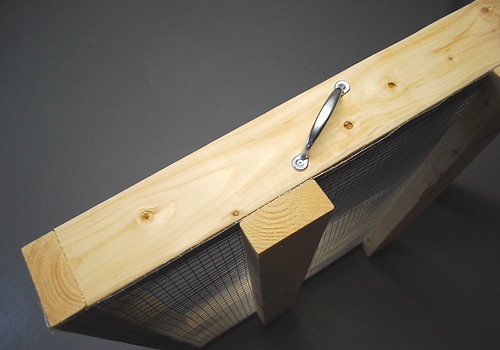
6. Attach the handles to opposite sides of the box. I placed mine about 14 inches from one end and at a slight angle simply because this felt most comfortable for me. Imagine that you are carrying a rather large laundry basket with your arms stretched out and one side of the basket resting against your lower abdomen as you walk. Ideally, you want to attach the handles to where you imagine your hands would grasp the frame in this position.

building a salad box 7
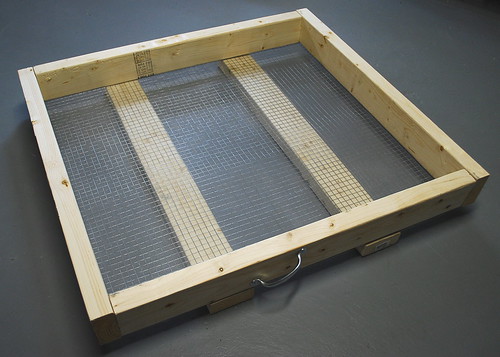
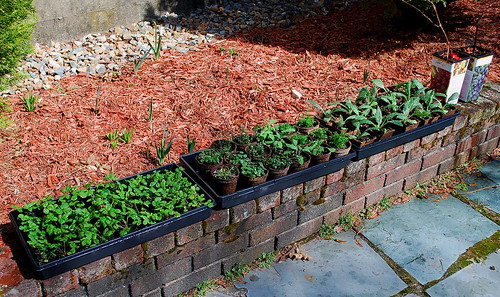
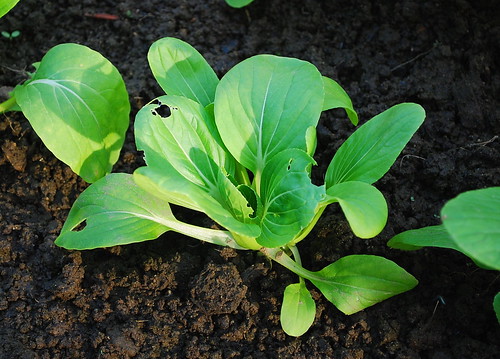
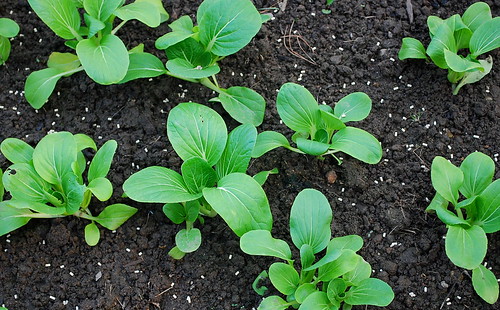
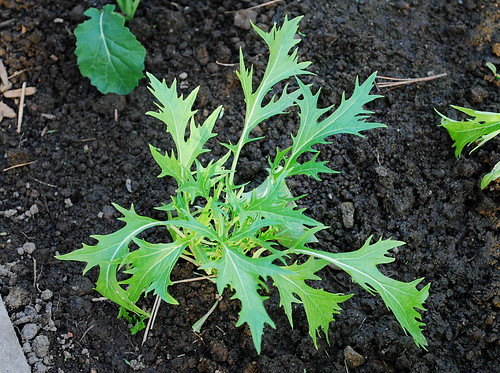
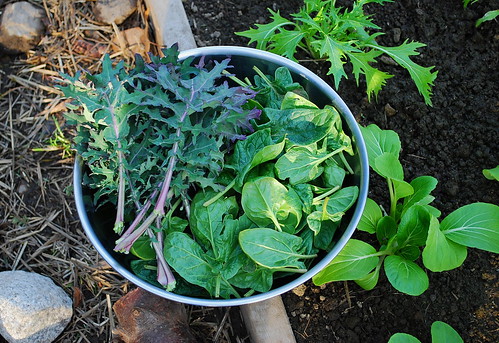
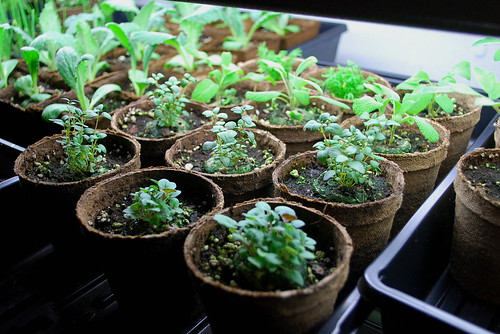
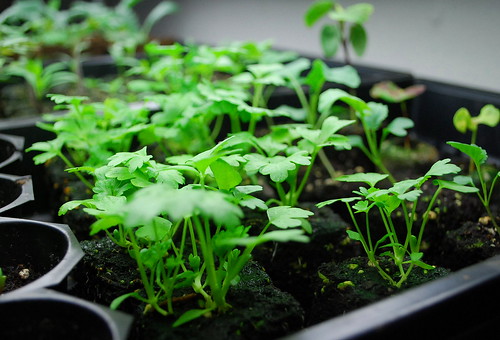
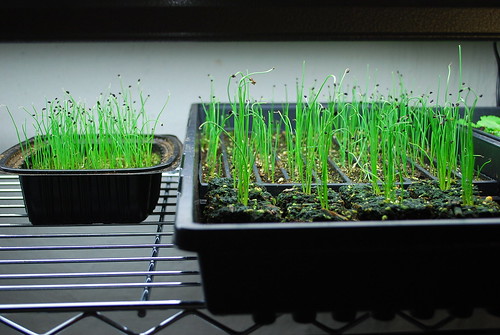
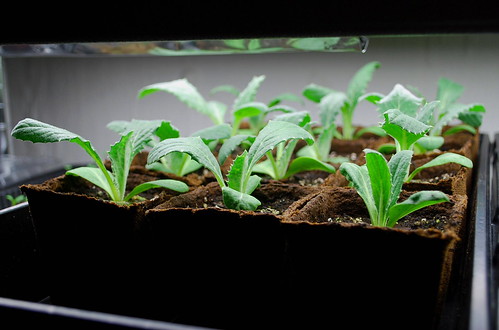
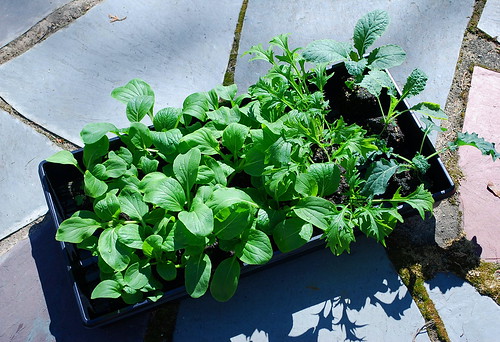
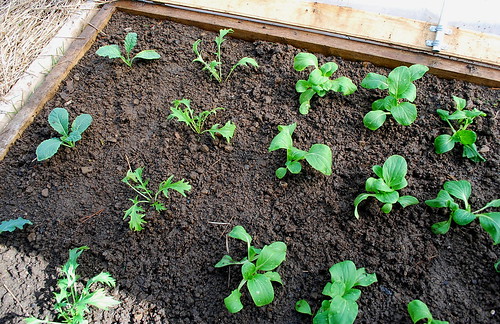
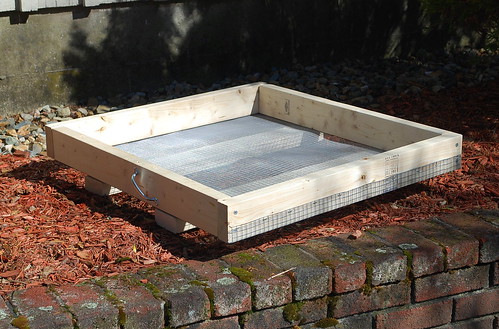
And there you have it. Pretty simple, right? The box offers about 30 x 26 inches of growing space. I can probably manage moving this box (soil and all) by myself but some of you may want to build a box half this size. This year, I intend to grow all of my baby leaf salad greens in these boxes as well as some mini-heads of lettuce and certain varieties of Asian greens (like Bonsai pak choi, tatsoi and mizuna).

If you'd like more information on salad boxes and tables, including other building designs, what soil mix to use and what greens to grow, visit the following links:

Martha Stewart's Website


College of Agriculture & Natural Resources

University of Maryland