Saturday, March 24, 2012

Flowering Mandarinquat Tree

 DSC_0093
A few weeks ago, my mandarinquat tree started flowering like crazy.  I'd never had a citrus tree that did so as much.  The blooms ran all along the stems and filled the room with the most pleasant scent.

DSC_0094
Hopefully this means that I'll get a semi-decent crop this year, and by that I mean a number greater than four, which is what I got last year.

DSC_0020
Speaking of mandarinquat trees - I have two, though I'm a bit concerned about one.  I'd purchased them from an online nursery a couple of years ago and had expected that their growing habit would mirror one another.  In this picture, you can see that my 'good' tree has small narrow leaves and has flowered consistently during the past year.

DSC_0019
My 'bad' tree produces wider larger leaves and has shown no indication that it will ever want to flower.  (They are lighter in color in this picture because they are new leaves.) It's also more vigorous in its growth than my good tree.  I've given my trees the same potting soil, same fertilizer and same growing conditions so I'm at a loss as to why my bad tree is not flowering at all.  All of the growth on my bad tree is happening above the graft line but I'm wondering whether it's still possible for a root stock to assert its characteristics here somehow.  It might be time to consult a professional.

Tuesday, March 13, 2012

Moving and Propagating Cranberry Plants

DSC_0117
Before we moved out of our Massachusetts home earlier this year, I'd attempted to dig up my two cranberry shrubs (vines) to take with us. I'd purchased them when we'd first moved in and they'd grown tremendously over the past two years. Cranberries are definitely worth growing in the home garden in my opinion because even if they don't fruit well, the foliage alone is quite attractive, particularly in late summer when the leaves turn several stunning shades of red and burgundy. To my dismay, despite the fact that the ground was completely frost free due to the unusually warm winter we'd had this year, the soil was nonetheless so compact that I could not dig them up with my trusty garden fork without destroying the fine roots. I could have used a spade but because I was moving them into pots, I didn't want a huge block of soil to contend with. As a result, I was resigned to leaving them behind.

Over the past two months, the ground did in fact freeze solid. Now that it has thawed completely, I was curious to try this again. When I stuck the fork into the ground this time around, I relieved to find that the soil was not nearly as compact as it was before. Why the change? My guess is that when the ground froze, the water expanded, lifting and aerating the soil in the process. In the end, I was able to shake off much of the dirt from the roots and haul these two monsters back to Vermont.

DSC_0130
I have to say, dividing cranberry shrubs is not an easy task. The low lying branches root easily when in contact with the ground so the plant grows like a carpet. You can sever the rooted stems from the mother plant and propagate your cranberries that way. Cranberry shrubs also send out runners, which root readily as well. The downside is that they also weave their way through the branches so what you are dealt with is a tangled mess when you attempt to divide your plants.

It took a lot of time and effort but in the end, I ended up with enough cranberry plants of varying sizes to fill a small patch, which I won't be doing any time soon unfortunately. My only other piece of advice is to handle the mother plant with great care as the older stems are extremely fragile at the base and easily break off. I lost a ton of branches in the process.

I'm glad I won't have to buy new cranberry plants.  It amazes me how expensive young fruit trees and shrubs can be these days.  In this case, another plant saved is another dollar earned.

Sunday, March 11, 2012

Growing Citrus Collection - Bearss Seedless Lime

DSC_0101
A couple of weeks ago, I was walking through the greenhouse house at Lake Street Garden Center in  Salem, New Hampshire when I spotted this little guy.  I wasn't expecting to see citrus plants for sale, especially in New England this time of year, but of course when I saw this Bearss lime, I had to get it.    It'll be another 2 years at least before this rooted cutting starts bearing fruit but having grown citrus trees now for past 4 years, I've learned to be patient when it comes to these things. 

Be warned - once you buy your first citrus tree, chances are you'll want more.  In addition to this Bearss lime, I have 2 Meyer lemon trees, 2 mandarinquats, a Seville orange, and a Kieffer lime.  Later this year, I'd like to get a couple different varieties of mandarin, like Owari Satsuma and Kishu.  Hopefully I'll always have a green room to accommodate my growing collection.  Otherwise, I'll be in BIG trouble.

Saturday, March 10, 2012

Fig Trees Update - Moldy Cuttings

DSC_0105
Last weekend, I was able to source the ingredients to fertilize my fig trees, which consists of  1 part super phosphate, 1 part 5-10-5, 1 part bone meal and 1 part garden lime, and applied it according to Joe Morle's instructions.  I'll also apply a liquid feed of 20-20-20 fertilizer every 20 days.  I'm anxious to see how my trees will fair this year.

DSC_0100
After a week of being indoors, my fig trees began to wake up. 

DSC_0123
Now they look like this.

Propagation Update - I'm not having much luck with the cuttings I took a couple of weeks ago.  I can't seem to keep blue mold from developing on them.  After a week of being in the peat moss, they were covered in it.  I then tried storing them in a moist paper towel and that didn't work either.  Dipping them in a bleach/water solution seems to help but the mold still comes back after a few days.  Now I just the cuttings covered in some barely damp perlite.  I'm at a loss at point.   Any suggestions?

Friday, March 9, 2012

My Gardening Helper

DSC_0075

DSC_0079

DSC_0112
(Are my pajama pants really that red???)

Thursday, March 8, 2012

City Farmers


I love this video! I find it amazing that this film was produced in 1996. While you can argue that the urban agriculture/gardening/greening movement has now become mainstream, gentrified and chic even, this film is a great reminder that the seeds for this movement were originally sown by ordinary people in the community who wanted nothing more than to rid their neighborhoods of junk filled abandoned lots and have a place to grow food.

When you listen to these gardeners tell their stories, it's interesting to hear how many of them love their gardens because it reminds them of simpler times - perhaps of their childhood and their parents or grandparents who also farmed or had gardens. I think that in large part explains why I personally love gardening so much.

Wednesday, March 7, 2012

Growing Ginger in a Pot

DSC_0111
While we're on the subject of rhizomes, I decided to try growing ginger this year, which is also considered the rhizome of the plant 'Zingiber officinale'.  They say it can take up to a year for the plant to produce ginger of a size worth harvesting.  And since we don't live in a subtropical climate, my ginger plant will be grown in a large pot and spend most of its time in the green room.  While I was at the grocery store the other day, I tried to choose pieces that looked the most fresh and plump (avoiding the shriveled ones) and had bumpy bits or eyes that were of a lighter shade of yellow.  Apparently, that's where the plant will send up it's shoots.

DSC_0108
To be honest, I didn't do too much research on the subject of growing ginger. I just broke the large root into three smaller sections, let the severed ends dry up a bit and then planted them in a large pot filled with some good quality growing mix.   I covered them with about an inch or two of the mix, watered them well and placed the pot in a warm location.

I have no idea how long it will take for them to sprout.  At this point, I'm gonna just cross my fingers and hope for the best.  If you have any advice on growing ginger successfully in a pot, please share!

Tuesday, March 6, 2012

Propagating Raspberries - Root Cuttings

DSC_0070
As a gardener, one of the saddest aspects about moving is having to leave behind some of your edible perennials. In my case, it was my raspberries and asparagus that hit me the hardest. A couple of years ago, I'd planted a small patch of raspberries, an everbearing variety that produces large dark red berries, which are VERY sweet and among the best I've ever tasted. What I especially like about this one is that it produces a fall crop on its first-year canes and then a smaller summer one on the same canes before they are pruned away. When we moved, I told myself that I would plant it again once we were settled into another home for the long term (which probably won't be for at least another couple of years).

Then it hit me the other day - instead of buying new canes, why not try to propagate the ones that were already growing in my old garden. Last week, while I was in Massachusetts, I decided to take some root cuttings. It seemed like the perfect time to do so since the canes were still dormant yet the soil was now frost-free (despite the fact that the only time I could do this was at night and in this case, during the early hours of a snow storm when there was already 3 inches of snow on the ground).

DSC_0073
As I surveyed my raspberry patch, what I was looking for was a sucker cane as these would yield the longest roots (or more accurately - rhizomes). I found one such cane located two feet away from the original plants. When I dug it up from the ground, I came away with two rhizomes that each measured a foot long - part of one that had connected it to the mother plant and another that would have gone on to produce other suckers. This was an exciting find for sure. From these, I took eight 3-inch root cuttings.

DSC_0083
This past weekend, Jonathan and I planted up the cuttings in small pots, which we covered with a plastic dome and set in a warm spot in the green room. With a little luck, at least some of them should go on to sprout in about a month. As they get larger, I'll transplant them into larger pots and hopefully find a permanent home for them in a couple of years.

I'm planning on taking a few more cuttings during the next week or two as I'd like to end up with enough starts to fill a large patch.

Saturday, March 3, 2012

Around and About Where We Live

DSC_0011
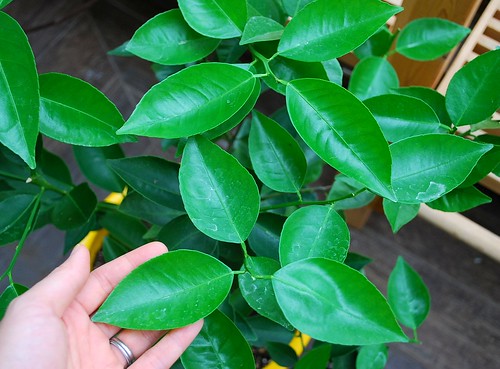
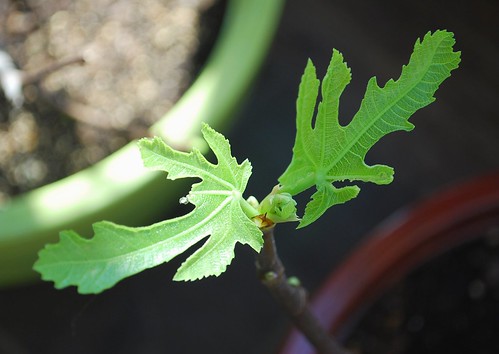
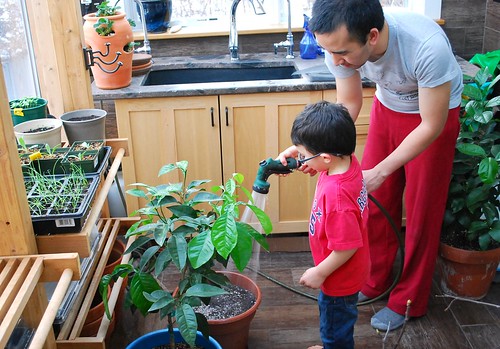
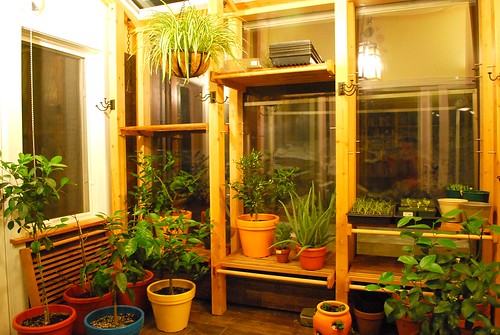
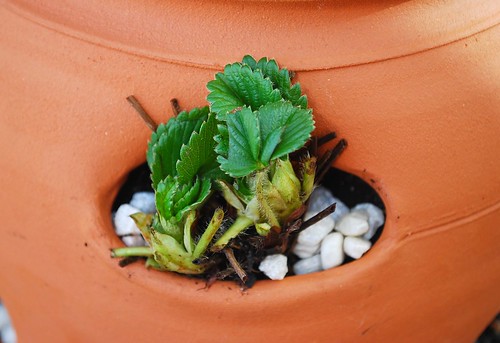
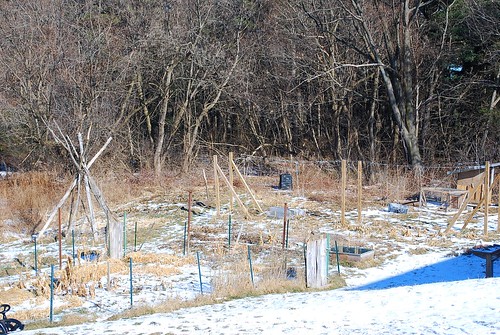
It just hit me that I've neglected to post about our little neck of the woods. Here's a picture of the small community garden that lies within our 4 acre cohousing development. Many families here also have growing beds in front or behind their homes and there are lots of fruit trees and bushes planted throughout the common grounds. My friend and neighbor Dorothy gave me a little tour of her garden today, which includes a rather marvelous looking peach tree that has produced well during the past couple of years. She also gave me a baggy of frozen gooseberries that she grew last summer, which I plan on turning into a dessert for one of our common meals next month.

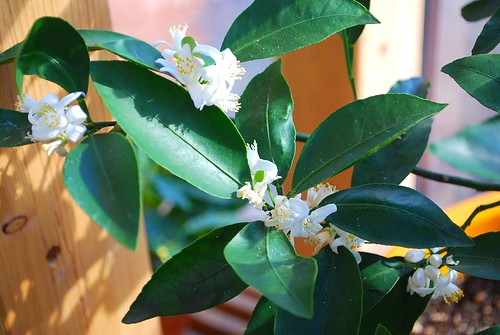
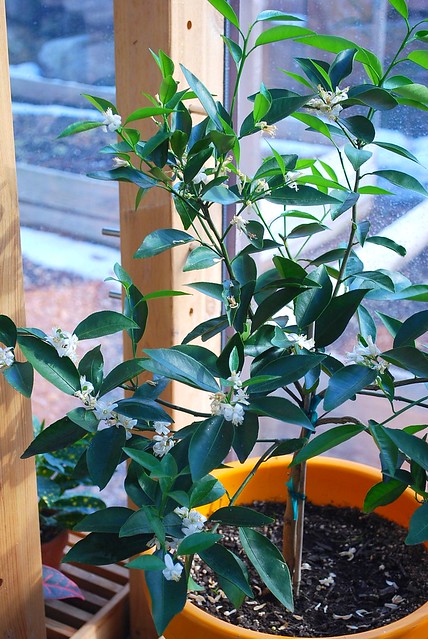
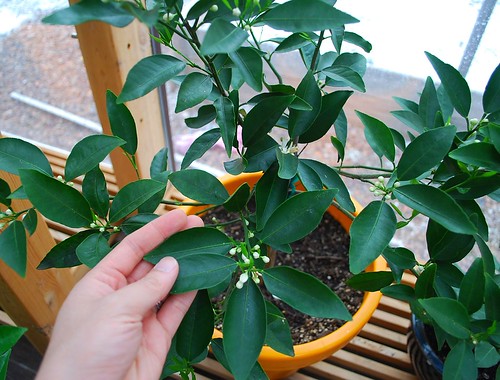
On that front, I cooked my second common meal for about 40 people yesterday night and I'm happy to say that it went really well. 'Common meals' are held on even numbered days except weekends and allows everyone who signs up a chance to break bread and catch up with their neighbors. I made three different stir-fries and there was not a single spoonful of anything left over by the end of dinner. Preparing a meal for that many people can be quite challenging but I had two wonderful helpers and since I love to cook and feed people, it ends up being quite fun for me. For dessert this time around, I made some Meyer lemon marmalade thumbprint cookies from my homegrown stash and everyone got a kick out of eating some locally grown citrus.

DSC_0018
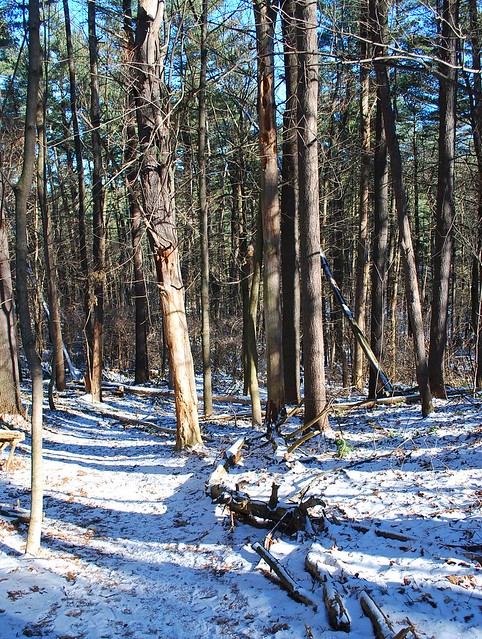
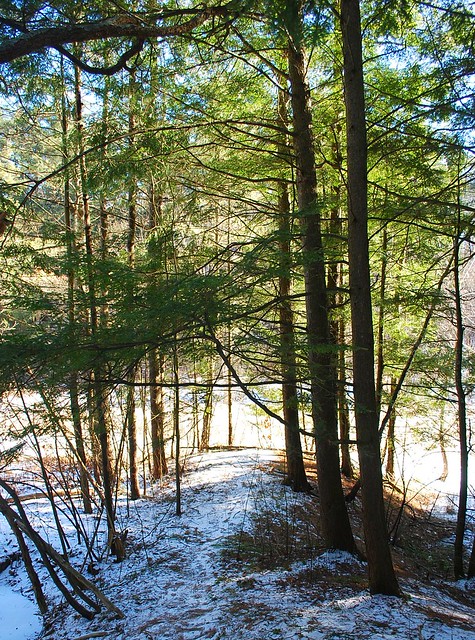
Anyway, directly behind our development is Burlington's Centennial Woods, which is a 68 acre nature preserve. The paths are quite hilly but it makes for great exercise. And it's nice to have a bit of wilderness close to home and within city limits.

DSC_0031
Even at this time of the year, the woods are quite beautiful. I can't wait to see it in summer and fall. (Spring I am told is a rather muddy affair here in Vermont).

DSC_0034
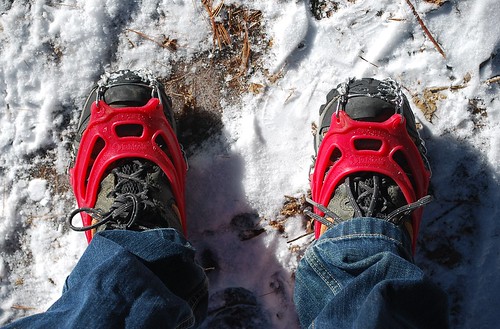
And of course you cannot hope to get around without a pair of these. They might as well call Vermont the 'Icy State' because I don't think I've ever lived in an area that gets as much ice as we do. Within the first two weeks of our arrival, I slipped and fell hard twice. These Micro Spikes make all the difference. I can literally run on a sloping sheet of ice with these on. In any case, I'm hopefully that the season for them will be over soon!

Finally, I had handed in my application for a plot at one of the city's community garden sites in early February. The Parks an Recreation worker told me that the site down the street from us was full but there were spaces available at the Tommy Thompson community garden, which is Burlington's largest site located at the Intervale and about a 5 minute drive from us. I don't know exactly what the rules are but apparently most of the sites are open to the gardeners sometime in April and close in late October. The land is tilled at the start of each growing year, though returning gardeners can ask for a no-till plot, which would allow them to extend their growing season beyond October. Thank goodness we have the raised beds behind our townhouse to plant a true fall garden. Hopefully I'll get my plot assignment soon.

Thursday, March 1, 2012

More Plants Please....

DSC_0072
I'm slowly starting to add more plants to the green room. Eventually, I'd like to have the space overflowing with ornamentals AND edibles!

Forcing Strawberries

DSC_0060
This past weekend, I decided to force the strawberry crowns that I'd dug up from the old garden last fall. I'd recently purchased a strawberry jar and was excited to fill it. Most of the crowns in this jar are 'Sarian' - a day neutral variety that is easily started from seeds and will produce in the first year. I'd started these last spring but the field mice had gotten to most of the strawberries before I could.

DSC_0064
As you can see, the crowns are already starting to wake up and produce their first leaves of the year. I'll keep them inside the green room until about mid-may. Hopefully they'll like their new home. Whenever I see these jars for sale, whether in a catalog or on a website, the picture accompanying the offer always shows seemingly dozens of strawberries spilling out of each hole. I wonder if such results are really possible. I guess we'll just have to fertilize regularly and see.

I'm currently in Massachusetts for work. Last night, I dug up eight of my 'Seascape' strawberry crowns, which I'll force in a second jar. Seascape is another day neutral variety that produces excellent tasting berries. While the ground is still frozen solid in Vermont, the soil in the old garden is completely frost free. I was pleasantly surprised by how easy it was to dig them up.