Showing posts with label Co-op work. Show all posts

Sunday, December 20, 2009

Construct Your Own Seed Mats

"Construct Your Own Seed Mats," as posted on Simple, Green, Frugal Co-op on December 21, 2009.

Posted by Thomas from A Growing Tradition Blog
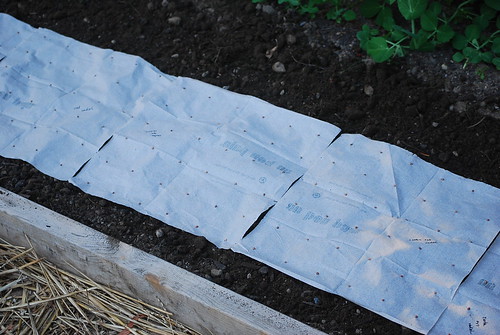
seed mats
Homemade Seed Mats (Radishes)

Have you ever come across an idea that sounded a bit silly or even crazy at first, but then the more you thought about it, the more you realized how absolutely brilliant it is? In this case, it took me about 5 seconds to see the light of day. And I have to thank none other than Gran from Annie's Kitchen Garden for enlightening me.

This my friends is a homemade seed mat, which allows you to sow many of your crops accurately and efficiently. For me at least, the benefits of these mats seem endless. Here are just a few I can think of as I'm writing this:
  • The obvious - thinning, or lack there of. Since you've perfectly spaced the seeds on the mat, you spend less time thinning your seedlings. Carrot growers rejoice!
  • Eliminating waste - Since you have less to thin, you also get to keep more of what you sow. Seeds are becoming increasingly expensive these days and more gardeners are choosing to save seed. These mats allow you to maximize your seed usage.
  • Aesthetics - The perfect spacing achieved by these mats gives your garden an ultra-neat look.
  • Maximizing space - Seed mats allow you to maximize your available square footage by evenly spacing your plants according to their specific requirements. This is particularly important if you only have a limited amount of growing space in your garden, hoop house or cold frames.
  • Regulating growth - Because your plants are evenly spaced, their overall growth becomes more regulated.
  • Time and flexibility - You're sowing entire mats, which is a fraction of the time it takes to sow individual seeds. (Your back will thank you.) Also, it took me about 15 minutes to construct 3 mats while comfortably sitting at a table. This is the type of gardening I don't mind doing at 11 pm.
  • Comfort - they are particularly useful for small seeds and crops that do not require large amounts of space in which to grow. From my own experience, I've found certain seeds to be particularly tedious to handle and sow into neat rows (wild arugula seed, for example, is the size of a grain of sugar).
  • Finally, cost - It costs next to nothing to make these mats and chances are, you already have the materials in your home. A six-row seeder costs $549.00.
Are you convinced yet? Or curious at least? Then give these homemade seed mats a try. All you need are some thin single-ply paper napkins or toilet tissue (anything that disintegrates easily when wet), some water soluble glue (like your child's Elmer's glue), a ruler and toothpick. Personally, I use fast food restaurant napkins for my mats, which degrade very quickly in the garden. The directions are pretty straight forward:

1. Unfold your napkin. On your napkin, using a ruler and pen, make a series of evenly spaced points. The space between these points will be dictated by the type of crop you are sowing. To give you an idea, most baby salad crops can be spaced 2 square inches apart (2 in by 1 in). Carrots and radishes can by spaced 4 square inches apart (2 in by 2 in). Spinach, many Asian greens, turnips, beets, claytonia and smaller-head varieties of lettuce can be spaced 16 square inches apart (4 in by 4 in). In fact, these seed mats are best for any crop that you can direct sow and space 6 inches apart or less.

2. Going row by row, dab the slightest bit of glue onto each point. (I've also used a thick paste made from flour and water, which worked well too. Use a toothpick to dab a bit onto each point.)

3. Place a seed at each point and press lightly with your finger. (For baby salad crops, I adhere 2 to 3 seeds at each point for better germination rates. For small or more delicate seeds such as carrots and many salad crops, touch the tip of a toothpick to your tongue or a wet sponge and use it to pick up and transfer the seed.)

4. Let the mats dry completely. Do not store stacked until they are completely dry.
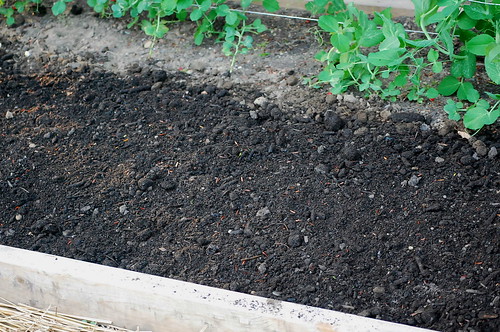
radish seed mats3
Newly Sown Mats

5. In the garden, amend your bed and level the soil surface with a garden rake. Lay the mats on top and sprinkle a bit of compost or garden soil onto each mat to keep them in place. (You can make a 50/50 mixture of compost and organic garden soil.) Once all of the mats are laid down, fill with enough soil to achieve the appropriate sowing depth. Water thoroughly.

6. Two or three days after the first seeds have sprouted, fill in any germination gaps with fresh seed.
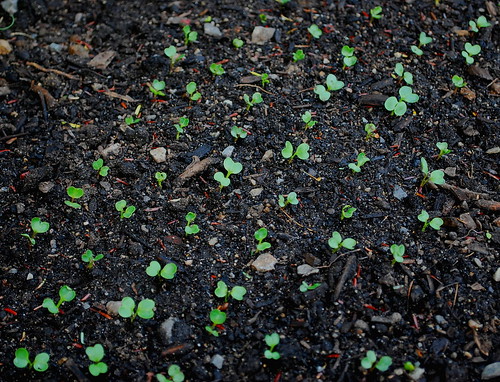
radish seeds mats
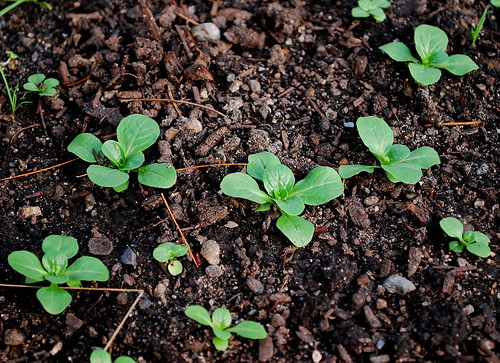
I achieved about a 90% germination rate with my radish seed mats.

And that's about it. Hopefully, some of you who are as anal as I am about neat and evenly planted rows will give this a try. For Gran's instructions on how to construct these seed mats, click here.

winter radishes
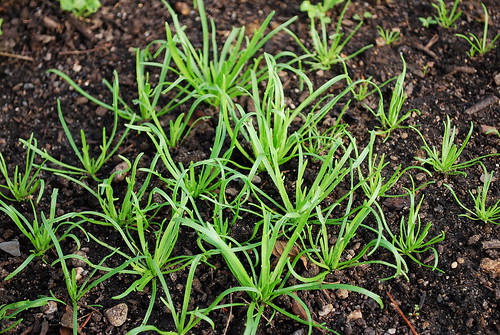
Same radish bed a few weeks later.

Thursday, December 3, 2009

Growing a Winter Garden

"Growing a Winter Garden," as posted on Simple, Green, Frugal Co-op on December 7, 2009.

Posted by Thomas, from A Growing Tradition Blog.

carrot harvest 3
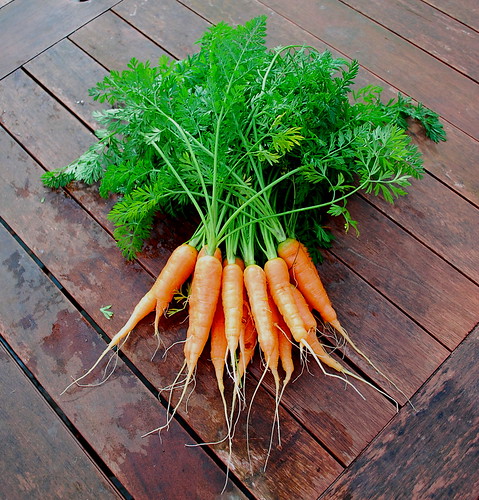
A Harvest of winter carrots.

Eat local, organic, in-season foods
- that's a mantra that may be difficult to follow year round, especially if you live in an area located within climate zones 1 through 7. Where I live, in zone 6 northern Massachusetts, our winters often prove long and frigid. Those wishing to buy organic locally grown produce in November will find that most of our farmers markets have closed for the season at the end of October. And the few farmers here who do choose to grow vegetables during the winter months may not always practice sustainable methods, since adding supplemental lighting and heat (which consumes significant amounts of fossil fuels) to a commercial greenhouse operation may be perceived as the only viable means to ensure a timely harvest. The alternative would be to buy organic produce at a supermarket. But in the dead of winter, this would not be considered local, in-season or sustainable.

winter garden 2
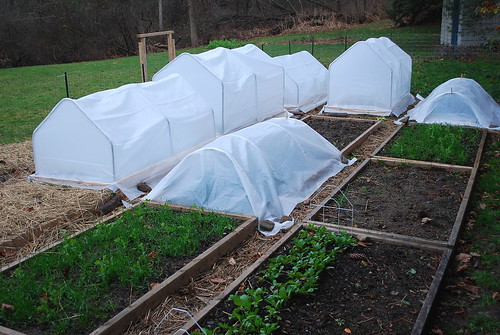
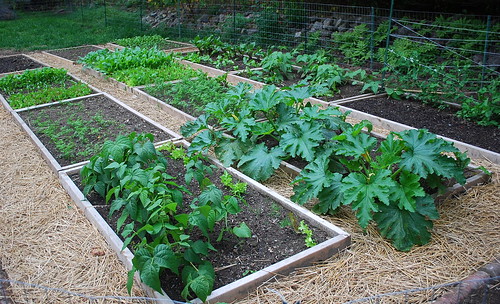
My winter garden this year.

This reality begs the question - as someone who wishes to follow this "eat local, organic, in-season" mantra year round, am I limited for 6 months out of the year to what's stored in a root cellar, processed in a jar or bagged in a freezer? Or is it possible to add some fresh variety to my local diet during the lean months by starting a low-tech, low-energy consuming, organic winter garden, while at the same time lessening my family's dependence on produce that is shipped in from California and foreign countries? (Packaged organic salad mix, for instance, is one of the most energy-inefficient and costly veggies that one can buy at the supermarket.)

I will admit that I have a fascination with growing and harvesting food during the winter months beyond just the need to eat local, organic and in-season food all year round. For starters, I appreciate the fact that this practice has had a long and rich history, particularly in Europe, and the stubborn Luddite inside of me wishes to preserve this tradition. Ultimately though, for the die hard locavore (which I am not), it does not get any more "local" or "in-season" than growing your own winter crops. Nor do you have to rely on a governmental agency to tell you whether the carrot that you are consuming is organic. And finally, using low-tech winter gardening techniques ensures that your practices are sustainable.

winter bed inner layer
Depending on where you live, your winter veggies may require an extra layer of protection during the coldest months. An inner layer of fabric row cover can help to increase the nighttime temperatures inside of your hoop houses by a few critical degrees.

I am a huge fan of farmer and guru Eliot Coleman, best known for his writings on winter gardening. His Four Season Farm in zone 5 Harborside, Maine specializes in growing food year round using only low-tech, non-heating (and in some cases, minimal-heating) elements. Coleman's technique relies upon, among other things, choosing the right varieties of winter crops, succession planting on specific fall dates, and a couple added layers of protection during the harsh winter months. The goal here is not to create an high-tech artificial environment in which to grow anything and everything, but to use low-tech and sustainable methods to give traditional winter crops the added protection they need to survive all winter long in zones 5, 6 and 7 and to extend the season by at least a couple more months in zone 4.

Snow
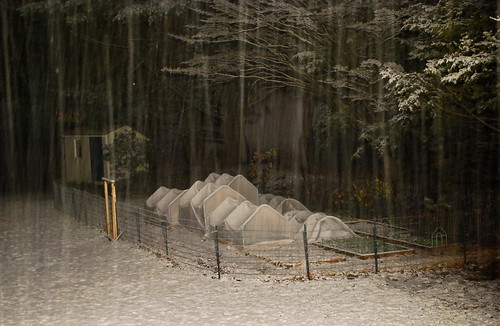
Hoop houses must be strong enough to withstand the heavy snow storms and winds of winter.

So grow a winter garden if you'd like to add some fresh variety to your local, organic and in-season diet during the cold months. Here are some tips on how to get started:

1. Read about Eliot Coleman's Winter gardening techniques. Coleman offers a great deal of information on which winter crops to grow, when to sow them and how to protect them from the elements. His book, "Four Season Harvest: Organic Vegetables for Your Home Garden All Year Long" is a great place to start.

2. You will need to offer your winter crops some form of protection from the elements. There are many hoop house designs available via the internet that practically anyone can build. Personally, I utilize mini hoop houses. You can read about how I built my mini hoop houses at here or go to http://www.agrowingtradition.com/2009/10/building-mini-hoop-houses.html.

3. Familiarize yourself with the hardiest of winter crops. Here are a few (some varieties are hardier than others): leeks, carrots, green onions, lettuces, bull's blood beet, a wide variety of Asian greens, spinach, radishes, chard, kale and wild greens like wild arugula, mache, claytonia and minutina. You will be surprised by the amount of fresh greens you can produce during the winter months.

4. Finally, just because none of your neighbors grow a winter garden doesn't mean it can't be done! Believe that it can be done and seek advice from local gardeners and bloggers who do! Practice makes perfect and soon, and eventually, your lean winter months will seem shorter and shorter.

A picture is worth a thousand words so here are photos of some of my zone 6 winter veggies:

tango and red romaine lettuce
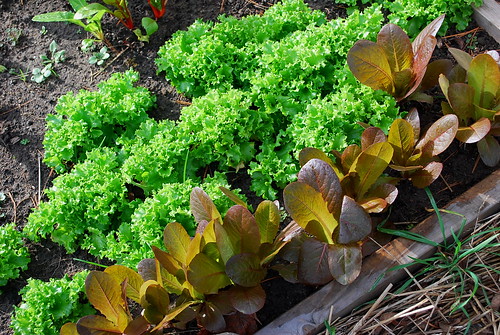
Rows of winter lettuce.

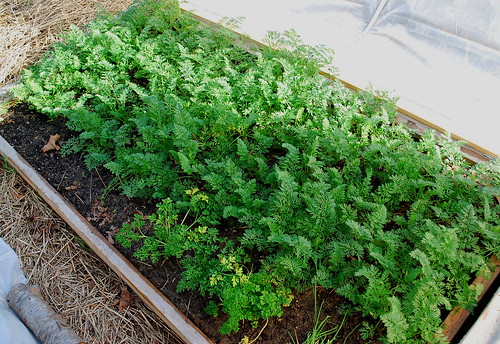
winter carrots - napoli
A bed of winter carrots

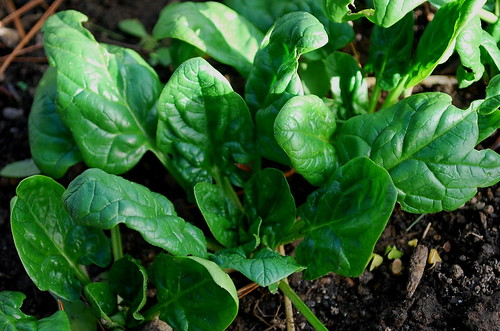
winter spinach
There are several varieties of spinach that are very cold hardy.

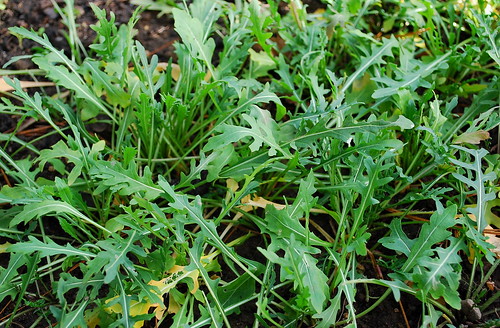
wild arugula
Wild arugula is one wild green that thrives during the winter months.

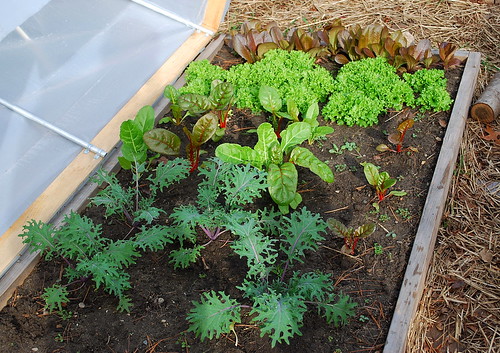
winter greens
A bed of kale, chard and lettuce.

minutina
Minutina adds an interesting look and texture to a winter salad.

mache 2
A late fall sowing of mache.

radish harvest
A harvest of winter radishes.

Sunday, November 22, 2009

Three Pies for the Holidays

"Three pies for the Holidays" - as posted on Simple, Green, Frugal Co-op on November 23, 2009.

Posted by Thomas, from A Growing Tradition Blog

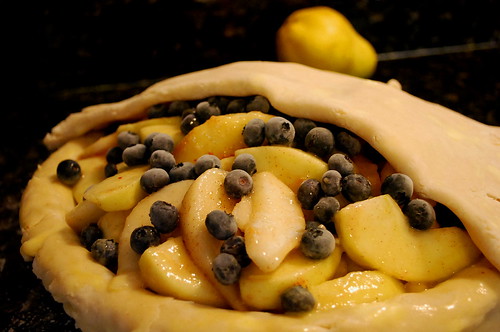
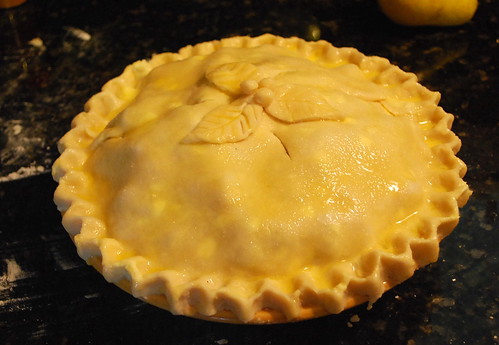
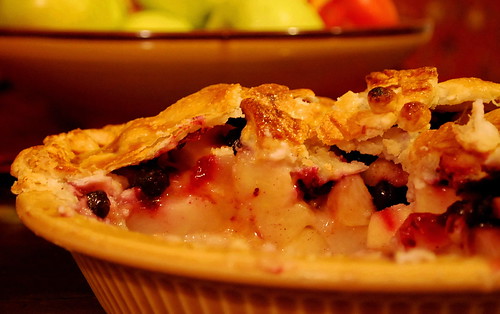
Pie 3
The Egyptians may have invented pie in 2000 B.C., but it wasn't until a couple hundred years ago that Americans began transforming this culinary wonder into an art form (no offense to my British friends). A lot has changed since the first pilgrims landed in the new world, but our passion for pie has remained constant, which is why to this day no American Thanksgiving feast would be complete without one (or 10). And with the holidays fast approaching, I thought I'd share three traditional fruit pie recipes that I like to make this time of year.

Pie Dough
It's true what they say, a good pie recipe starts with a great crust. Here is one that has never let me down:

Perfect Pie Crust Recipe

2 1/2 cups of all-purpose flour
1 1/2 teaspoons of kosher salt
2/3 stick of unsalted butter (chilled and cut into 1/2 inch cubes)
3/4 cup of vegetable shortening (chilled and cut into 1/2 inch cubes)
1/2 cup of ice water

In a large shallow bowl, mix the flour and salt together. Using a pastry cutter/fork, incorporate the butter and shortening until the mixture resembles a coarse meal (you should still have rather large bits of butter and shortening when you're done). Slowly drizzle in the ice water and mix with a wooden spoon. Transfer the dough onto a floured work surface, and fold it together using your hands. The dough should come together easily but should not feel overly sticky. Cut the dough in half and shape into balls. Wrap each in cellophane and refrigerate for at least an hour.

Traditional Apple Pie Filling Recipe- (No American Thanksgiving holiday would be complete without at least one apple pie. I have tested and tweaked many apple pie filling recipes over the years and this happens to be my personal favorite.)

7 large firm apples pealed, pitted and sliced (for a more interesting pie, I use 4 Granny Smith and 3 Fugi apples)
2/3 to 3/4 cup sugar (depending on sweetness of apples)
2 1/2 tablespoons all-purpose flour
1 tablespoon lemon juice
1/2 teaspoon cinnamon
1/4 teaspoon salt

Pie 1
Pie 2
Autumn Fruit Pie Filling Recipe (The best version of this pie is the local one. I tend to make this pie in late-August to mid-September when all of these fruits are available at our farmers markets here in New England. However, I will freeze some local peaches and wild Maine blueberries in order to make this pie for Thanksgiving and Christmas.)

2 large peaches pealed, pitted and sliced
2 large pears pealed, cored and sliced
3 large apples pealed, cored and sliced
1 cup of blueberries or raspberries (fresh or frozen)
2/3 to 3/4 cup of sugar (depending on sweetness of fruit)
1 tablespoon of lemon juice
3 tablespoons of corn starch
1/2 teaspoon of cinnamon
1/4 teaspoon of salt
grated zest of 1 small orange

Wild Blueberry Pie Filling Recipe (Fresh wild blueberries are available here in New England during the month of August. I tend to freeze a good amount of blueberries during this time for use throughout the holiday season.)

5 cups wild blueberries (fresh or thawed-frozen)
3/4 cup sugar
4 tablespoons cornstarch
1 tablespoon lemon juice
1 teaspoon of grated lemon zest
1/4 teaspoon of salt

Pie 4
Directions for all three filling recipes:

Preheat the oven to 425 degrees F. Mix all ingredients together with your hands until the sugar and cornstarch (or flour) are thoroughly distributed. Remove the dough one at a time from the refrigerator and roll each into a circle about 1/8 inch thick. Lay the first crust into a 9-inch deep-dish pie pan and fill with the fruit mixture. Dot the top with 2 tablespoons of unsalted butter. Beat together 1 egg and 1 tablespoon of milk and brush the edges of the crust with some of this mixture. Place the second crust on top and lightly press along the edge of the pie pan to seal the two layers. Cut the edges of the crusts to within 1/2 to 1 inch of the pie pan and then fold the edge of the top crust over and under the edge of the bottom crust, pressing lightly as you do so. Cut 3 slits onto the top crust (to vent steam), brush with more egg mixture and sprinkle some sugar on top. Bake at 425 degrees F for the first 30 minutes, then lower to 350 for another 25-40 minutes until a skewer inserted into the pie pierces fruit that is cooked yet still slightly firm (except for the blueberry pie). Cool for at least 4 hours before serving.

Sunday, November 8, 2009

Grow Your Own Citrus - Meyer Lemons

"Grow Your Own Citrus - Meyer Lemons" - as posted on Simple Green Frugal Co-op, November 9, 2009.

Posted by Thomas, from A Growing Tradition

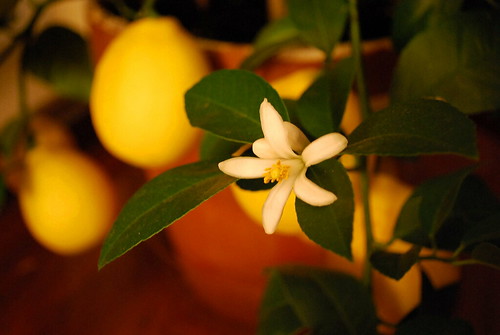
meyer lemon blossom
Since Meyer lemon trees can bloom throughout the year, it is possible to have fruits ripening alongside clusters of new blossoms.

I've always had a fascination with citrus trees. Maybe it's because one of my earliest childhood memories revolve around wandering the streets of Chinatown during Chinese New Year and seeing miniature mandarin orange trees for sale. They were like the Christmas trees of the Orient - deep evergreen foliage with small fruit that resembled orange-colored ornaments. Years later, while visiting my sister in southern California, I was struck by all of the citrus trees lining the front lawns and backyards of many of the homes we drove by on our way to Little Saigon, one of the largest Vietnamese-American enclaves in the United States. In addition to oranges, we saw trees filled with grapefruits, kumquats, mandarins, lemons and mandarinquats. I was instantly smitten. It was early March and I decided right then that I would grow a citrus tree, regardless of the fact that our winters here in New England often feel Siberian.

lemon tree
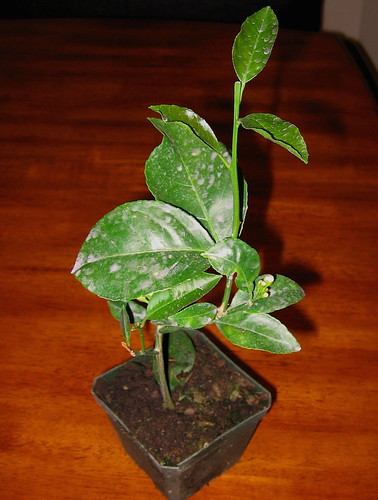
My Charlie Brown lemon tree

When I got home, I did a bit of research and quickly placed an order for a Meyer lemon tree. The online catalog assured me that the Meyer lemon would make for an excellent houseplant and I will admit, I could not stop looking at the airbrushed photo of the tree - a perfectly shaped and compact specimen filled with bright golden-yellow orbs. What I received in the mail was a little less perfect. In fact, it was hard to imagine at the time that anything edible would develop from this twig. Nonetheless, I read as much as I could about citrus cultivation and gave my Charlie Brown lemon tree the care and devotion it deserved.

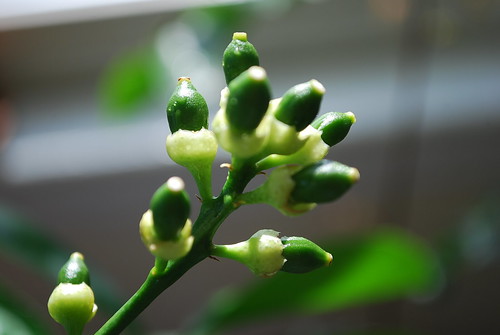
Meyer Lemon Blossom
The blossoms can be hand-pollinated using a fine and delicate brush. Some flowers contain a pistil while others do not. The scent of citrus blossoms, which can fill a room, is reminiscent of jasmine.

Meyer lemon trees (as with most citrus) undergo several flushes of growth throughout the year. Sometimes this growth is primarily leaf, while other times it is accompanied by large clusters of blossoms. Since the tree often blooms in January, it is critical to hand pollinate. (In fact, my tree had its first major flush of blossoms in the dead of winter.) I use a small fine art brush to transfer pollen from one flower to the tip of the pistil of another. If all goes well, the ovary at the base of the pistil will swell into a tiny green lemon a few days after the petals have fallen off. Now all that's left to do is to wait patiently. It can take as long as 9 to 10 months for the lemons to mature.

Young Meyer Lemon Fruits
Flowers containing a pistil, if properly pollinated, will develop into tiny lemons. It is normal for a tree to shed most lemons within a cluster in order to focus its energy on the largest few.

For anyone interested in growing citrus, the key to success is in the fertilizer and soil. I made sure to plant my lemon tree in a well-draining potting soil mix and feed it three times a year with a slow-release organic citrus fertilizer (the brand I use is Growmore). A daily misting does wonders as well, especially during the winter months indoors. I keep my Meyer lemon tree in front of a window that gets about 5 hours of direct sunlight a day. Sometime during late spring, when nighttime temperatures get above 45 degrees F, I leave my tree in a sunny spot outside for most of the summer.

lemon tree
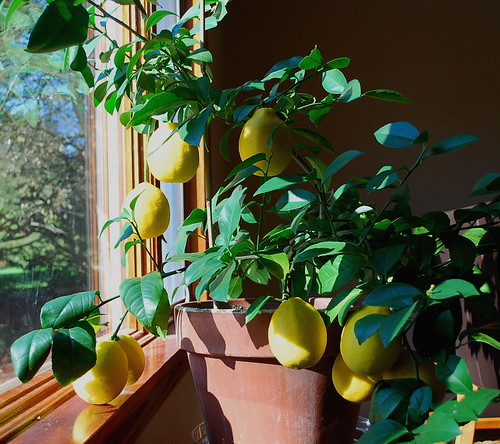
Charlie, 19 months later. Meyer Lemons are ripe when their skins develop a golden-yellow hue. These lemons are not quite there yet.
Fast forward 19 months later, Charlie has developed into a rather attractive houseplant and is rewarding me with my first harvest of lemons - 9 total. The fruits are from flowers that bloomed last January and are destined to become marmalade. (Locavores rejoice!) Most of our house guests stare at the tree in wonder and fondle the lemons to make sure they are real. In addition to my Meyer lemon, I also have a Kaffir lime tree, the leaves of which are very fragrant and commonly used in Thai and Indian cooking. Soon, I'd like to add Seville oranges and mandarinquats to my collection.

For more information on how to grow citrus as houseplants, click here. If you have any experience or additional advice on how to grow citrus successfully, please share!

Monday, October 26, 2009

Five Fall Crops Worth Mentioning

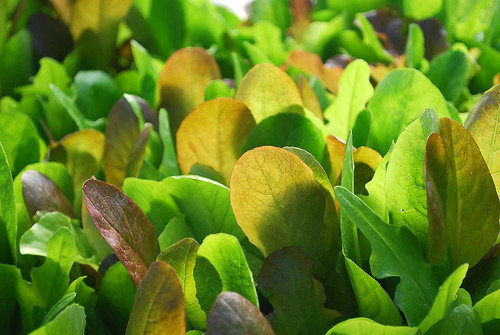
lettuce mix 2
Hello everyone, I just uploaded my third piece for Simple, Green, Frugal Co-op. My post this week highlights five fall vegetables that I grew this year - most of which will sound very familiar to those of you who regularly read this blog. If you have the time or the inclination, you can read about it here.

As always, thanks for the support. I can't tell you how much I've learned from all of you!

"Five Fall Crops Worth Mentioning"- as posted on Simple, Green, Frugal Co-op on September 27, 2009

Posted by Thomas, from A Growing Tradition

When our family moved to our new home in late July, I was a bit disappointed that we had missed out on being able to grow many of the traditional summer crops that seem to dominate seed catalogs these days. While other gardeners were tending to their tomato, cucumber and melon plants, I was breaking ground, raising fence and sowing my fall garden. Looking back, I was glad for the experience. Here in New England, many of us are so focused on getting our summer crops to mature in September (and rightly so) that we often overlook the extended bounty that a traditional fall garden can produce. I experimented with many different types of fall crops this year. And while I've had my fair share of failures along the way, I've learned that all of the planning and effort that goes into growing a proper fall garden is well worth it.

There are many things I look for in a good fall vegetable - quick maturity dates and cold hardiness to name a couple. Instead of listing them all, I thought I'd highlight five crops that I believe exemplify many of these characteristics. In no particular order:

1. The Obvious - Cut and Come Again Lettuce

lettuce mix
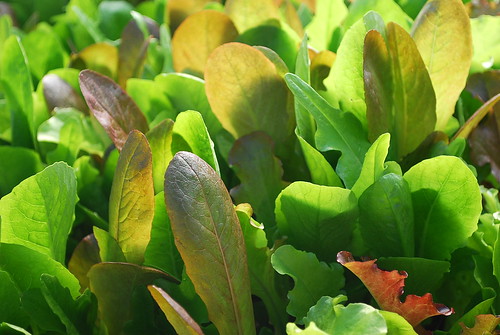
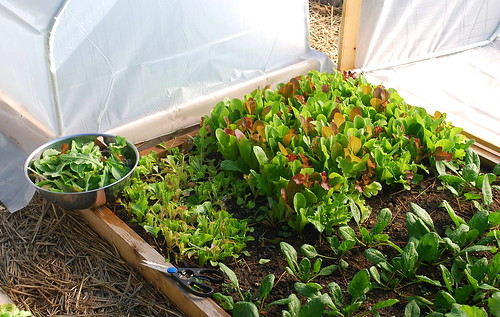
30 Days to harvest - Fall lettuce/salad mix is the ideal gift that keeps on giving. I can appreciate a crop that will allow me to harvest from it over and over again until a mighty November frost intervenes (longer if you give it some protection). Cooler weather offers two added benefits - 1) you don't have to worry about your lettuce bolting unexpectedly and 2) certain greens (such as arugula) that would normally be too sharp for my taste during the summer months develop a milder flavor. Finally, I consider a fall harvest of salad greens to be the perfect break between the succulent vine-ripened crops of summer and the hardier root vegetables of winter.
harvesting lettuce mix

2. The Esteemed - Hakurei Turnips

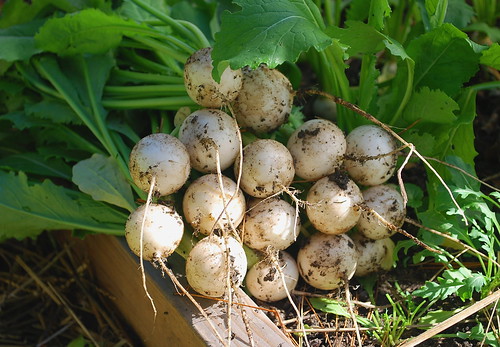
hakurei turnips harvest
40 days to harvest - I cannot speak highly enough about this vegetable. Those of you who dislike conventional turnips might appreciate this mild and crisp variety from Japan. Prized by top chefs around the world, Hakurei turnips can be enjoyed raw in a salad or lightly cooked. When steamed and tossed with a bit of butter, these turnips taste like the best cauliflower I have ever had (but much easier and faster to grow). Hakurei turnips are best harvested golf ball-sized and produce tasty greens as well. Sow seeds every couple of weeks from mid-August to mid-September to ensure a steady crop throughout most of the fall.

turnips and carrots 2

3. The Humble - Radishes

easter egg radishes
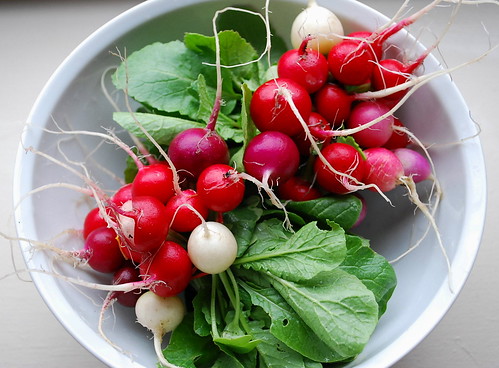
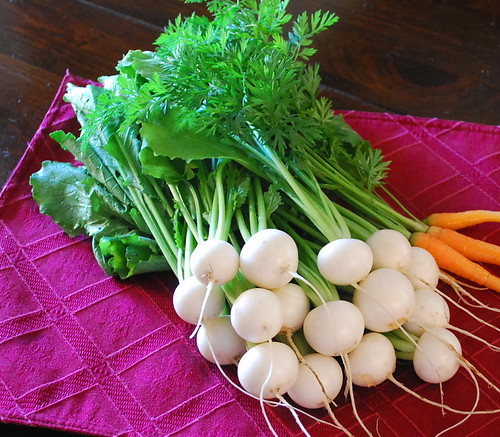
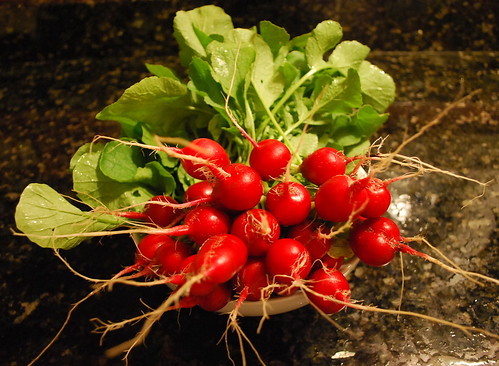
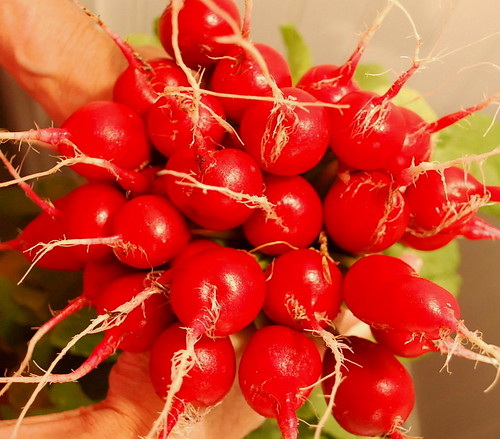
30 days to harvest - I will admit that radishes are not high on my list of favorite things to eat. However, what they lack in taste, they more than make up for in color, which can range anywhere from brilliant to radiant. This humble vegetable grows easily in cool weather and small-type varieties are very quick to mature. Harvest small-type radishes young as they tend to get hot and pithy the larger they get. I enjoy them raw in a salad or pickled.

radish bouquet 2

4. The Tender and Sweet - Chinese Broccoli

flowering brasscia
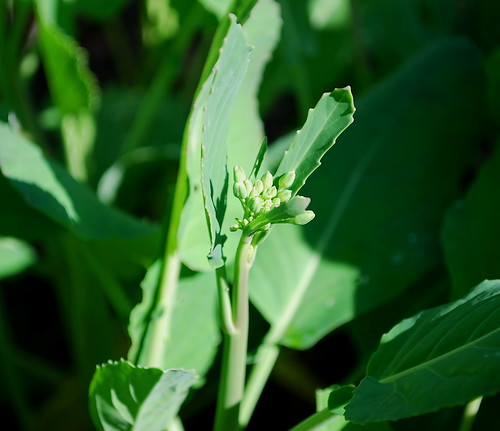
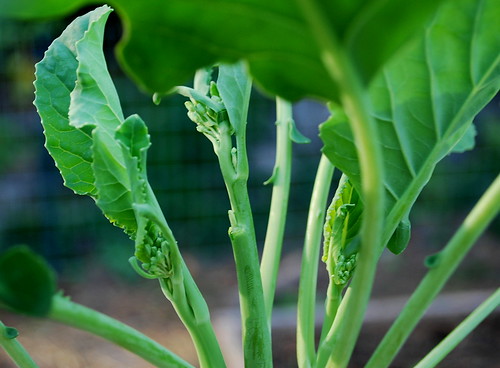
45-50 days to harvest - Most Asian greens thrive in cooler weather, and out of these, many are exceptionally cold hardy. The disadvantage of growing Asian greens is that most are susceptible to the same pests that plague other brassicas. Therefore, protection in the form of row covers is generally needed. The advantage is that they usually have relatively short maturity dates. One variety that performed very well for me this year was a flowering-type brassica known as Green Lance, more commonly referred to as Chinese broccoli. The stalk, leaves and flower buds of this plant are all edible. In particular, the stalk (like asparagus) is very tender and sweet. I will continue to grow this vegetable in place of fall broccoli as it is faster to mature, more productive, and in my experience, much less vulnerable to pests.

flowering brassica 2

5. The Nutritional Powerhouse - Spinach

Fall Spinach 3
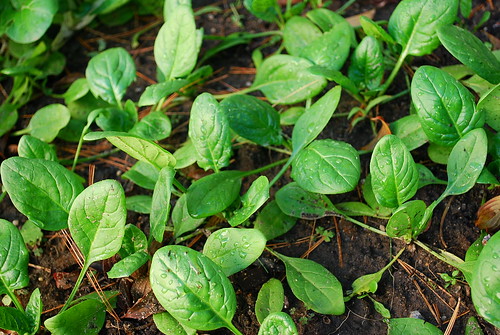
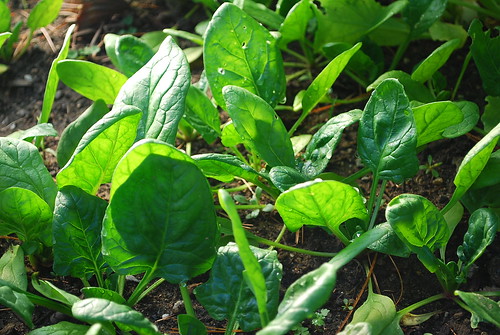
40 days to harvest - There are several varieties of spinach that are exceptionally winter hardy. While other fall greens slowly succumb to frost, spinach will remain surprisingly resilient with a bit of added protection in the form of a cold frame or row covers. The variety that I am growing currently is called "Space". Spinach, like lettuce and most Asian greens, can be harvested during most stages of development, making them a particularly reliable fall crop regardless of how quickly the weather turns cold. And if that is not enough to make you want to grow spinach, its nutritional value should.

Fall Spinach 2
I hope you consider growing some of these vegetables in your fall garden. One final peace of advice - please bear in mind that precise sowing dates are much more crucial when planning a fall garden (sow too late and you will end up eating mostly baby greens). You can mitigate this somewhat by utilizing row covers. To be on the safe side, add a couple of weeks to the maturity date listed on the seed packet to help ensure a harvest. If you have any fall crops you particularly love that I have not mentioned here, or have any fall gardening tips that you would like others to know, please share!

Wednesday, September 30, 2009

On Family and Tradition

scan2
Hi Everyone - For those of you who may not be aware, I'm now a contributing writer for Simple, Green, Frugal Co-op. If you have a chance, please take a moment to check out my first ever post for them (and leave a comment!). As always, I appreciate your support! Thanks!

"A Return to Tradition" - Simple, Green, Frugal Co-op (September 30, 2009)

(As posted on September 30, 2009)
I used to wonder what it was that had led me to become the gardener and, for lack of a better word, "foodie" that I am today. Why do I sniff and fondle all of my produce, wince at the newest processed food to hit the market, and notice that the supermarket shelves seem to contain more packaging then food these days? Why do I spend hours cultivating the soil in my yard, battle against insects and neighborhood wildlife, and dream of ways to extend my growing season? And why do I feel nothing but perfect contentment every time I visit a local farm, comb through the booths at my local farmer's market, and spend all day cooking up a traditional feast for my friends and family?

fall garden 3
This year's fall garden

As I flipped through the yellowing pages of an old family photo album a few months ago, it struck me that I've become the consumer, gardener, cook (and to a certain extent, husband and parent) that I am now not because of what I've read in the Op-Ed section of the New York Times or seen depicted in a PETA hidden video. I am who I am because of how I was raised by my father. Glued to each page of this album were photos taken during countless food celebrations, fishing excursions, and farm visits that seem to span all of the years of my childhood. Then there were the many trips to Chinatown, outdoor produce markets, and botanical gardens - the sights and smells of which I can still recall vividly. Lastly, there were the photos taken of me and my four siblings playing in our father's wondrous urban vegetable garden, a now mystical place that I long to return to but never will.
radish bouquet 4
A recent harvest of red globe radishes

As I took that trip down memory lane, I began to realize that over the years, I've slowly developed into a person that's a lot like my father in a way (though not nearly as brave). He was the quintessential Luddite, always insistent on doing things the traditional or what I used to consider the "old-fashioned" way. As a result, all family traditions were strictly observed and ceremoniously carried out. He was a modest person who would rather risk a stomach ache than let any food, good or bad, go to waste. By the same token, he was also someone who knew how to revel in a good meal and often ate and drank to excess. All of these things used to mystify me about my father until I grew to understand that he was of a generation that had witnessed and experienced true human suffering. After the Vietnam War, he saw our family through periods of famine, planned our death-defying escape from a Communist regime, kept us hopeful during our time at the refugee camps, and brought us to the United States in hopes of a better life. I soon realized that if I have had to endure hunger and the type of familial/cultural separation my father had experienced during his lifetime, matters of food and tradition would become all the more important to me as well.

fall garden 2
An assortment of hardy winter crops

So as I consider the reasons why I strive to live a greener life, I find the ones closest to home to be the most compelling. While issues such as what's wrong with our agricultural industry, what deadly toxins might be lurking in our food, or what is lacking in our current energy policy are matters of urgency on a national and global scale, these things only drive me personally to a certain extent. Ultimately, I grow the vegetables I grow, cook the foods I cook, and live the way I do because I hope to preserve something that was handed down to me by my father many years ago - a tradition of growing one's own food, nurturing one's family, and celebrating one's culture.

Pie 3
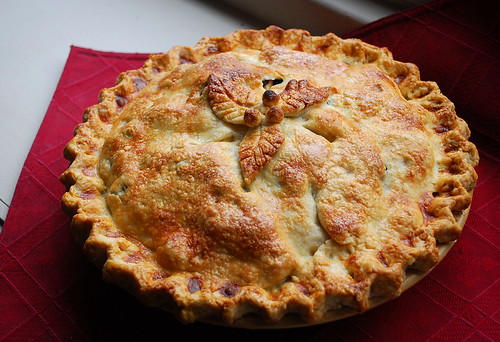
A traditional recipe - autumn fruit pie

What are some of the reasons why YOU strive for a greener life?

Footnote - As a new contributor to the Co-op, I am excited to be able to share with our readers my personal experiences and endeavors at living a greener life. Those of you who've read my personal blog know that I am just beginning this journey of mine. Surely I will have my fair share of setbacks and failures and therefore will be writing purely from a non-guru perspective, which to me is the most honest and entertaining point of view to have. I've learned a great deal from other "green" bloggers and hope that I'll be able to inspire others in my own small way. Until next time!