Wednesday, April 27, 2011

Around the April Garden

I thought I'd give a quick update on what's happening in and around the garden right now. In no particular order:

spring greens 2
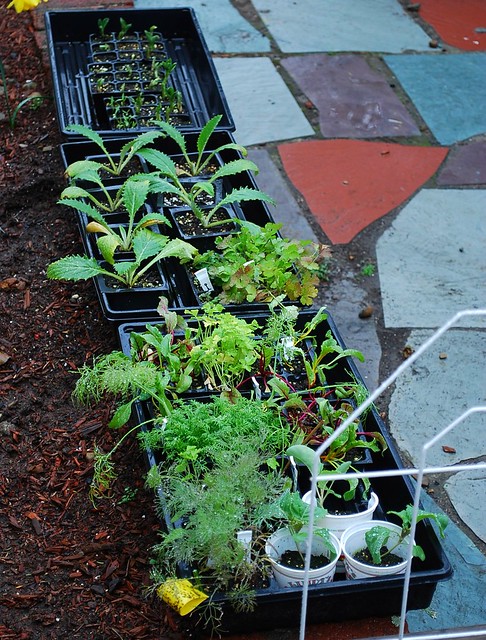
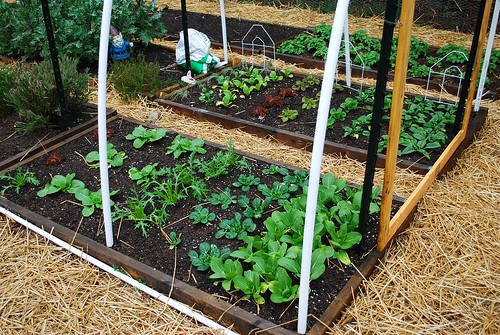
Now that the weather has warmed up a bit, the spring greens are growing rather quickly.

Asian greens
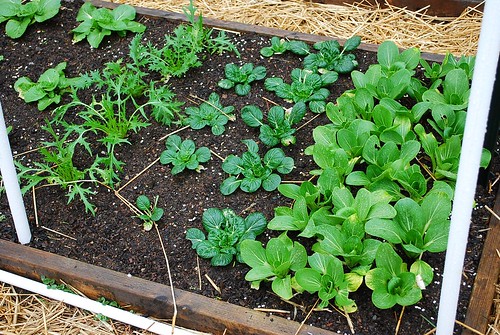
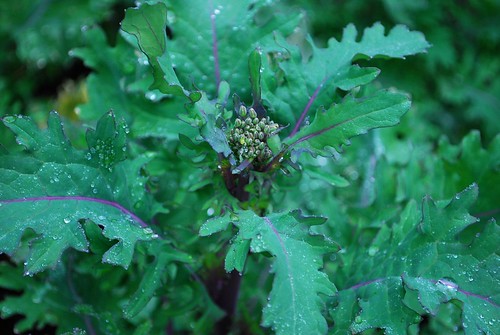
I will begin harvesting the Shanghai bok choy (right) in a couple days. Personally, I like my Asian greens on the smaller/younger side. The tatsoi (middle) will require another week or two.

spring greens
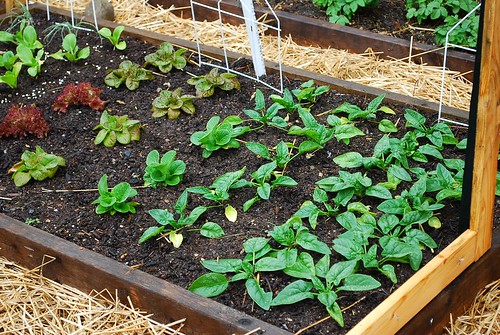
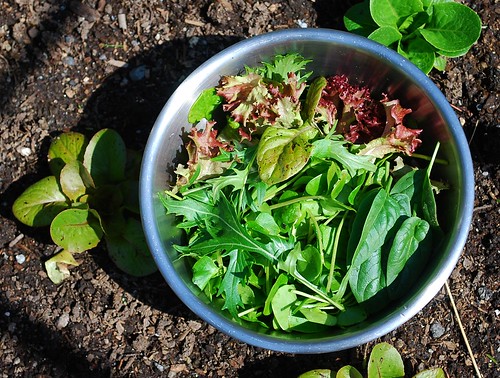
I can now harvest some spinach leaves as well (right). The variety I'm growing this spring is "Regiment" and I have to say, I like it much better than "Space". I'm growing several varieties of lettuce this spring. Winter Density (middle) is growing particularly fast.

radish seedlings
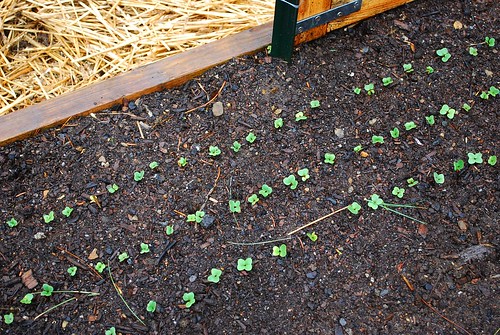
The French Breakfast radishes are up. Unlike carrots and beans, radishes always seem to germinate well in our garden.

wild strawberry plants
My red and yellow wonder strawberries are leafing up fast. The first flowers don't seem too far behind. I have a second bed with three times as many plants, which will need to be located to another part of the garden. I'm hoping to use them as a mini hedge around my garden fence to keep the weeds down.

pea sprouts
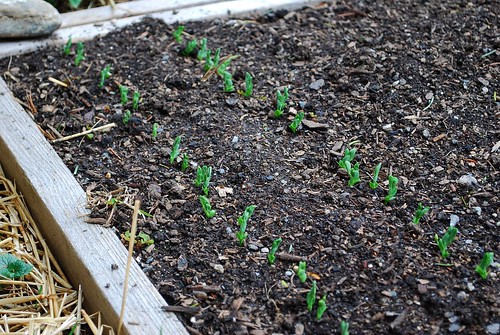
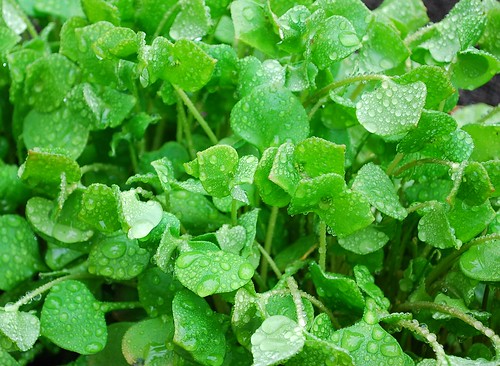
My snow and shell peas are up. I was really happy that germination was close to 100%. These will have to be thinned. The shoots are really tasty in salads or stir-fried.

Speckled Romaine Lettuce
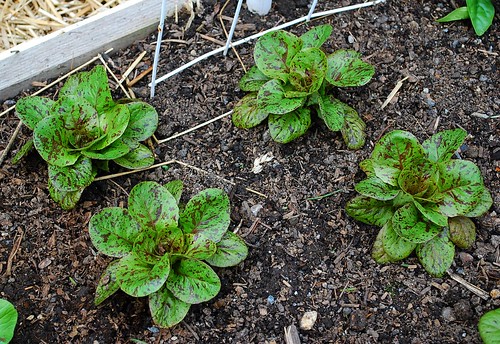
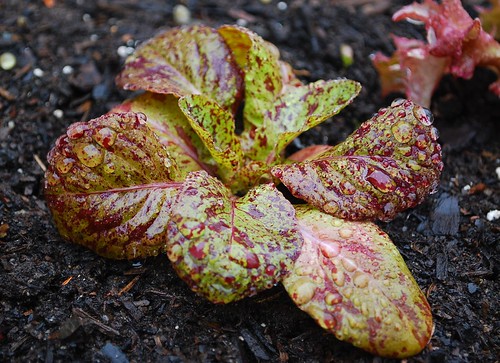
Another photo of my speckled romaine lettuce.

DSC_0017
It didn't take very long time for last year's thyme and sage to bounce back.

Fava Bean Seedling
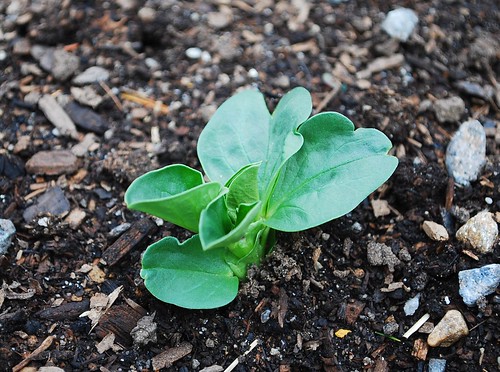
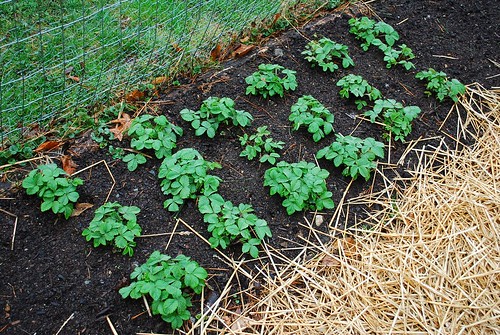
After a very long wait, the fava beans are up. I'm growing three varieties this year. I decided to hedge my bets and start additional seeds indoors. Germination ended up being around 90% so I transplanted my excess seedlings in another bed. We have about 80 fava bean plants - 10 times as many as last year, which is fine by me since they are one of our favorite veggies.

DSC_0071
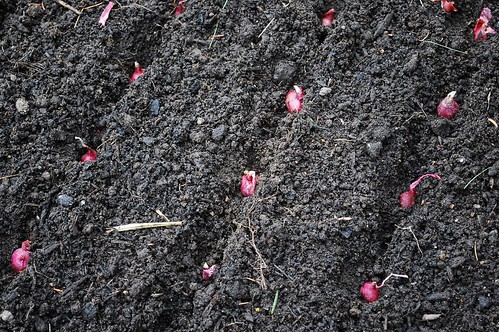
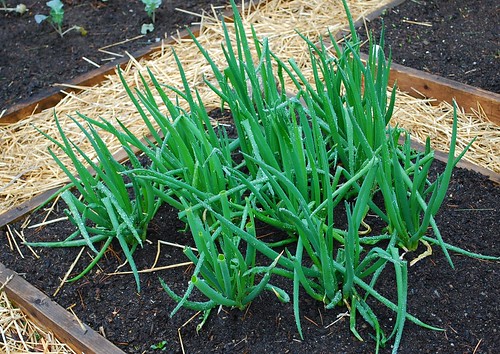
I also planted some red onion sets this weekend. Is it awful that I don't feel bad about not starting them from seed this year?

DSC_0003
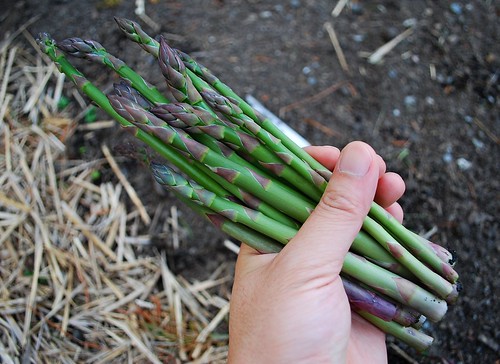
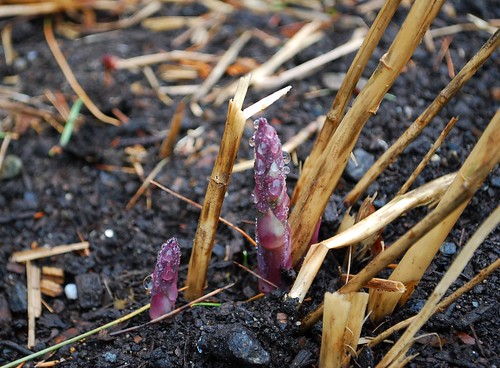
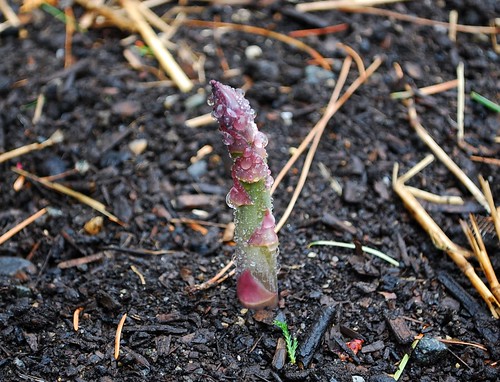
Finally, I harvested my first Jersey Supreme asparagus spears today! They sort of sneaked up on me as the shoots were tiny this past weekend. Luckily, I made a point to check on them again today. I would hate to have missed out on this first crop. Oh, and boy were they delicious simply steamed with a bit of butter. I'd never eaten asparagus that was cooked within minutes of being picked. I don't think you can find anything as sweet or tender at the supermarket.

Monday, April 25, 2011

The Rain Soaked Garden

DSC_0027
I really need to get a rain gauge for the garden. Keeping track of how much water our veggies get is not something I'm very good at. Our summer last year was incredibly dry and I'm sure our crops would have done much better if I had watered more often and consistently. On the other hand, I'm hoping that mother nature doesn't overdo it this year with the rain like she did in 2009.

That being said, I love to walk around the garden right after a storm and seeing everything covered in raindrops. Sometimes a fog rolls through and casts a faint glow over everything. It also makes some interesting photography.

DSC_0029
I'm growing this speckled romaine lettuce for the first time. Hopefully it tastes as wonderful as it looks.

DSC_0023
The hyacinths are in bloom right now. They smell incredible and are among my favorite spring flowers.

DSC_0047
The claytonia is lasting longer than I'd expected. They seem to be thriving under the cooler than normal conditions.

DSC_0042
Finally, my lone rhubarb plant is doing well. I'd planted the rather pathetic-looking crown last spring and am hoping to harvest a few stems this year. The first ones to emerge seem fat enough but aren't long at all. I'm keeping my fingers crossed that this will change as the plant grows. Otherwise, we'll have to wait another year.

Sunday, April 24, 2011

April Harvest Update and the Emergence of Asparagus

DSC_0065
This weekend, I harvested a good amount of greens for an Easter dinner party we attended on Sunday. I picked a bunch of claytonia and added some mizuna, spinach and baby lettuce to the mix. Thankfully, it was a hit!

DSC_0059
The Red Russian kale has started to flower. I've been trying to harvest as much as I could, but to be honest, after a long winter I'm looking forward to pulling them up and planting something different. Does anyone know whether kale buds are edible?

DSC_0057
I've been harvesting some of our overwintered scallions as well. The remainder of these will have to be pulled, chopped up and frozen as they are showing signs of bolting already.

DSC_0053
Finally, our Jersey Supreme asparagus are starting to emerge from the ground. It's nice to see a sight like this, especially on this Easter - a holiday traditionally observed by pagans to celebrate this time of rebirth and fertility.

DSC_0052
I planted these asparagus crowns last spring and they eventually grew into healthy plants last year. There is some debate on whether you should begin harvesting the tender shoots in the 2nd or 3rd year, but according to Ohio State University:

The year after planting, asparagus can be harvested several times throughout a three-week period, depending on air temperatures. Research shows there is no need to wait two years after planting before harvesting. In fact, harvesting the year after planting will stimulate more bud production on the crown and provide greater yields in future years, as compared with waiting two years before harvesting.

Sounds good to me! In fact, the spears that are emerging now are of good size so I am looking forward to seeing them on our dinner plate soon.

Wednesday, April 20, 2011

This Week's Gardening Chores

Brassica Transplants
I wasn't able to get as much gardening done this past weekend as I would have liked. We've had a good amount of rain and overcast skies so far this month - not surprising considering it's April in New England. The garden remains pretty wet still but the plants don't seem to mind it all too much. When I dig down 6 inches in my planting beds, I see lots of water ( pools of it in fact). Our yard has significant drainage issues this time of year but the ground tends of dry out by the time June rolls around. Let's hope that's the case this year.

Transplanted Broccoli
I did get around to transplanting some broccoli, Brussels sprouts, cauliflower, purple sprouting broccoli (from Dan) and savoy cabbage. For me, it always becomes a lot easier to evaluate your overall available gardening space once your early spring greens and brassicas are in (I always tend to underestimate the amount of growing space I have). I want to make sure I leave enough room to grow all of my summer crops but it also would be nice to have enough space left over to fit in a second sowing of brassicas if I can. We love broccoli around here and any remaining space available will be planted with it.

Question to those of you who've grown purple sprouting broccoli - can I expect anything this year? Or will the plant only produce edible buds the following year?

Carrot Bed
On Sunday, I was also able to install my carrot box, which was built using 2x6's and made to fit one side of an existing bed. Our soil is so heavy here that it is often different to get carrots that are straight. Hopefully, adding another 6 inches of fine potting medium to the top will help us achieve better results (and deter the mice). I placed fabric row cover on top to help shield the germinating seeds from this week's heavy rains.

Tuesday, April 19, 2011

In the Kitchen - Classic Pineapple Upside Down Cake

Pinapple Upside Down Cake
I've been meaning to write this post for some time now. Better late than never I guess. A while back, I made Joanne Chang's recipe for pineapple upside down cake for the first time and boy, it is every bit as delicious as I had remembered. When she first opened her store Flour in Boston over a decade ago, a slice of this cake was one of the first things I had tried. It has been years since I have seen it on the menu so when her first cookbook was released last year, I was happy to find that she had included the recipe for this cake.

Pinapple Upside Down Cake 2
Marc and I are not huge cake eaters but this pineapple upside cake is our kryptonite. We can finish off an entire round in one sitting if we are not careful. The cake itself is perfectly eggy and not too dense or sweet. It also has the most delicious (almost cookie-like) crust at the bottom and around the edge and enough caramel fruit topping to satisfy serious pineapple lovers such as myself. I won't post the recipe here (I never like to do so without permission) but you can find it online if you do a simple search. Better yet, you can pick up a copy of her book, which has quickly become one of my favorite pastry books.

(And if any of you are wondering - No, I'm not being paid to write this! I just love me some pineapple upside down cake!)

Sunday, April 17, 2011

Harvesting Claytonia

Claytonia 2
I noticed the other day that the claytonia (miner's lettuce) was starting to flower now that our spring has warmed up. This was a sure sign that we either had to harvest it or let the plants go to seed.

Claytonia 1
The pretty white flowers seem to emerge from the center of each cupped leaf. If I didn't know any better, I would have never guessed that this interesting looking plant was edible.

Harvesting Claytonia
We harvested enough for several salads and there's much more to be had. The leaves are fairly delicate, succulent and only slightly crisp. To me, claytonia tastes sort of like spinach only lighter, sweeter and milder. We like it simply dressed with a lemon vinaigrette.

Thursday, April 14, 2011

Seed Potatoes

Alien Potatoes
Looking at this picture, you may wonder whether or not this is some sort of alien experiment gone terribly wrong, but alas it's just what's left of last year's potatoes, which started sprouting in the basement back in January. The All Blue potatoes I grew last summer were so pretty when sliced open. When I placed an order for seed potatoes a couple months ago, I was really disappointed to learn that Moose Tubers wasn't offering them this year. This past weekend, I rummaged through this mess to see if there were any potatoes worth salvaging to plant in the garden. But in the end, I decided against it and chucked them all into the compost bin.

Seed Potatoes
My seed potatoes arrived in the mail yesterday. I ended up choosing another blue-fleshed variety called "Adirondack Blue". I also ordered an early blushed-red variety called "Augusta" but unfortunately there must have been an issue with this variety as the company sent me Yukon Gold potatoes in its place. I have to admit that that I'm rather disappointed because of this.

Next year, I think I'll forgo purchasing mail-order seed potatoes. I was at our local feed store this past weekend and noticed that they had some All Blue, All Red and Kennebec potatoes (among others) for sale at a reasonable price. Sure they cost more per pound but then again, you don't have to pay the hefty shipping and handling costs. I may have to swing back this weekend just to get a few.

In the Kitchen - Making Grilled Pizza

Ham and Pineapple Pizza

Now that the weather have warmed up a bit, we're able to do a lot more outdoor grilling these days - which means, it's grilled pizza time! Some of you may already know this but I'm a huge fan of using your outdoor grill as a pizza oven. If you don't own a wood-fired oven (which is probably 99.99% of us), you might find the grill to be a good substitute. I've baked many pizzas using a conventional oven and a baking stone and have never been able to get results that are nearly as good. With a conventional oven, you usually don't get that nice char at the bottom of the pizza and the pizza itself doesn't cook quickly enough, which often results in a crust that is soggy in the middle and rather dry around the edge.

Grilled Shrimp and Mushroom Pizza
Grilles Shrimp, Mushroom and Feta Pizza

One method I've read to improve the quality of your pizza by way of conventional oven is to heat a quarter inch steal plate (where you would get one, I don't know) near the top rack and cook your pizza for a couple of minutes on broil. The steal gets very hot in the heating process, which allows for the pizza to cook very quickly.

Maybe I'll try this method one day but for now, I'm perfectly content with using my gas grill. I place a pizza stone directly on the grill rack and heat it covered on high until the temperature gets to about 425 degrees F. In goes the pizza, which cooks for 4-5 minutes before it's done (turned halfway during the process). In my experience, results are best when the pizza cooks at a temperature of about 450 degrees F. Also, you end up with a browner and crispier outside crust if the diameter of the pizza is only slightly less than the diameter of the stone (allowing for more direct heat contact with the outside crust).

barbecue chicken pizza
Barbecue Chicken Pizza

Personally, I prefer a thinner crust pizza. Peter Reinhardt's pizza dough recipe is a great one. As far as toppings go, Marc loves Hawaiian pizza while I prefer something more exotic like shrimp and wild mushrooms. Jonathan likes everything from plain cheese or pepperoni to barbecue chicken. These days, everyone is happy.

Monday, April 11, 2011

The Freshly Mulched Garden

April Garden 1
As the weekend drew to a close, we were able to haul the remaining compost over to our "homegrown" pile behind the shed, smooth over the planting beds and lay down some fresh straw along the garden paths. Now that Marc is able to spend more time with me in the garden, we can get much more done in one weekend. One of the things I like best about gardening is being able to stand back and look at a finished project with pride. Maybe it's because vegetable gardening is something born from your own two hands (I doubt that we would feel the same way if we had paid someone else to do it). I also enjoy its communal aspects as well. Marc's mother came over to help out, our neighbors were out tidying up their yard and our children were running around both properties laughing and playing. It's times like these that make me appreciate the simpler things in life.

Anyway, here is what it looks like now:

Freshly Mulched Garden
A half bale of straw was enough to cover this space. I have to admit that straw isn't really my favorite form of mulch but it does present a nice contrast to the dark raised beds, especially when it's still relatively fresh and yellow.

Freshly Mulched Garden 2
I also got around to sowing some shell peas, snow peas and French Breakfast radishes. Still no signs of the Fava beans I planted two weeks ago (though it has only warmed up in the past week). Should I be worried? I might have to start some indoors just to be on the safe side.
This week I'll also be sowing some carrots and mesclun mix and transplanting several varieties of broccoli. With temperatures remaining in the 6o's this week, I finally feel as though the Spring gardening season has begun.

Compost Pile
On a final note, I tidied up our compost pile a bit to make way for the excess we purchased. I moved all of the fresh(er) garden waste to the left. The waste to the right has broken down quite a bit but still needs several more months to finish.

Compost Pile 2
We piled the remaining compost onto the semi-decomposed waste. Hopefully, this will help speed the process along. As you can see, my composting pen is pretty lame. Until I find a composting system that I really like, this will have to do.

Sunday, April 10, 2011

The Back Garden

back garden 2
On Saturday, we decided to do some work in the back garden. Those of you who've followed my blog for a while now will remember that I'd taken the lazy gardener's approach to setting up this space last May. Instead of breaking my back trying to remove a well established lawn (and destroying most of the topsoil in the process), I decided to let Mother Nature do the slow work of it for me. I'd used a not so mighty rototiller to break ground on my first garden the previous summer and was not interested in repeating the process.

expanding garden 4
Anyway, here's a reminder of how this space looked like last May. (You can read about it here.) I'd laid a thick layer of dead leaves followed by grass clippings before covering the entire space with some porous landscape fabric and leaving the old lawn to break down slowly over the course of a year. The melons planted here also benefited from the added warmth generated by the black fabric and natural processes happening underneath.

back garden 1
As you can imagine, I was really anxious to find out whether or not this method had worked and to what extent. When I removed the plastic, I noticed immediately how different the soil looked. I raked away some leftover debris from the surface and then poked into the ground with my garden fork. Amazingly, no traces of lawn (roots and all) or leaves remained. The topsoil also felt light and crumbly. Needless to say, I was beyond stoked - so much so that I decided against turning over the soil as I wanted keep the structure intact. (I always kill too many worms in the process anyway.) Anyway, I would definitely recommend this slow method of lawn removal.

back garden 3
After initial inspection, we then went about the task of covering the new beds with 2 cubic yards of compost. I really hope the tomatoes, corn, cukes, melons, artichokes and potatoes we grow here will benefit greatly from this. And since it will be at least May before we plant anything in this space, we'll have plenty of time to make it look a bit prettier. Next weekend, I'll have to take down the beat-up fence and put it back up again (properly this time).

April Gardening 1
I hope you all had a fun time gardening this weekend. We sure did and the weather was definitely perfect for it.

Friday, April 8, 2011

Compost Question for the Masses - To Dig or Not to Dig?

April Garden
Looking at this picture, you would think it was still mid-March. This spring (at least in my opinion) has been a bit cooler than usual thus far and I think we are at least a couple of weeks behind schedule temperature-wise. However, it seems Mother Nature is now playing catch up as it's expected to get into the 60's during the next six days. (I need to plant peas ASAP!)

Anyway, I thought I'd take a few pictures this weekend to document the progress we're making each day. The ground is still soft but no longer muddy and the beds have dried up quite a bit. We only had a couple hours to work in the garden today but it felt really good to break a sweat under the mid-afternoon sun.

Amending beds
We took the plastic off of the hoop house today mainly because the inside temperature was reaching into the 90 degrees during the day (bad for spinach and Asian greens) and also because I was really sick of looking at it. I would have just taken off the doors but it was casting a shadow as well. The frame will be kept up this summer as I'm thinking of growing pole beans or cucumbers on them. This fall, I'll move the hoop house a row over so that it no longer casts a shadow and install the professional greenhouse plastic.

We also cleaned up most of the beds and started to lay down the compost. Anyway, here is my question to all you out there:

Do you dig your compost into the soil or just let it rest on top? Obviously, digging it into the soil would be the more conventional approach but I've read an article or two that said that leaving the compost on top (or working it lightly into the top two inches of the soil) and allowing the worms to bring it down slowly mimics nature to a greater extent and is therefore more beneficial to your plants. On the other hand I've also read that sunlight can diminish the quality of compost. For heavy feeders such as melons and tomatoes, I can see the benefits of digging a deep hole and filling it with compost, but I wonder if turning the compost into the soil is really necessary most of the time. The lazy garden in me hopes not. Any thoughts on the issue?

What "Work" Looks Like

Compost
Yesterday, I placed a delivery order for some compost with Rogers Spring Hill Garden and Farm Center located in Ward Hill, Massachusetts. It promptly arrived this morning. This is what 4 cubic yards of compost looks like on your front lawn. Now I know what I'll be doing for the next three days.

At $30 a yard (plus $30 delivery free), I felt like it was a good deal. The same amount of packaged compost would have cost a lot more. Hopefully this will be enough to amend all of my beds. The rest will be stored for the fall garden.

Wednesday, April 6, 2011

Over-Wintered Kale

Red Russian Kale 1
Not much growing in the garden right now, except for maybe the kale. This week is the first time in months that the nightly low hasn't reached below 31 degrees in our area. Some of my early transplants suffered major frost damage when it got down to 25 degrees last week but I think they'll recover. I guess I'll start some more now just to be on the safe side.

Some random tidbits - Inside, the peppers and tomatoes have sprouted and the artichokes are ready for cold treatment (they'll be kept outside unless it gets below 35 degrees). I've just done a second sowing of Poblano peppers - something we didn't grow nearly enough last summer. Also, I'll have to fit in some time during the next couple of days to sow some shell and snow peas. (Finally.) I feel like they were already up and growing this time last year.

Red Russian Kale 2
Anyway, I was able to harvest some Red Russian kale this past weekend. Something tells me these plants won't last very long as they were the first to bolt last spring.