Naan Bread Recipe
3 cups bread flour
1 1/3 cups tepid water (80 - 90 degrees F)
1 teaspoon active dry yeast
1 1/2 teaspoons salt
2 tablespoons butter, melted
1 clove garlic, minced (optional)
Stand-mixer directions:
Pour the water into the bowl of an electric strand-mixer fitted with a dough hook and add the yeast. Stir with a wooden spoon to dissolve the yeast. Mix together the salt and flour in a medium bowl. Add the flour mixture to the water and begin mixing on low until the dough begins to gather around the dough hook. Turn up the speed to medium and continue kneading the dough for 5 minutes or until it is smooth and taut.
Hand-kneading directions:
Pour the water into a large bowl and add the yeast. Stir with a wooden spoon to dissolve the yeast. Mix together the salt and flour in a medium bowl. Begin by adding 1 1/2 cups of the flour mixture to the water. Stir this in the same direction for a couple of minutes to begin developing the gluten. Add the remaining flour 1/2 cup at a time, continuing to stir until the dough becomes too stiff to work with the spoon. Fold the dough a few times with your hand to incorporate the remaining flour. Turn the dough out onto a lightly floured surface and knead it vigorously for 10 minutes. Dust with more flour if necessary. At the end of the 10 minutes, the dough should be smooth and taut.
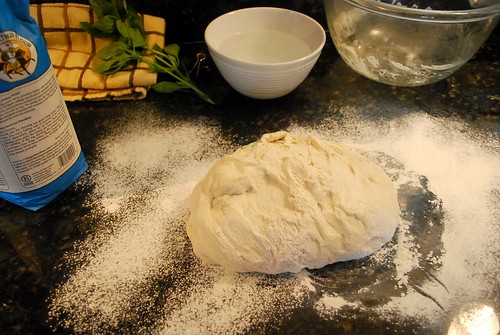
Transfer the dough to a lightly oiled bowl. Cover the bowl with plastic wrap and allow the dough to rise at room temperature for at least 2 hours. It should double in volume by the end of this period. (You can also allow the dough to rise slowly overnight in the refrigerator. Bring it to room temperature before moving forward.)
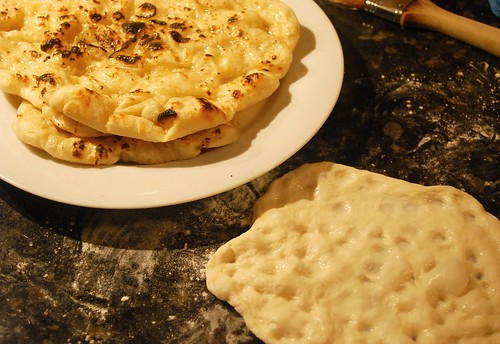
Melt the butter in a small pan on medium-low heat. Add the garlic and swirl it around as it sizzles for about 20 - 30 seconds. Remove from heat and set aside. (I don't bother to clarify my melted butter but you can if you like.)
Gas stove top directions:
Unless you have a tandoor, I would recommend this method. What it lacks in "authenticity" it more than makes up for in convenience. Heat a covered cast iron pan on medium heat on top of your gas stove. Remove the dough from the bowl and place it onto your lightly floured work surface. Cut a 4 ounce piece of dough from the ball. Using your hands, pull and flatten it into a disk about 7 inches in diameter (like you would a pizza dough). Don't worry if the disk isn't perfectly round or uniform in thickness. These variables will give the finished bread its rustic look and contrasting textures. Dip your fingers into a bowl of cool water and press them into the dough, creating dimples throughout the surface of the disk. Don't worry about getting the top too wet. (In fact, you want it be fairly wet as this helps to give the finished bread it's classic chewy texture.) Cut another piece of dough from the ball and repeat this process.
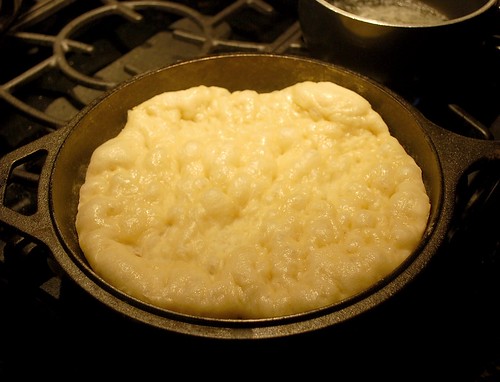
Once the first round has rested for a few minutes, remove the lid and gently place the dough into the heated pan dimple side up. Replace the lid and let the bread bake for about 4 minutes or until the top looks puffed and somewhat translucent. As the bread is baking, re-dust your work surface with flour and work on your third round of dough. When it is done, remove the bread with a pair of tongs and place the second round into the pan to bake. (If the bottom of the bread looks too brown or scorched, lower the heat a bit.)
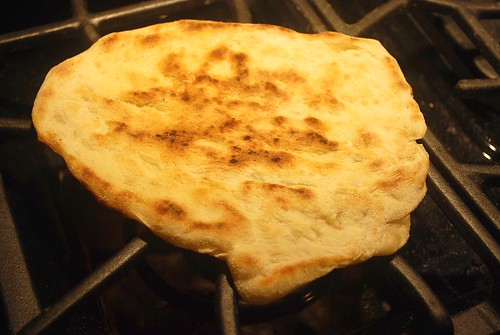
Light another burner to its medium setting and place the first round top-side down directly onto the burner. Using your tongs, move the bread around to evenly char the top. (This should only take a few seconds.) Place the finished bread onto a plate and lightly brush the top with some melted butter. Work on your next round of dough. Repeat this process for the remainder of the dough.
Oven Directions:
Position a baking stone onto the center of the oven and preheat it to 500 degrees F. Remove the dough from the bowl and place it on your lightly floured work surface. Cut it into 2 pieces. Pull and press the first piece into a rather large and thin (1/4 - 3/8 inch thickness) oblong shape. Again, don't worry if the thickness of the disk is not uniform or tears in some places. Dip your figures into a bowl of cool water and press them down into the surface of the dough, creating wet dimples throughout. Let the dough rest for a few minutes. Then carefully place the dough onto the baking stone and bake for 5 minutes or until the bread looks puffed and lightly browned on top. While the first loaf is baking, work on the second piece of dough. Brush the finished bread with melted butter.
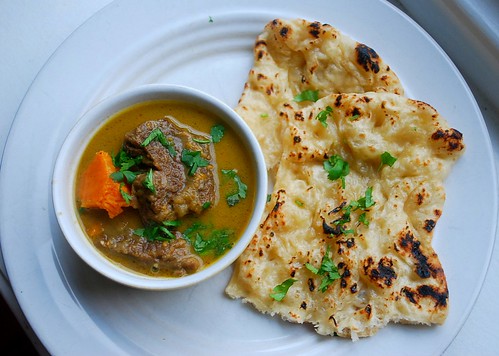
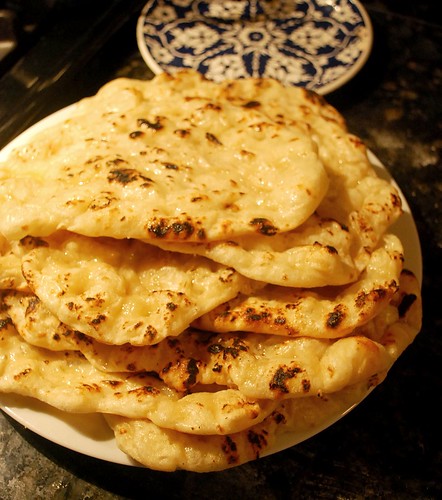
I generally use the stove top method when making this bread. Once you get into a rhythm, the steps become pretty straight forward. Recently I made a batch to accompany a beef and sweet potato curry. This is definitely one of my favorite breads to dip with. This bread is best when served immediately after baking. However, it is also great toasted the next day.
Please note: Some regions of the world make naan bread with milk and yoghurt, which I've read adds thickness and volume to the finished bread. Others do not. I might experiment with this recipe though and incorporate these ingredients for fun. It will be interesting to see how it affects the end result.


Brilliant idea, the cast iron on top of the stove, Thomas. I shall do that from now on, My recipe uses yogurt, but I'll try yours. Beautiful pictures. That curry looks swimmingly good, too.
ReplyDeleteI was admiring the naan in your post about making soup. Thanks so much for providing the recipe!
ReplyDeleteI have been trying to wait patiently for this recipe since you talked about it!!! Yahoo sounds so good and easy to make. I am going to make these for the football game on Sunday :)
ReplyDeleteGoing to give this a try next week since it's too late in the day for todays meal. I have to do it on one of my days off from work.
ReplyDeleteLooks so yummy! Now I'm going to go eat a piece of a gluten free roll to stop the craving.
ReplyDeleteHad to try it. bread is rising now, and Im making red curry to go with it. I dont have a cast iron skillet or baking stone so Im just baking with a cookie sheet. Thanks for sharing the recipe!
ReplyDeleteThanks for the recipe! I would always stumble on naan bread recipes with eggs, I'm really glad to see an egg-free one that I can easily veganize for my tastes! I'm excited to try it this weekend.
ReplyDeleteWonderful Illustration. Naan looks great.
ReplyDeleteLooks so delicious, definitely will be giving it a try- yum!
ReplyDeleteIn this post is very interesting and more informative because in the kitchen that can be make naan bread recipe so that can be learn and make in this new recipe due to in this post.
ReplyDeleteThat looks great. I am thinking I could use my ceramic dutch oven as I don't have cast iron.
ReplyDeleteYou can steal a woman heart easily with your baking skill ;-). That looks delicious. Yummy, my favourite.
ReplyDeleteOh yummy! Thanks for the tutorial! Now I want some Naan!! And you asked about the Borlotti beans I harvested. This is how I decided to cook them.
ReplyDeletehttp://tastytravels-holly.blogspot.com/2011/08/whats-cookin-meatless-monday-slow.html
Do you have any good bean recipes?
Beautiful looking bread and I am encouraged by it's simple ingredient list and relatively fast prep time. I don't have a gas oven but I do have a good baking stone so I think I will give this recipe a whirl in the near future. But I am going to wait a week or so. Our summer FINALLY decided to arrive and the temps are forecasted to be (for us) quite warm for the next week. We do not have air conditioning so the house will be warm and doing any serious baking in that kind of situation does not sound appealing at all. But I am positive right behind this final summer hurrah will be the cool and damp arrival of fall and what a fun recipe this will be to try at that time.
ReplyDeleteWell done, very professional.
ReplyDelete