
Posted by Thomas from A Growing Tradition Blog
Homemade Seed Mats (Radishes)
Have you ever come across an idea that sounded a bit silly or even crazy at first, but then the more you thought about it, the more you realized how absolutely brilliant it is? In this case, it took me about 5 seconds to see the light of day. And I have to thank none other than Gran from Annie's Kitchen Garden for enlightening me.
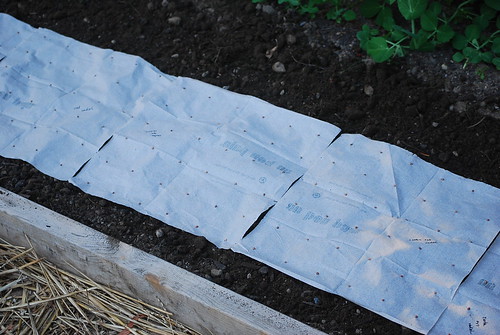
This my friends is a homemade seed mat, which allows you to sow many of your crops accurately and efficiently. For me at least, the benefits of these mats seem endless. Here are just a few I can think of as I'm writing this:
- The obvious - thinning, or lack there of. Since you've perfectly spaced the seeds on the mat, you spend less time thinning your seedlings. Carrot growers rejoice!
- Eliminating waste - Since you have less to thin, you also get to keep more of what you sow. Seeds are becoming increasingly expensive these days and more gardeners are choosing to save seed. These mats allow you to maximize your seed usage.
- Aesthetics - The perfect spacing achieved by these mats gives your garden an ultra-neat look.
- Maximizing space - Seed mats allow you to maximize your available square footage by evenly spacing your plants according to their specific requirements. This is particularly important if you only have a limited amount of growing space in your garden, hoop house or cold frames.
- Regulating growth - Because your plants are evenly spaced, their overall growth becomes more regulated.
- Time and flexibility - You're sowing entire mats, which is a fraction of the time it takes to sow individual seeds. (Your back will thank you.) Also, it took me about 15 minutes to construct 3 mats while comfortably sitting at a table. This is the type of gardening I don't mind doing at 11 pm.
- Comfort - they are particularly useful for small seeds and crops that do not require large amounts of space in which to grow. From my own experience, I've found certain seeds to be particularly tedious to handle and sow into neat rows (wild arugula seed, for example, is the size of a grain of sugar).
- Finally, cost - It costs next to nothing to make these mats and chances are, you already have the materials in your home. A six-row seeder costs $549.00.
1. Unfold your napkin. On your napkin, using a ruler and pen, make a series of evenly spaced points. The space between these points will be dictated by the type of crop you are sowing. To give you an idea, most baby salad crops can be spaced 2 square inches apart (2 in by 1 in). Carrots and radishes can by spaced 4 square inches apart (2 in by 2 in). Spinach, many Asian greens, turnips, beets, claytonia and smaller-head varieties of lettuce can be spaced 16 square inches apart (4 in by 4 in). In fact, these seed mats are best for any crop that you can direct sow and space 6 inches apart or less.
2. Going row by row, dab the slightest bit of glue onto each point. (I've also used a thick paste made from flour and water, which worked well too. Use a toothpick to dab a bit onto each point.)
3. Place a seed at each point and press lightly with your finger. (For baby salad crops, I adhere 2 to 3 seeds at each point for better germination rates. For small or more delicate seeds such as carrots and many salad crops, touch the tip of a toothpick to your tongue or a wet sponge and use it to pick up and transfer the seed.)
4. Let the mats dry completely. Do not store stacked until they are completely dry.
Newly Sown Mats
6. Two or three days after the first seeds have sprouted, fill in any germination gaps with fresh seed.
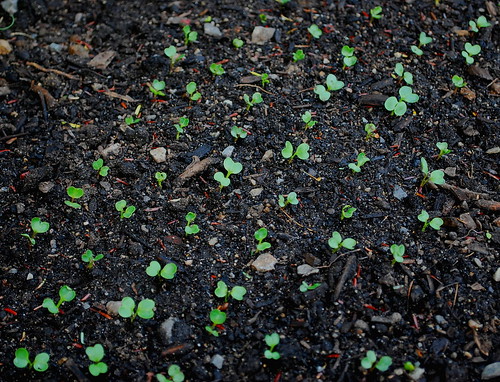
I achieved about a 90% germination rate with my radish seed mats.
And that's about it. Hopefully, some of you who are as anal as I am about neat and evenly planted rows will give this a try. For Gran's instructions on how to construct these seed mats, click here.

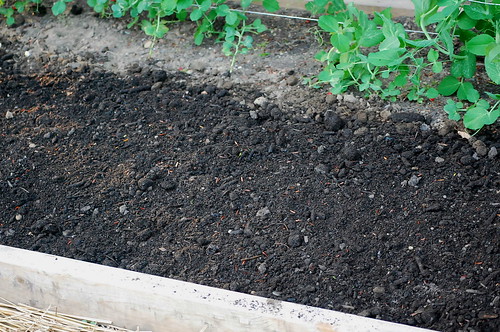
Same radish bed a few weeks later.


I love Granny's mats. I'm so glad her idea worked for you!
ReplyDeleteI'm hoping that the planting board grids I now have will help me get the same results.
I wholeheartedly agree, Thomas! I got the idea from Granny too, and only used it once this year but will making much more use of it this year. Especially with raised beds, it is so satisfying to see them neat and tidy! Happy New Year to you and your family!
ReplyDeleteThat's a great tutorial on seed mats!
ReplyDeletePerfect activity for a rainy, cold day :) . Thank you so much!
ReplyDeleteBlessings,
Catherine :)
These are a great idea. I'm sowing a bunch of seed tomorrow and will give this a try. And it makes the plants look so pretty all lined up. Thanks!
ReplyDelete