Monday, February 28, 2011
In the Kitchen - Shrimp Wonton Soup Recipe
Not much happening on the gardening front I'm afraid. Just as I was starting to believe that Mr. Groundhog may have been right this year, we got seven more inches of snow this past weekend. I can't complain though - the white stuff is melting slowly but surely and best of all, we haven't had the huge amounts of rain we had this time last year that caused our backyard to flood for a month. I'm still keeping my fingers crossed.
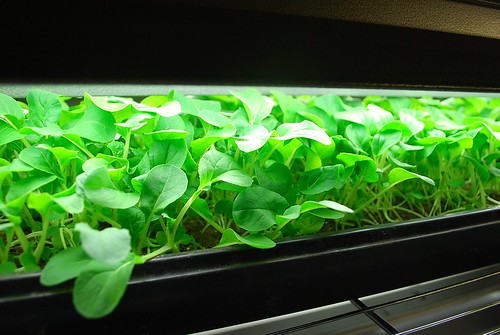
Anyway, I thought I'd post the recipe for my shrimp wonton soup. It's one of my favorite soups to make for the family. I love to garnish the soup with some bok choy microgreens, which adds freshness and crisp. Scalding them in the hot soup broth cooks them just enough. Delicious!
Shrimp Wonton Soup Recipe
Soup Broth
6 cups unsalted or low-sodium chicken broth (preferably homemade)
1/2 medium onion cut into large wedges
2 inch piece ginger cut into 1/4 inch slices
2/3 inch cube rock sugar (or 1 tablespoon white sugar)
1 tablespoon soy sauce
1 teaspoon fish sauce
5 oz package of oyster mushrooms cleaned and separated
kosher salt to taste
Fried Garlic
2 large cloves of garlic finely chopped
1 tablespoon of canola or vegetable oil
1 teaspoon of sesame oil
2. To prepare the fried garlic, heat the canola and sesame oil in a small pan on medium-low heat. Add garlic and stir-fry for a few minutes until it is evenly browned and develops a nutty aroma. (Be careful not to burn it! The garlic should be the color of roasted peanuts when done.)
2. In a medium stock pot, combine all of the above ingredients except for the oyster mushrooms. Add the fried garlic and flavored oil. Bring the soup to a boil and then simmer covered on low heat for at least 30 minutes. Add salt to taste. 10 minutes prior to serving, add the oyster mushrooms to the simmering soup.
Shrimp Wontons
30-36 wonton skins
1/2 lb shelled and de-veined raw shrimp
1/2 cup chopped scallions
2 tablespoons of chopped cilantro
1 tablespoon of tapioca starch (or cornstarch)
1 teaspoon soy sauce
1 teaspoon of salt
1 teaspoon of sugar
1/2 teaspoon of ground black or white pepper
1/2 teaspoon dark sesame oil
3. In a food processor or mini-prep, pulse the shrimp until it resembles a chunky paste. Transfer the ground shrimp to a large bowl and combined thoroughly with the remaining ingredients.
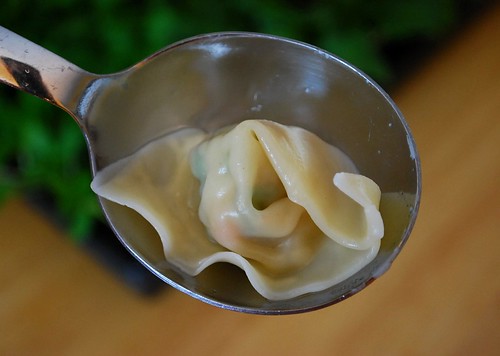
4. To make the individual wontons, brush the four sides of a wonton skin with a bit of cold water. Place about a teaspoon of shrimp filling in the center of the square. Fold the square in half to make a triangle, pinching the edges lightly to seal in the filling. Brush one corner of the triangle with water and join it with the opposite corner (pinching them together) to form a tortellini shaped wonton. (You can make these wontons ahead and store them in the freezer. To prevent the wontons from sticking to one another, freeze them in a single layer on a cookie sheet before storing them in a freezer bag.)
5. I find that 5 wontons are enough for a small serving, 7 for a large serving. To cook the wontons, bring a medium pot of salted water to a boil. You can cook up to a dozen wontons at a time but be careful not to to overcrowd them. Drop the wontons into the pot and the bring water back to a boil on medium high heat. Stirring gently, cook the wontons for 2-3 minutes until they float and the skins are cooked. (You can cook the wontons straight from the freezer but add another minute to the cooking time.) Using a slotted spoon, remove the wontons and place them directly into the serving bowls.
Garnishes
bean sprouts
Asian microgreens
chopped scallions
chopped cilantro
small wedges of lime (8 to a lime) - optional
6. Assembling the individual bowls - If using the bean sprouts, scald them in the hot cooking water for about 20 - 30 seconds. Remove with a slotted spoon and place a small handful on top of the wontons. Then place a handful of Asian microgreens over the bean sprouts. Sprinkle some chopped scallions and cilantro into each bowl and add the juice from one squeezed wedge of lime. Finally, pour about 1 to 1 and a half cups of the hot soup over everything. Serve immediately!
Variation - In place of the microgreens, you add 2 cups of sliced baby bok choy or napa cabbage directly into the simmering stock 10 minutes prior assembling the bowls.
Tuesday, February 22, 2011
Seedling Update - Flirting with Desaster.
Things are coming along slowly but surely on the seed starting front. I try to examine my seedlings very closely on a daily basis to look for any signs of trouble. Some of you may recall that I had a serious run-in with green aphids last year, which you can read about here. I'd purchased several infected plants from an online nursery and the little bastards ended up spreading to the rest of my indoor seedlings, ultimately decimating my artichoke plants.
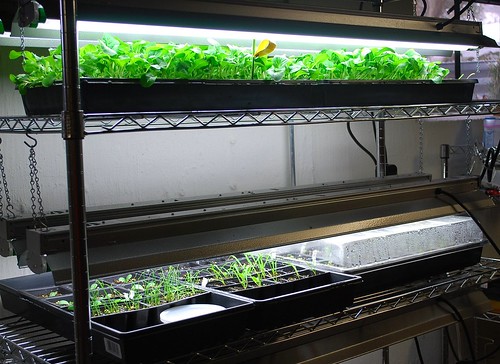
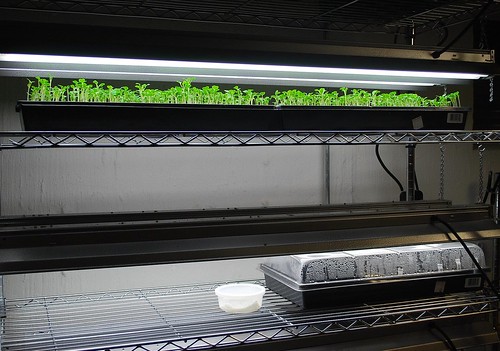
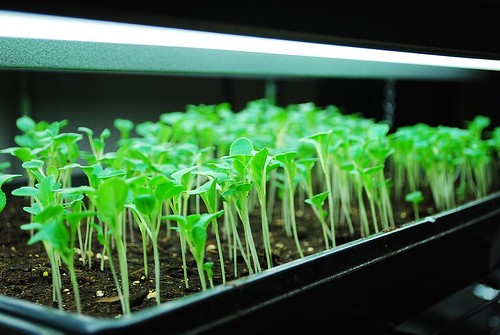
You can understand now why I FLIPPED OUT yesterday when I spotted several green aphids on my bok choy microgreens. How on earth was this possible?! They'd disappeared from the basement when I set out all of my plants last spring and my fall seedlings showed no signs of infection. Then it dawned on me that several weeks ago, I'd brought inside from the hoop house my carrot bucket to thaw out. Stupidly, I placed it down in the basement next to my seed starting shelves. Upon closer inspection, the bucket harbored a huge colony of overwintering aphids (surely descendants from last year's brood). I moved as quickly as I could to quarantine my seedlings. I dumped the carrot bucket outside and moved the microgreens onto the back porch. I inspected my seedlings and found several aphids so I saturated everything with organic insecticidal soap spray. For now, I've placed clear plastic domes over all of my plant trays to prevent any stray bugs from getting to them. Tomorrow night, I will wipe down the shelves as an added precaution and spray again in a week. I will not remove the domes unless I am confident that the aphids are gone. From now on, no more foreign or outdoor plants in the basement!
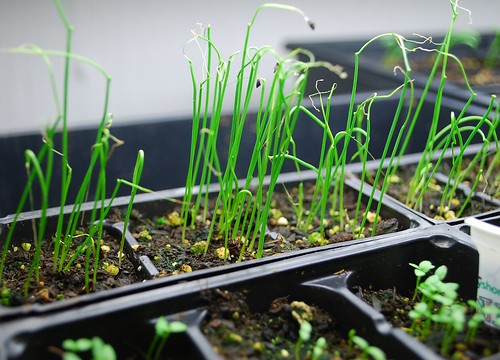
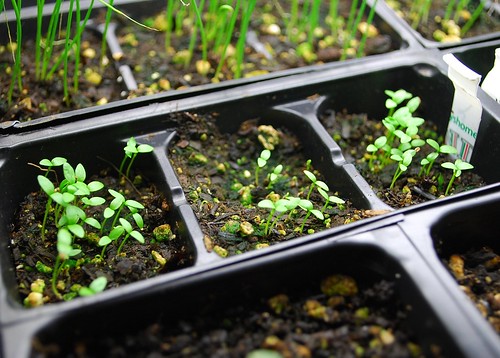
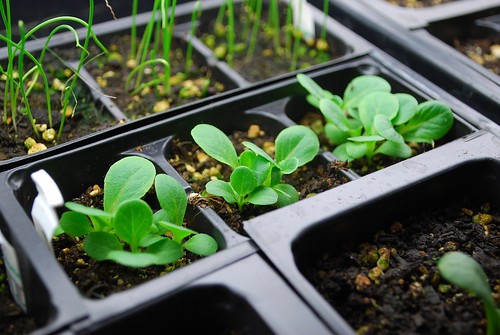
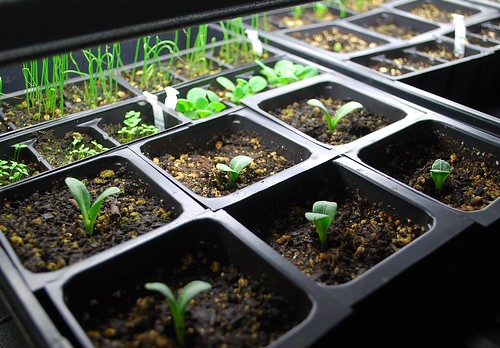
Aphids aside, here's how the seedlings are looking at the moment:
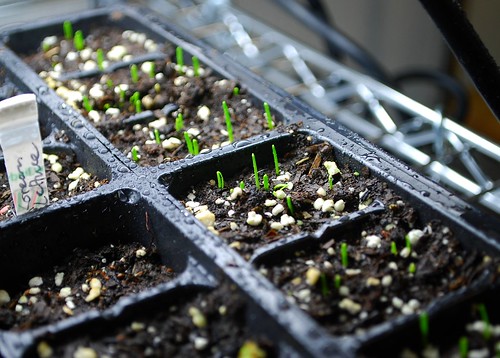
Last year's scallion seeds
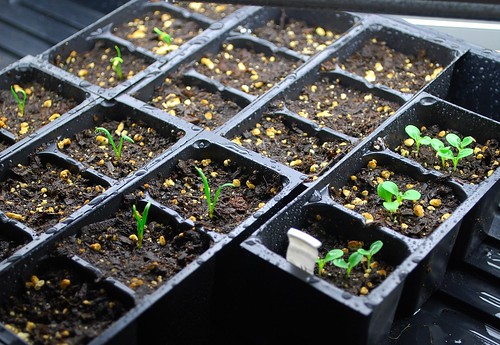
Last year's celery seeds
Winter Density lettuce
Imperial artichokes
Labels:
artichokes,
celery,
garden pests,
indoor seed starting,
onions,
salad greens
Thursday, February 17, 2011
First Signs of Life
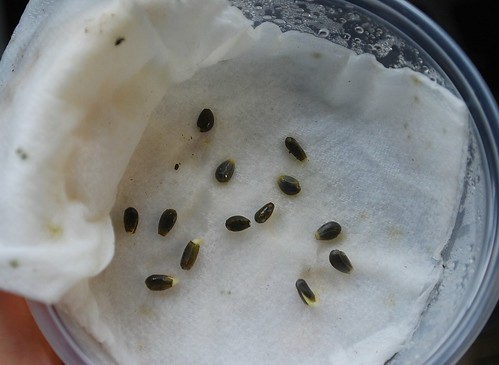
Apologies - these photos are about a week old. I should have gotten around to posting about them earlier. I've found that the best and sure fire way to start artichokes is by soaking the seeds overnight and then pre-sprouting them in a damp paper towel. Doing this saves a lot of time and aggravation in the long run.
The scallion seeds I purchased last year have remained viable. Thank goodness for small miracles.
The Regiment spinach is starting out bit spotty (any suggestion?) while the Winter Density lettuce needs to be thinned.
Also, I started most of my spring greens tonight and am hopeful (considering the wave of warmer we've experienced this week) that they will be ready to be transplanted into the hoop house by mid-March.
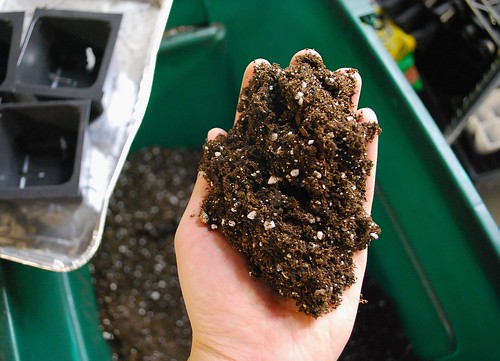
Planting Medium
I don't remember the last time I've gone a week without posting anything. I guess I've been distracted lately. You could say that I've rediscovered my passion for baking and have been consumed with several of my long neglected pastry/bread making books. I spent a good part of my early 20's working at a cafe in Boston's South End neighborhood. I have to admit that it was one of the best jobs that I've ever had. I miss arriving at the cafe before the sun rose, turning on the ovens to bake the morning's pasties and sitting down with a fresh cup of dark roasted Costa Rican coffee to take in the sunrise before the doors opened. Maybe one day I'll come full circle and open up a small neighborhood cafe of my own.
On the gardening front, earlier this month I was able to track down the ingredients for my soil block mix. For anyone interested, I use this recipe developed by Eliot Coleman. To my delight, I found at our local plant nursery an amazing shellfish compost produced by Winterwood Farm out of Maine. Uniform in texture, the compost is crumbly and incredibly fresh smelling. I would have never guessed that it was made of shellfish. I doubt you would be able to find something this good at a chain store.
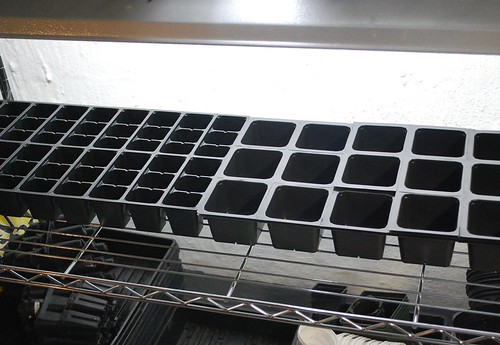
This year, I've also decided to be a bit more selective about using soil blocks. They require a bit of work and for some veggies, especially those that don't mind having their roots disturbed a bit, it's just not worth it in my opinion. And that is why I also picked up a few cell flats at the plant nursery. At 99 cents a piece, I couldn't think of a reason not to. I'm sure they'll come in handy when I sow the bulk of my spring greens.
Wednesday, February 9, 2011
And So It Begins...
This past weekend, I finally got around to sowing the first seeds for 2011. I must admit that up until now, I'd been struggling to get motivated. Then it hit me that February was here, which meant that March was just around the corner. My anxiety ended up winning out over my laziness.
I started a few cells of scallions, several varieties of lettuce, celery and spinach. I also soaked some artichoke seeds for a day and then placed them in a plastic container lined with some damp paper towels. Hopefully they'll sprout in a week or so. I had success starting them this way last year and fingers crossed it will work again this year.
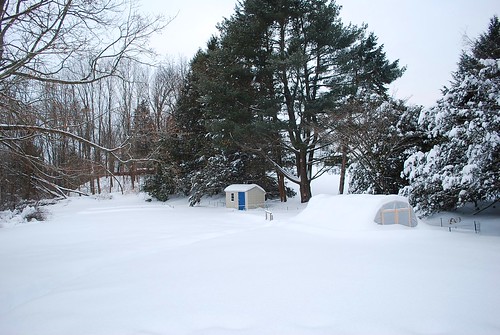
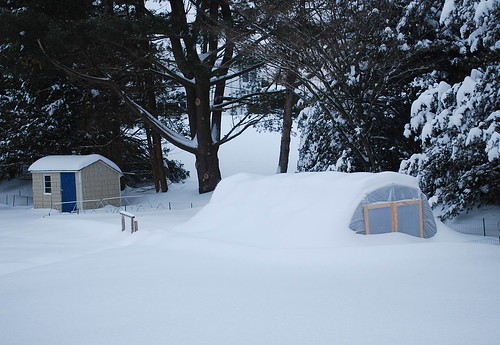
I also started a couple trays of white stemmed mini bok choy. These will be harvested as microgreens. I figured that since the hoop house was half buried in snow right now, these greens will help tie us over until the winter warms u a bit.
Now that the spring gardening underway, I'm looking forward to doings more. How is your seed starting going?
Saturday, February 5, 2011
Winter's White
At this point, we've pretty much given up. It's amazing how one bad New England winter can really wear you down to the bone. There's over 3 feet of snow in the backyard and about twice as much around the house where we've plowed. Yesterday, we had to hire professionals to remove upwards of 4 feet of snow from our roof, further contributing to the pile up. Ice dams had formed all around our roof and the excess moisture was beginning to seep into our house - evidenced by our bedroom ceiling, which will have to be repainted.
It's ironic then that I'm dreading the approach of spring. Our ground tends to thaw rather slowly while our springs tend to be pretty wet. These things alone can cause many basements and yards in our area to flood, including our own. You add 3 feet of melting snow to the mix and well...you have a potential disaster on your hands. Needless to say, I am hoping for a very dry spring accompanied by a slow gradual thaw.
On the gardening front, I'll be sowing the first of my seeds this weekend (I really haven't been in the mood get to started lately). The leaves on my Meyer lemon tree are beginning to show signs of yellowing again. Now I'm starting to believe that this may be due to a moisture issue. There's a real possibly that most of its leaves will be gone by April. If that happens, then I'll have to prune the tree back aggressively to ensure new growth and say goodbye to any chance of a good lemon harvest next fall. Hopefully I'll be able move my citrus trees to the hoop house sometime next month as I'm sure the added sunlight would benefit them greatly.
How are the rest of my fellow New Englanders holding up?
Wednesday, February 2, 2011
Adventures in Baking - No Knead Bread
Bread making has undoubted become my pass time of choice these days. I don't remember any other time in my life during which I've baked as consistently. I'm sure it has something to do with the weather we've been experiencing. This winter has proven to be a brutal one for New England. I don't remember the last time we've had to deal with this much snow - so much that we've run out of places to dump it. In any case, when it's bad outside, a freshly baked loaf of bread does wonders to lift the spirit.
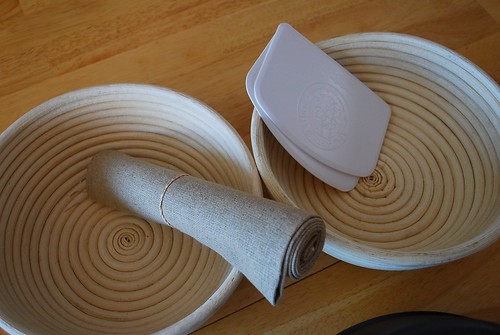
I splurged a bit and got a few bread making supplies that I've been fancying for a while now. Among the purchases were a couple of brotforms, a Lodge combo cooker, a baker's couche and two dough scrapers. I was especially excited to try out the brotforms, which help to circulate air around the dough as it rises and imprints an interesting pattern on the finished boule.
This past weekend, I tried my hand at making the No Knead Bread recipe (yes, that one) made famous several years ago by the New York Times. I'd read the article when it was first published but will admit that I was never too keen on trying it. The bread snob inside me was skeptical that a formula that simple could produce something worth savoring. Boy was I wrong. Though it isn't the best bread I've ever eaten, the finished product is well worth the minor effort.
I did end up tweaking the recipe a bit. I replaced 50 gram of the bread flour for whole wheat and upped the water to 360 grams. Here is the tweaked recipe in full:
380g bread flour
50g whole wheat flour
360g water at room temperature
1/4 teaspoon of instant yeast (I use SAF)
1 1/4 teaspoon of salt
In a large bowl, mix all of the ingredients thoroughly with your hand. Coat a second bowl with a bit of oil and transfer the dough. Cover with plastic wrap and let the dough rise slowly for at least 12 hours. At a room temperature of 65 degrees F, I actually like to let the dough rise for closer to 14 hours (it definitely doesn't hurt and the dough is well ballooned by then).
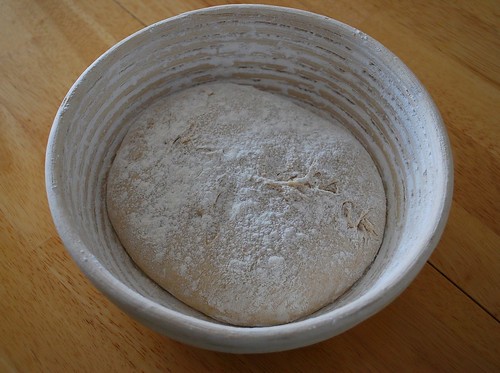
At this point, I do 4 or 5 folds with the dough still in the bowl to shape it a bit. Then I turn it onto a lightly floured surface and do a series folds to tighten the dough's surface and form it into a ball. And unlike the official recipe, I lay the ball seam-side up in a floured brotform and increase the final resting time to 3 hours. (Note: rice flour works great to prevent the dough from sticking to the brotform.)
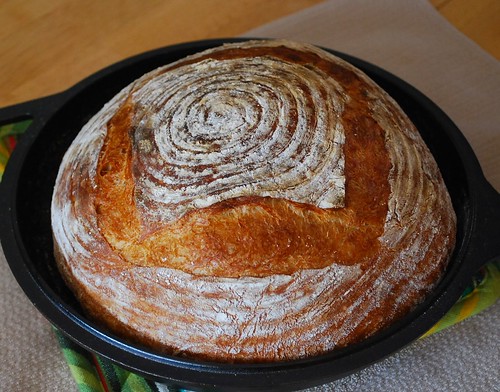
When it's time to bake, I preheat the oven and combo cooker for about 20 minutes at 500 degrees. The loaf is then carefully inverted onto the heated pan (seam side down) and a few slashes are made to the top. I then cover the loaf with the top pan and bake at 450 degrees for 30 minutes, after which the top comes off and the loaf bakes for another 15 to 20 minutes uncovered. When the bread comes out, it looks something like this:
The first loaf turned out very good.
The next loaf came out even better.
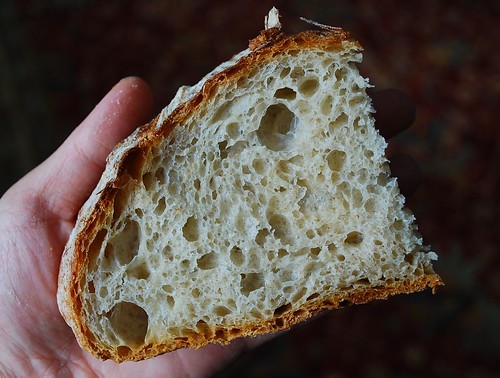
The best part of this bread is undoubtedly the crumb, which has an open structure and springy texture. The crust is crisp and a bit chewy when eaten fresh and toasted the next day. And most importantly, the flavor is very good. I am now officially a no knead bread convert.
On a final note, I think I'll continue to experiment with this bread. Stuffing the dough with lots of goodies just before the final rise sounds like a good place to start. Olives sound good....cubes of pepper jack cheese sound even better.
Subscribe to:
Posts (Atom)